 by
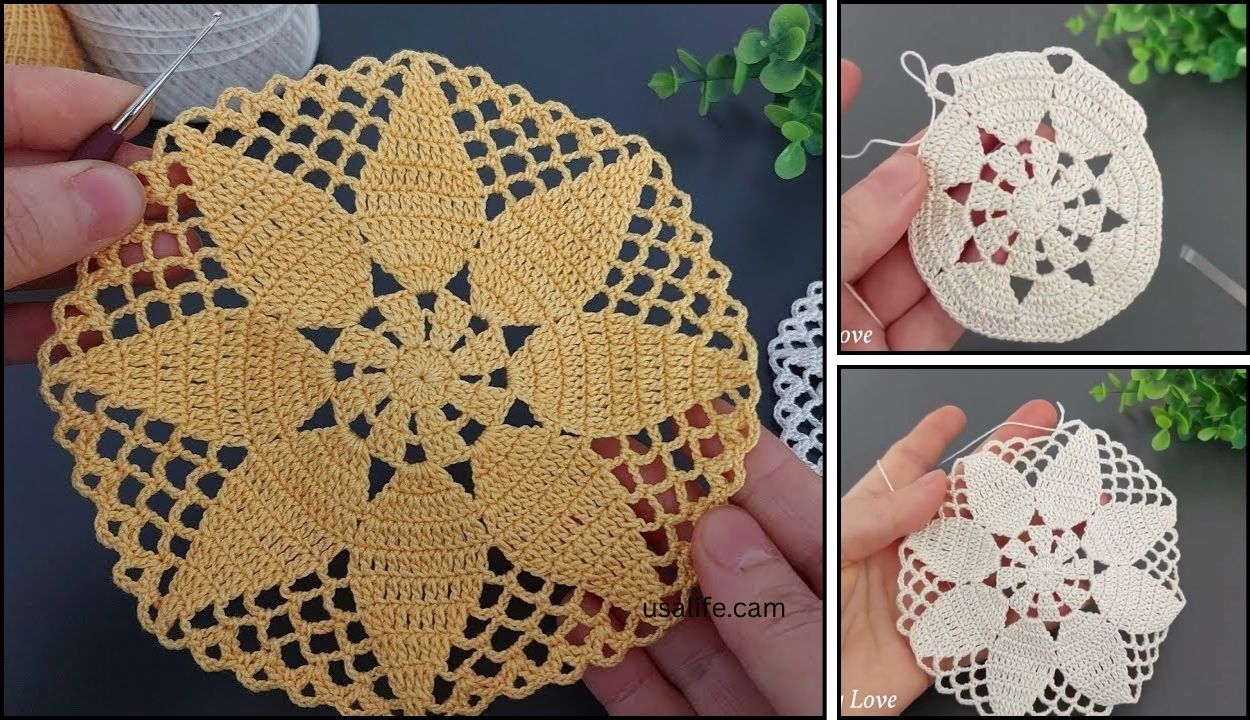
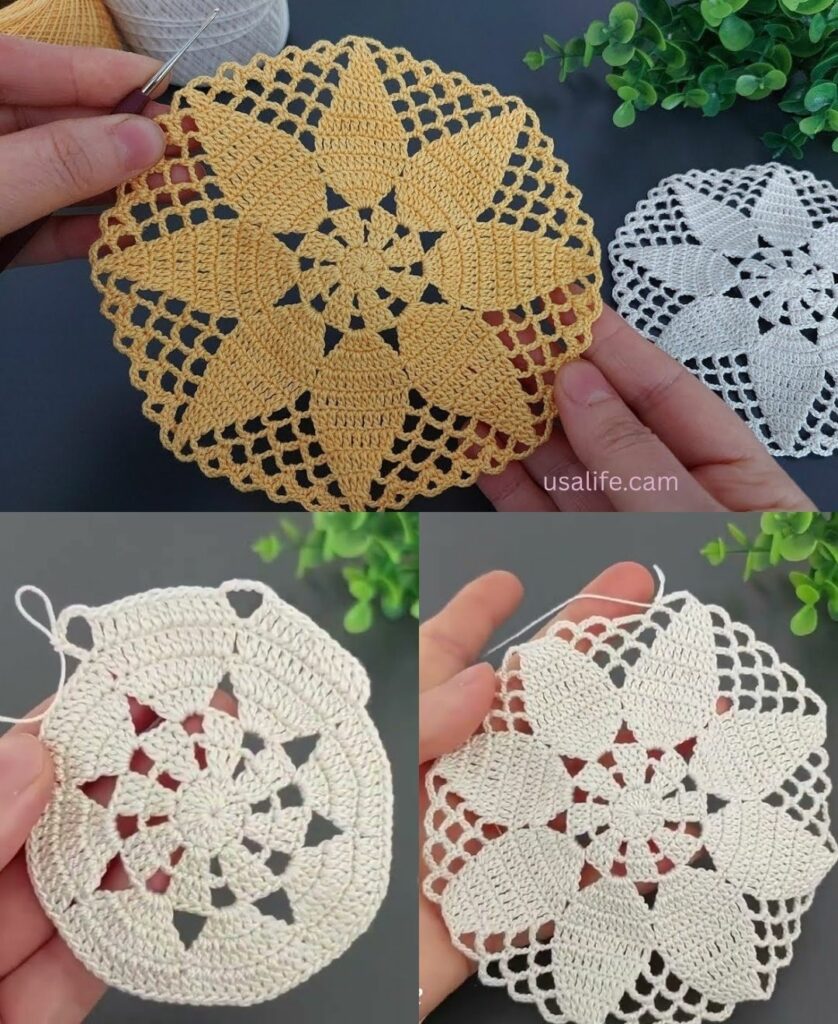
by Crocheting a doily is a wonderful project that allows you to explore the beauty of lace, symmetry, and intricate shaping. Doilies are traditionally worked in fine cotton thread, but using light-weight yarn (like Sport or DK) is easier for beginners.
This guide details a classic Round Lace Doily using simple crochet techniques to create an airy, delicate pattern.

🧶 Classic Round Lace Doily Tutorial
Materials Needed
- Thread/Yarn: For beginners, a DK or Sport weight cotton yarn (Size 3) is easiest to handle. For a traditional look, use Size 10 Cotton Thread.
- Crochet Hook: The size recommended for your chosen thread/yarn (e.g., 3.0 mm for yarn or 1.75 mm for thread).
- Scissors
- Tapestry Needle: For weaving in the end.
Key Crochet Terms
| Abbreviation | Stitch Name |
| ch | Chain |
| sl st | Slip Stitch (used to join rounds) |
| sc | Single Crochet |
| dc | Double Crochet |
| tr | Treble Crochet (Triple Crochet) |
| sp | Space (refers to a chain space) |
| st(s) | Stitch(es) |
Part 1: The Solid Center Foundation
The doily starts with a flat circle, which is the tight, solid center.
- Round 1 (Center): Start with a Magic Ring (or ch 4 and sl st to join). ch 3 (counts as first dc). Work 11 dc into the ring. Join with a sl st to the top of the beginning ch 3. (12 sts)
- Round 2 (Increase): ch 3 (counts as first dc). Work 1 dc into the same stitch. Work 2 dc (dc-inc) in each stitch around. Join with a sl st to the top of the beginning ch 3. (24 sts)

Part 2: Creating the Lace Windows
This section introduces chain spaces to begin building the open, airy lace design.
- Round 3: ch 3 (counts as dc). dc in the next st. ch 1. Skip the next stitch. Repeat [dc in the next 2 sts, ch 1, sk 1 st] around. Join with a sl st to the top of the beginning ch 3. (8 dc pairs, 8 ch-1 spaces).
- Round 4: ch 3 (counts as dc). dc in the next st. ch 2. Skip the ch-1 space and the next stitch. Repeat [dc in the next 2 sts, ch 2, sk 2 sts] around. Join with a sl st to the top of the beginning ch 3.
- Round 5: ch 3 (counts as dc). dc in the next st. ch 3. Skip the ch-2 space and the next stitch. Repeat [dc in the next 2 sts, ch 3, sk 3 sts] around. Join with a sl st to the top of the beginning ch 3.
Part 3: Adding Petal Details (Shells)
We use shell stitches to create the look of petals and add a bit of weight to the edge.
- Round 6 (Move): sl st into the next dc, and sl st into the ch-3 space. (This positions you for the shell).
- First Shell: ch 3 (counts as dc). Work [2 dc, ch 1, 3 dc] into the same ch-3 space.
- Anchor: Work sc into the space between the next two dc clusters from Round 5.
- Repeat: [Shell (3 dc, ch 1, 3 dc) in the next ch-3 space, sc in the space between the next two dc clusters] around. (8 shell stitches total).
- Join with a sl st to the top of the beginning ch 3.

Part 4: The Final Scalloped Edge
This round creates a delicate, pointed border using taller stitches.
- Round 7 (Traveling): sl st into the next 3 dc’s, and sl st into the ch-1 space at the peak of the first shell.
- First Scallop: ch 3 (counts as dc). Work [3 tr, ch 1, 4 tr] into the same ch-1 space.
- Anchor: sc into the sc anchor stitch between the two shell motifs from the previous round.
- Repeat: [Work a Scallop (4 tr, ch 1, 4 tr) into the ch-1 space of the next shell, sc into the sc anchor stitch] around.
- Join with a sl st to the top of the beginning ch 3. Fasten off.
Finishing and Blocking (The Most Important Step!)
For your doily to look professional, open up the lace, and lie perfectly flat, you must block it.
- Weave in Ends: Cut your yarn, leaving a long tail, and weave it securely into the back of the doily using your tapestry needle.
- Soak: Soak the doily thoroughly in lukewarm water (a little fabric softener can help).
- Squeeze: Gently squeeze out the excess water (do not wring).
- Pin: Pin the doily onto a foam board or thick towel, stretching the scallops and points firmly outward to define the final circle shape.
- Dry: Allow the doily to dry completely, which may take up to 24 hours.
Your beautiful crocheted doily is now ready for display! Would you like to try a doily pattern that uses different stitches, like the pineapple stitch?
Video tutorial: