by
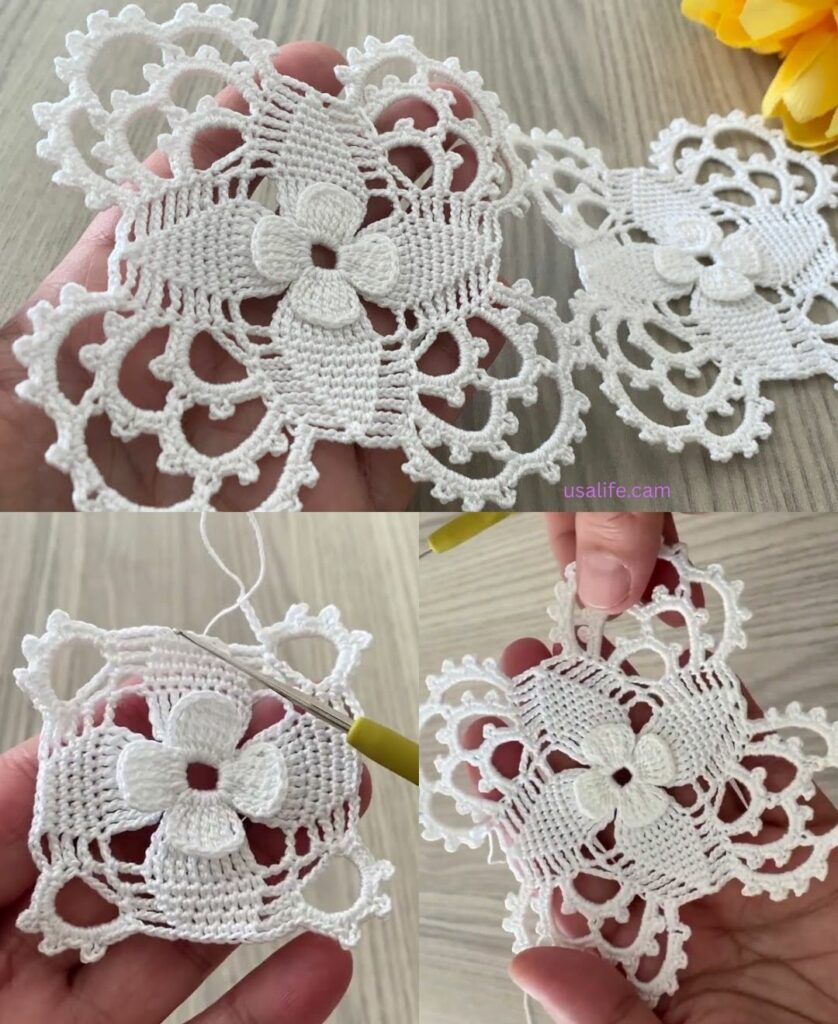
by That is a beautiful and elegant project idea! A Stylish Square Motif Runner is a classic piece of home décor that allows for wonderful texture and geometric interest. The runner is created by making several identical motifs and joining them in a long, rectangular strip.
Here is a detailed tutorial for a Lacy Shell Square Motif that is stylish, delicate, and perfect for joining into a runner.
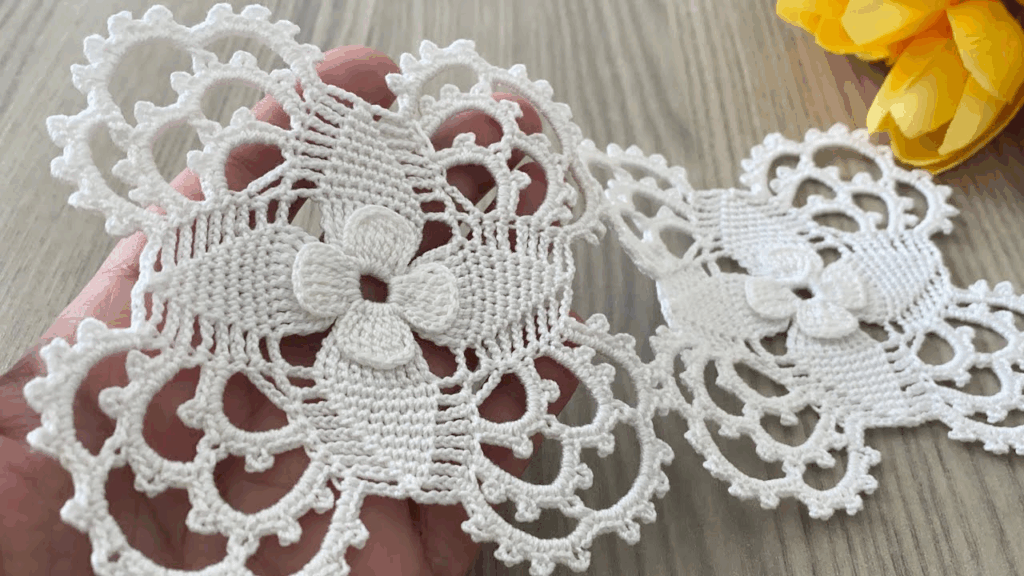
💎 Lacy Shell Square Motif Runner Tutorial
This motif uses shell stitches and picots to create a delicate, lacy texture, with clean edges for easy joining.
Materials You’ll Need
- Yarn/Thread: Size 10 or 20 Cotton Thread for a fine, traditional runner, or Fingering/Sport Weight Cotton Yarn for a thicker, faster result.
- Crochet Hook: The size appropriate for your material (e.g., 1.5 mm for thread, 3.5 mm for yarn).
- Scissors, Tapestry Needle, Stitch Markers.
Key Crochet Terms
| Abbreviation | Stitch Name |
| ch | Chain |
| sl st | Slip Stitch |
| sc | Single Crochet |
| dc | Double Crochet |
| tr | Treble Crochet (Triple Crochet) |
| Picot | Ch 3, sl st into the first ch |
| Shell | (3 dc, ch 2, 3 dc) in one space |
Part 1: The Lacy Shell Motif Pattern
We will build the motif from the center outwards, defining the corners in Round 3.
Round 1: Center Foundation
- Start: Make a Magic Ring. ch 3 (counts as dc). Work 15 dc into the ring.
- Finish: Pull the tail tight. Join with a sl st to the top of the ch 3. (16 sts).

Round 2: Creating the Base Mesh
- ch 1. sc in the same st. ch 3. Skip 1 st. Repeat [sc in the next st, ch 3, sk 1 st] 7 more times.
- Finish: Join with a sl st to the first sc. (8 ch-3 loops).
Round 3: Defining the Corners
This round transforms the circle into a square by creating 4 corner shells.
- sl st into the first ch-3 loop. ch 3. Work (2 dc) into the same loop. ch 1 (separates the clusters).
- Corner Shell: Work [3 tr, ch 3, 3 tr] into the next ch-3 loop.
- Side: ch 1. Work 3 dc into the next ch-3 loop. ch 1. Work 3 dc into the next ch-3 loop.
- Repeat: [Corner Shell (3 tr, ch 3, 3 tr) in next sp, ch 1, 3 dc in next sp, ch 1, 3 dc in next sp, ch 1] two more times.
- Finish: Join with a sl st to the top of the beginning ch 3. (4 corners, 8 side clusters).
Round 4: The Final Joining Edge
This round adds delicate picots and sets up the clean chain spaces for joining.
- sl st over to the ch-3 corner space.
- Corner: ch 1. Work sc in the same space, ch 3, sc in the same space.
- Side Mesh: ch 3. Work sc into the next ch-1 sp. ch 3. Work sc into the next ch-1 sp. ch 3. Work sc into the next ch-1 sp. ch 3.
- Repeat: Continue the sequence [Corner (sc, ch 3, sc), Side Mesh (3 sc anchors separated by ch 3)] around the square.
- Finish: Join with a sl st to the first sc. Fasten off.

Part 2: Assembly and Border
1. Determining the Runner Length
- Measure one finished motif.
- Decide the total length of your runner (e.g., 36 inches).
- Divide the runner length by the motif size to determine how many motifs to make and join in a straight line.
2. Joining the Motifs (The Neatest Way)
Use the Join-as-You-Go (JAYG) method when working the final round (Round 4) of subsequent motifs.
- Work Motif 2 until you reach a chain space on a side you wish to join.
- Instead of working
ch 3on Motif 2, workch 1, then make a sl st into the correspondingch 3 spaceon Motif 1, then workch 1back on Motif 2. - For the corner join, work the corner as
sc, ch 1, sl st into the corner of Motif 1,ch 1, scback into the corner of Motif 2.
3. The Continuous Border
Once all motifs are joined in a straight line, work a continuous border around the entire perimeter of the runner.
- Round 1 (Anchoring): Join yarn to a corner. Work sc evenly around the entire perimeter. In the valleys where the motifs meet, work sc3tog (single crochet 3 together) to keep the seam flat. Work 3 sc in the corners.
- Round 2 (Final Scallop): ch 3 (counts as dc). Work 2 dc in the same st. Skip 2 sts. Work sc in the next st. Skip 2 sts. Repeat [5 dc Shell in the next st, skip 2 sts, sc in the next st, skip 2 sts] around the entire perimeter. (Adjust skip count slightly if necessary to place a Shell perfectly at each corner).
Final Step: Blocking
Blocking is mandatory for a lace runner. Wet the finished piece, gently stretch it out to its exact final dimensions, pinning the corners and side scallops to a mat. Allow it to dry completely to set the lace and ensure the runner lays perfectly flat.
Video tutorial: