by
by That is a fun request! To create an Eye-Catching Crochet Motif, we need a design that incorporates texture, color contrast, and geometric complexity without being overly difficult.
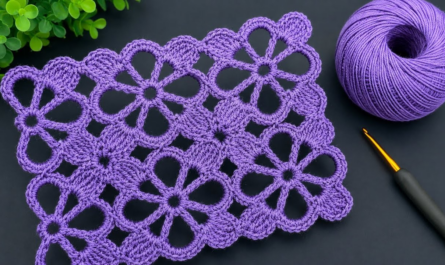
I will detail a tutorial for the Woven Starburst Motif, a square that uses a combination of basic stitches and clever placement to create a mesmerizing, layered, “woven” effect that is truly unique and eye-catching.

🌟 Eye-Catching Woven Starburst Motif Tutorial
This pattern combines simple stitches (DC, SC) with strategic chain spaces to give the illusion of threads woven over and under each other, radiating from a central point.
Materials You’ll Need
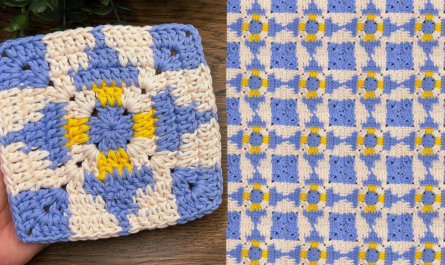
- Yarn: Medium-weight yarn (worsted/size 4). Using two contrasting colors (Color A and Color B) is essential for the woven effect.
- Crochet Hook: The size appropriate for your yarn (e.g., 5.0 mm).
- Scissors, Tapestry Needle.
Key Crochet Terms
| Abbreviation | Stitch Name |
| ch | Chain |
| sl st | Slip Stitch |
| sc | Single Crochet |
| dc | Double Crochet |
| V-st | V-Stitch (dc, ch 1, dc) |
| Corner | (2 dc, ch 2, 2 dc) |
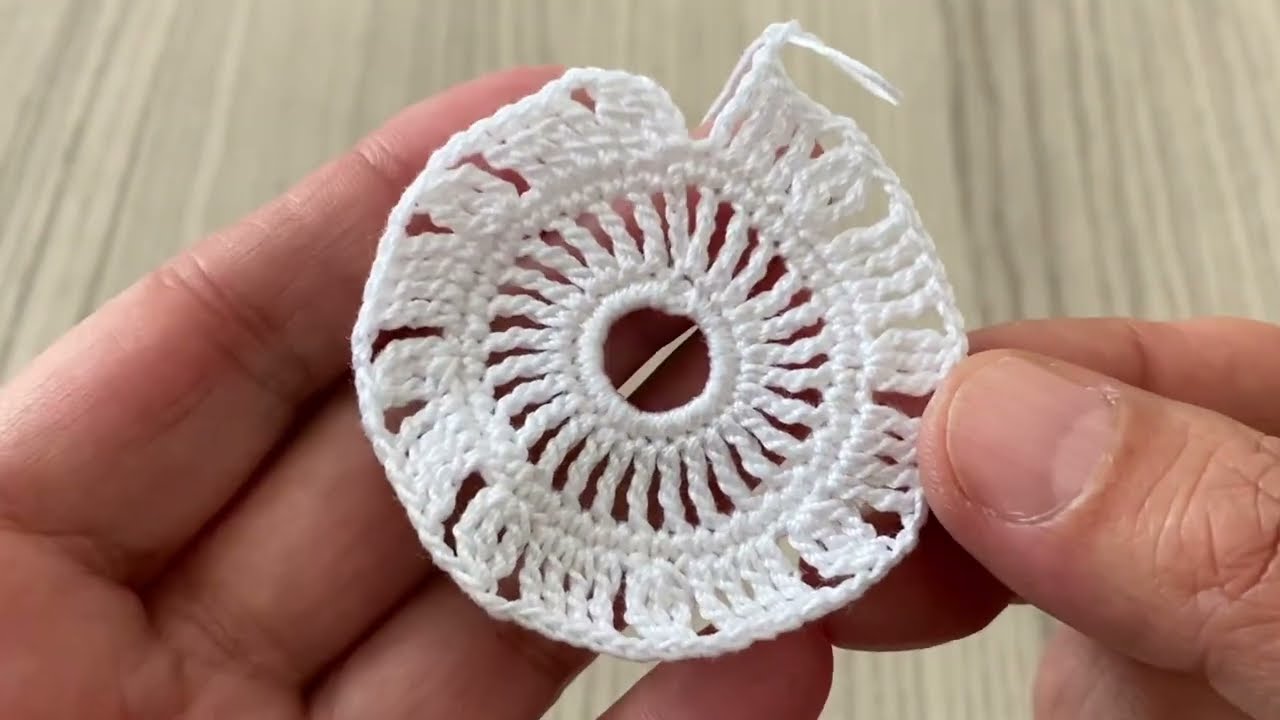
Part 1: Creating the Starburst Foundation
Round 1: Center (Color A)
- Start: With Color A, make a Magic Ring.
- Base: ch 3 (counts as dc). Work 15 dc into the ring.
- Finish: Pull the tail tight. Join with a sl st to the top of the ch 3. (16 sts).
Round 2: Beginning the Rays (Color B)
This round introduces the contrast and the foundational structure for the “woven” sections.
- Join: Join Color B into any stitch with a sl st.
- First V-st: ch 3 (counts as dc). ch 1. Work dc in the same stitch (V-Stitch).
- Anchor: ch 1. Skip 1 st. Work sc in the next st. ch 1. Skip 1 st.
- Repeat: [V-Stitch (dc, ch 1, dc) in the next st, ch 1, skip 1 st, sc in the next st, ch 1, skip 1 st] 3 more times. (4 V-stitches, 4 sc anchors).
- Finish: Join with a sl st to the top of the beginning ch 3. Fasten off Color B.
Part 2: Establishing the Woven and Square Shape
Round 3: Building the Arms (Color A)
We work into the chain spaces to create the radiating “arms.”
- Join: Join Color A into the sc anchor from R2 with a sl st.
- Side Cluster: ch 3 (counts as dc). Work 2 dc in the same sc stitch.
- Woven Section: ch 3. Work sc into the ch-1 space of the V-Stitch from R2. ch 3.
- Corner Cluster: Work 3 dc into the next sc anchor (this will become a corner).
- Repeat: [3 dc in the next sc anchor, ch 3, sc in the V-st ch-1 sp, ch 3] 3 more times.
- Finish: Join with a sl st to the top of the beginning ch 3. Fasten off Color A.

Round 4: Squaring Off (Color B)
This round uses the tall chain spaces from R3 to create sharp corners, enhancing the geometric feel.
- Join: Join Color B into any 3 dc cluster (this is now a side cluster).
- First Corner: ch 3 (counts as dc). Work dc in the next 2 sts. Work Corner Shell (2 dc, ch 2, 2 dc) into the next ch-3 loop.
- Side: Work dc in the next sc anchor. Work dc in the next 3 dc cluster.
- Repeat: [dc in the next 3 sts, Corner Shell (2 dc, ch 2, 2 dc) in the ch-3 loop, dc in the sc anchor, dc in the next 3 sts] 3 more times.
- Finish: Join with a sl st to the top of the beginning ch 3.

Part 3: Final Frame
Round 5: Frame and Expansion
- ch 3 (counts as dc). Work dc in every stitch along the side until you reach the ch-2 corner space.
- Corner: Work [2 dc, ch 2, 2 dc] into the corner space.
- Repeat: Work [dc in every stitch across the side, Corner (2 dc, ch 2, 2 dc)] around the square.
- Finish: Join with a sl st to the top of the beginning ch 3. Fasten off.
Finishing the Motif
- Weave in Ends: Secure all tails.
- Blocking is Essential! The key to making this motif “eye-catching” is blocking. The combination of dense center clusters and wide chain spaces can cause puckering. Pin the square firmly at all four corners and along the sides to emphasize the sharp square shape and open up the woven starburst.
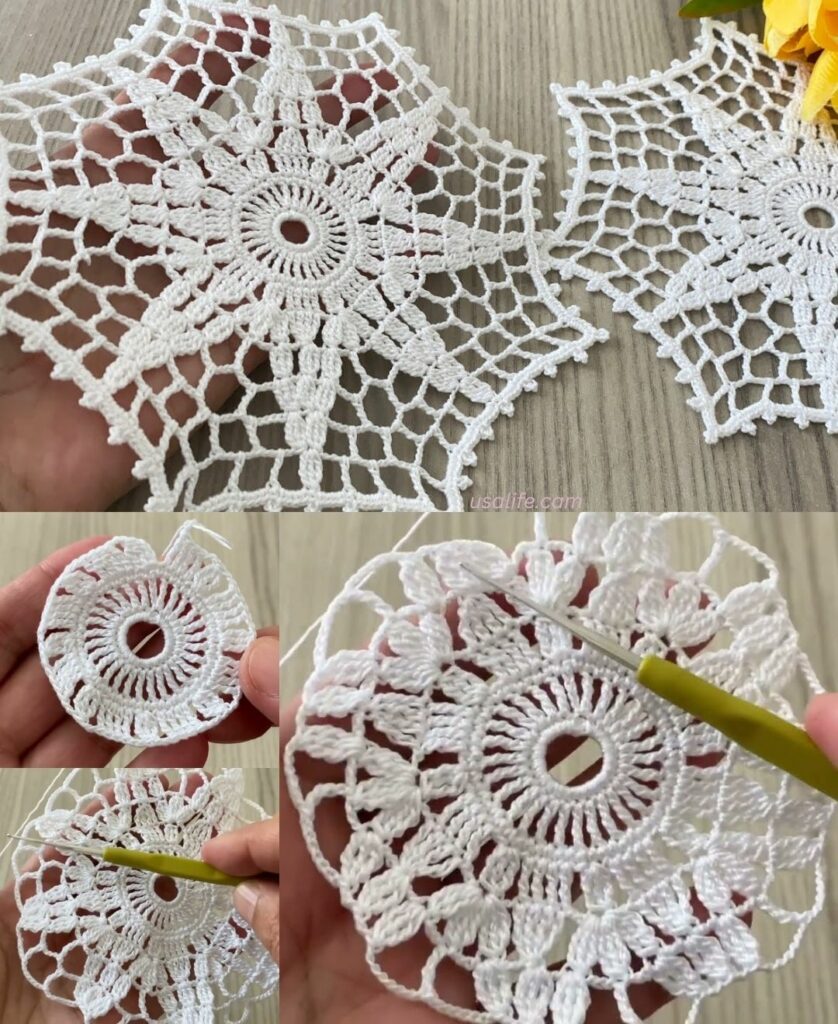
The resulting motif is a stunning piece of geometric textile art!
Video tutorial: