 by
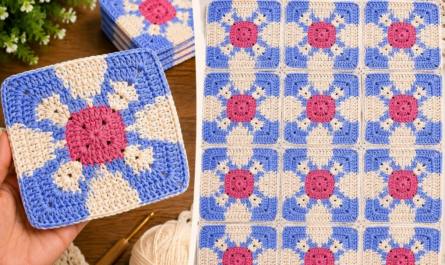
by A “Perfect Square Motif” is one that lies completely flat, has sharp $90^\circ$ corners, and does not “spiral” or slant as it grows. For the projects you’ve mentioned—like a structured blouse or a professional table runner—the Solid Square Motif is superior to the traditional lacy granny square because it provides a clean, modern canvas.
Since you are in Phnom Penh, I recommend using a Mercerized Cotton or a Linen blend. These fibers have no “stretch,” which helps the square maintain its perfect geometric shape even after washing.

1. Materials for the “Perfect” Result
- Yarn: DK weight (Category 3) Cotton.
- Hook: 3.5mm (E). Using a slightly smaller hook than usual creates a firmer “fabric” that won’t sag.
- Tools: 4 stitch markers (one for each corner).
2. The Pattern: The Solid Geometric Square
This pattern uses US terms.
Round 1: The Foundation
- Start: Create a Magic Ring. (This is essential for a “perfect” square so there is no hole in the middle).
- Setup: Ch 3 (counts as 1 dc).
- The First Side: Work 2 dc into the ring.
- The First Corner: Ch 2.
- Repeat: 3 dc into ring, ch 2 three more times.
- Close: Pull the magic ring tight. Sl st to the top of the ch-3 to join.
- Check: You should have 12 dc total (3 per side).

Round 2: The Perfect Corner Formula
To keep the square flat, we must increase by 4 stitches per side in every round.
- Setup: Ch 3 (counts as 1 dc).
- Side: Dc in each dc until you reach the ch-2 corner space.
- The Corner: In the ch-2 space, work (2 dc, ch 2, 2 dc).
- Tip: Place a stitch marker in that ch-2 space.
- Repeat: Dc in every stitch across the side; (2 dc, ch 2, 2 dc) in the corner space.
- Join: Sl st to the top of the ch-3.
Round 3 and Beyond
- Repeat the steps from Round 2.
- Every round, the number of dc on each side will increase.
3. The Math of Growth
To ensure your square is “perfect,” you can check your stitch counts using this formula. If your count is off, the square will begin to ripple (too many stitches) or bowl upward (too few).
If $n$ is the round number, the total stitches per side ($S$) can be calculated as:
$$S = 3 + 4(n – 1)$$
Stitch Count Table:
| Round ($n$) | Stitches per Side ($S$) | Total Stitches in Round |
| :— | :— | :— |
| 1 | 3 | 12 |
| 2 | 7 | 28 |
| 3 | 11 | 44 |
| 4 | 15 | 60 |

4. 3 Secrets to “Perfection”
A. The “Hidden” Stitch
When you work 2 dc into a corner, the first stitch of the previous side often gets hidden or “covered” by the new stitches. Beginners often skip this stitch by accident, which makes the square lopsided. Always pull your corner stitches slightly to the side to find that first hidden dc.
B. Flip Your Work (Optional but Recommended)
If you notice your square is starting to “tilt” or look like a spiral, try turning your work after every round.
- Round 1: Right Side.
- Round 2: Wrong Side.This cancels out the natural lean of the double crochet stitch and results in a perfectly straight square.
C. The “Invisible” Join
Instead of joining with a slip stitch and chaining 3 (which creates a visible “seam” on your blouse), try the Standing Double Crochet to start new rounds. This makes the start and end of the round look exactly like the rest of the stitches.

5. From Motif to Model
- For the Runner: Use the “Join-As-You-Go” method. In the final round of your square, instead of a
ch 2corner, do ach 1, then slip stitch into the corner of the other square, thench 1to finish the corner. This creates a seamless, flat link. - For the Blouse: Once you have your perfect squares, lay them out. A “Perfect Square” motif looks best in a garment when the squares are rotated $45^\circ$ to look like diamonds. This creates a more flattering “V” shape at the neckline and hem.
Would you like me to explain how to calculate the number of squares needed for your specific blouse size based on these “Perfect Squares”?
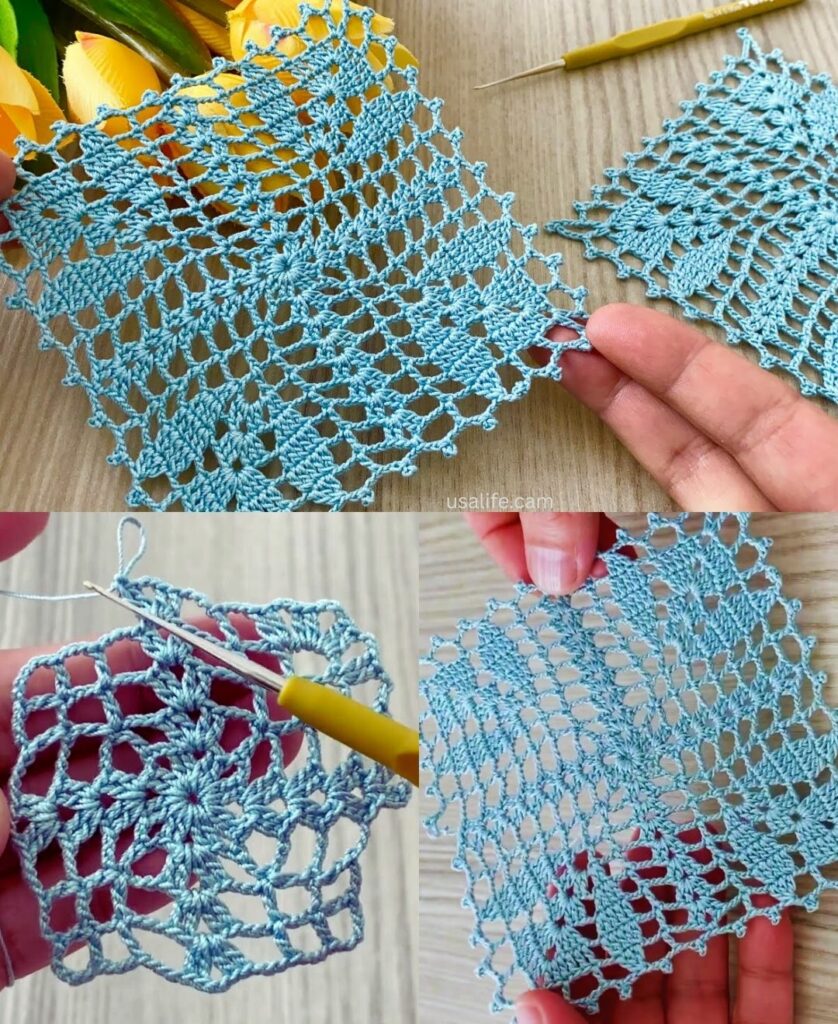
Video tutorial: