by
by A Delicate Cream Lace Square Motif is a timeless piece of crochet artistry. By using fine thread or lightweight yarn in a soft, creamy neutral, you can create a piece that looks vintage and sophisticated. The key to “lace” is balancing clusters of stitches with open chain spaces to create that signature ethereal look.
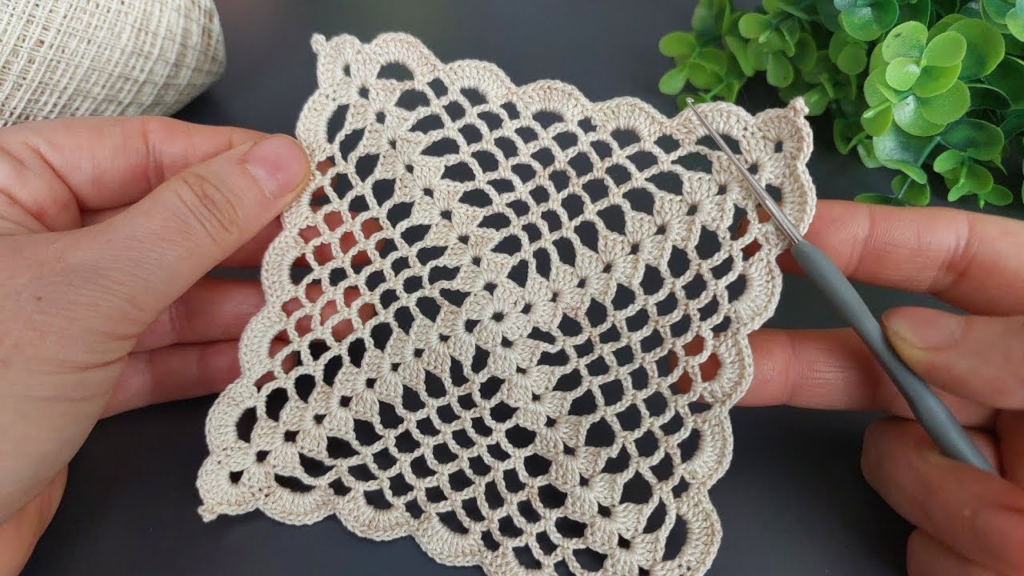
Here is your detailed, step-by-step masterclass for creating a delicate, lacy motif.
🧶 The Lace Toolkit
- Yarn: A lightweight, smooth cotton thread or fine yarn (e.g., Size 3 or 10 crochet cotton, or a fine bamboo/cotton blend).
- Hook: A smaller hook (e.g., 2.0 mm to 3.0 mm) is essential. Lace needs tension to look crisp; a larger hook will make the motif look “sloppy” rather than delicate.
- Stitch Key (US Terms):
- ch: Chain
- sl st: Slip Stitch
- dc: Double Crochet
- tr: Treble Crochet (Yarn over twice)
- Picot:
ch 3,sl stback into the first chain.

🛠 The Step-by-Step Construction
Round 1: The Petal Center
- Start:
ch 6, join withsl stto form a ring. - The Base:
ch 3(counts as first dc), work 15 dc into the ring. - Join:
sl stto the top of the initialch 3.
Round 2: The Lacy Expansion
- The Spikes:
ch 1,scin next stitch,ch 5,sk 1stitch. Repeat this 8 times around the circle. - Join: You will have 8 little “arches” or loops.
sl stinto the firstsc.

Round 3: Turning to a Square
- Position:
sl stinto the center of the firstch-5arch. - The Corner:
ch 5(counts astr+ch 1),trin the same arch,ch 3,trin the same arch. (This creates a corner). - The Side:
ch 3,scin the next arch,ch 3. - Repeat: In the next arch, work
(tr, ch 3, tr)for the corner. Thench 3,scin next arch,ch 3for the side. - Repeat this around to create 4 corners and 4 sides.
Round 4: The Delicate Border
- The Fill: Work
scinto every stitch around. - The Picot Edge: In every corner space, work
(sc, picot, sc). This adds a dainty, beaded-like texture to the corners. - The Finish:
sl stto join. Fasten off and weave in your ends carefully so they don’t show through the open lace.

✨ Pro-Tips for a “Delicate” Finish
1. The Power of “Thread”
If you use standard “worsted” weight yarn, it will look chunky and heavy. For a truly “delicate” lace look, look for Size 3 or Size 10 Cotton Crochet Thread. It transforms the motif into a piece of fine, heirloom-quality lace.
2. The Blocking Process (Crucial)
You cannot skip this step with lace! When you finish, the motif will look like a wobbly, small ball.
- Wet Block: Submerge the motif in cool water.
- Pin: Stretch the motif onto a blocking board or a piece of cardboard covered in plastic wrap. Use a pin in every single corner and at the peak of every arch.
- Patience: Let it dry completely while pinned. This “forces” the lace pattern to open up and remain open permanently.
3. Creating a “Lace Runner” or “Blouse”
Since this motif is delicate, you want the join to be invisible.
- Use the “Join-As-You-Go” method: When you reach the final round of your second motif, attach it to the first by
sl stinto the corresponding corner picot. This creates a seamless, airy connection that looks like the motifs were born together.

💡 Styling Idea: The “Vintage” Palette
To enhance the delicate nature of the cream color:
- The Contrast Join: Join your cream lace motifs using a pale sage or dusty rose thread. The faint hint of color peeking through the lace joins creates a romantic, vintage aesthetic that is perfect for summer blouses or a bridal-style table runner.
Would you like me to help you map out a layout for a runner, or would you like to know how to create a simple “bridge” stitch to join these into a continuous lace fabric?