by
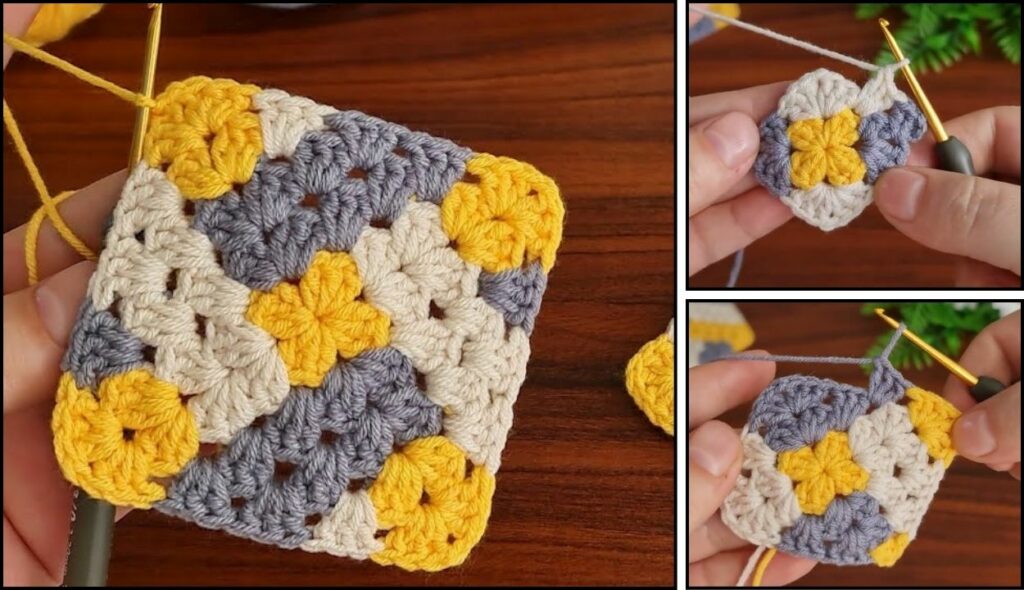
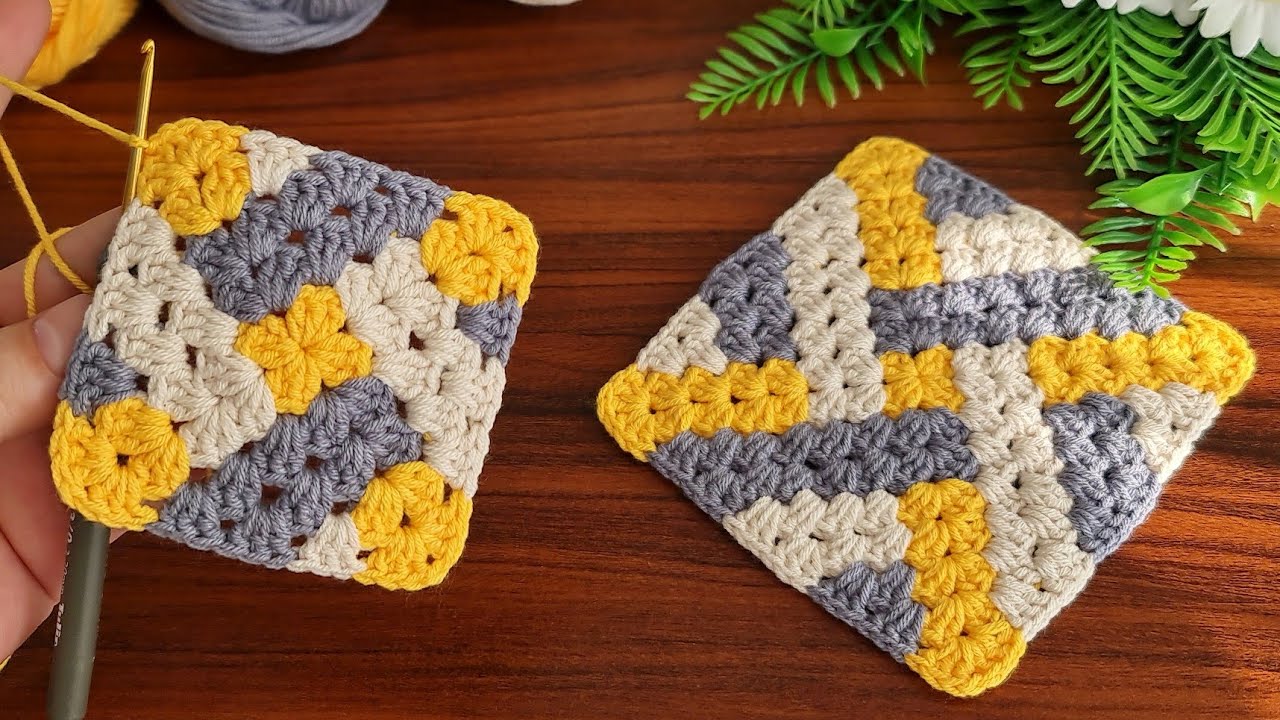
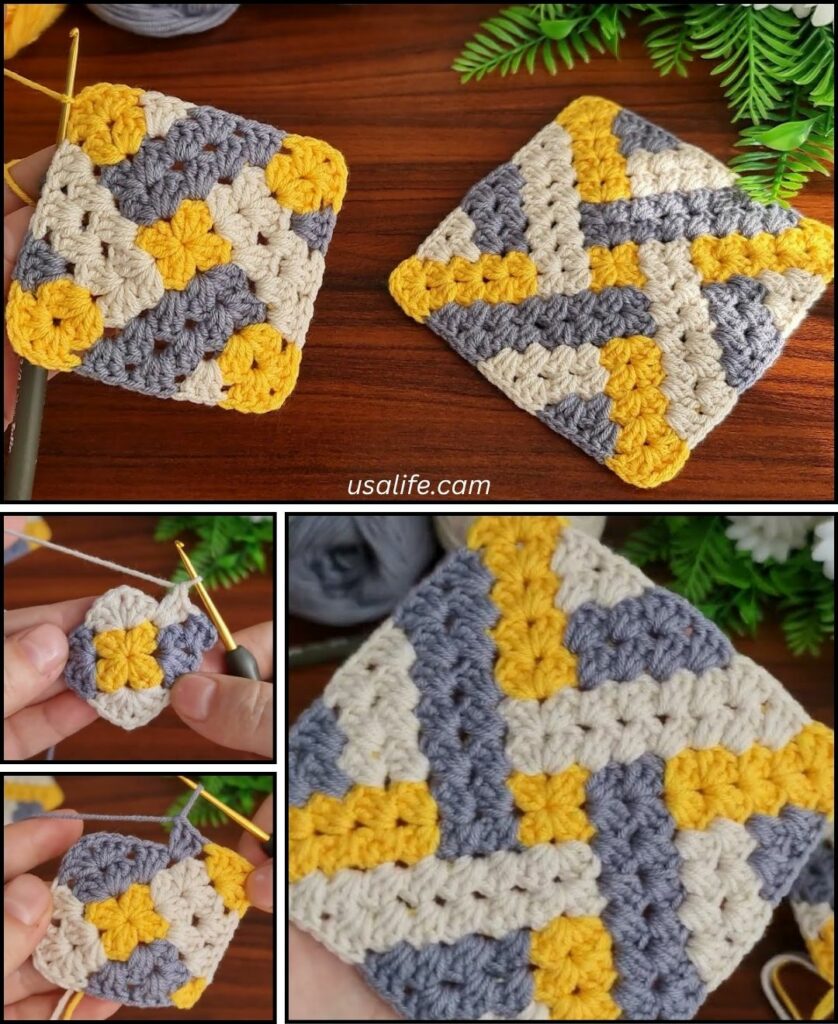
by You’re looking to crochet a Classic Granny Square with 3 Colors in Stripes! That’s a fantastic choice. This variation is a cornerstone of crochet, allowing you to create vibrant, eye-catching projects like blankets, bags, or even garments by simply changing colors with each round. It’s perfect for beginners to practice color changes and yarn management.
Given that it’s warm in Phnom Penh, 100% cotton yarn is an excellent choice for your granny squares. Cotton provides great stitch definition, is breathable, and creates a lovely finished product. However, acrylic yarn is also a popular and affordable option, widely available in a huge range of colors, and easy to work with.
How to Crochet a Classic Granny Square (3 Colors, Striped)
This guide will walk you through creating the iconic granny square, changing colors with each round to create a striped effect. This pattern primarily uses just a few basic stitches.
1. Essential Materials You’ll Need
- Yarn:
- Color A: Your first color.
- Color B: Your second color.
- Color C: Your third color.
- Worsted Weight (Aran / Medium / Category 4) Cotton or Acrylic Yarn: You’ll only need small amounts of each color for one square, making this a great scrap yarn project.
- Crochet Hook: The yarn label will recommend a hook size. For worsted weight yarn, a 4.0mm (US G/6) or 5.0mm (US H/8) hook is common. Choose a size that gives you good stitch definition without being too tight or too loose.
- Scissors: For cutting your yarn.
- Yarn Needle (Tapestry Needle): Absolutely essential for weaving in all those loose ends, especially when changing colors frequently.
2. Basic Crochet Stitches You’ll Use
Mastering these few stitches is all you need for a classic granny square:
- Magic Ring (MR) / Adjustable Ring: (Highly Recommended!) Creates a neat, tight center. If you find this tricky, you can
ch 4, then sl st to joininto the 1st chain to form a ring. - Chain (ch): The fundamental stitch for creating loops and spacing.
- Slip Stitch (sl st): Used for joining rounds and moving the yarn position.
- Double Crochet (dc): The main stitch that forms the “clusters” in a granny square.
- Working in Rounds: You’ll build the square by working in circles from the center out.
- Fasten Off: The way you secure your work so it doesn’t unravel.
- Weaving in Ends: Hiding yarn tails for a clean, professional finish.

Classic Granny Square Pattern (3 Colors, Striped)
This pattern makes a standard 4-round granny square, with each round worked in a different color. You’ll rotate through your 3 chosen colors.
Abbreviations (US Crochet Terms):
- ch: chain
- sl st: slip stitch
- dc: double crochet
- st(s): stitch(es)
- ch-sp: chain space
(...): work stitches into the same stitch or space[...]: repeat instructions in brackets- FO: Fasten off
Understanding Color Changes at the End of a Round
When working in rounds and changing colors, you’ll complete the last stitch of the round with your new color.
How to Change Colors at the End of a Round:
- Work the last dc of the round (the 3rd dc of your final cluster) up to the last yarn over. You should have 2 loops on your hook.
- Drop the current color. Pick up your new color.
- Yarn over with the new color and pull through both loops on your hook to complete the dc.
- Now, sl st into the top of the beginning ch-3 of the round using the new color to join.
- Cut the old color yarn, leaving a 4-6 inch tail. You’ll weave this in later.
Round 1: Color A (The Center)
- With Color A, create a Magic Ring (MR).
- (Alternatively: Ch 4, then sl st into the 1st ch to form a ring.)
- Ch 3 (counts as your first dc).
- Work 2 dc into the center ring. (This completes your first “granny cluster” of 3 dc).
- Ch 2 (this creates your first corner space).
- Work 3 dc into the center ring.
- Ch 2.
- Work 3 dc into the center ring.
- Ch 2.
- Work 3 dc into the center ring.
- Ch 2.
- To join and change color: Work the last dc of this round. Drop Color A. Pick up Color B. Yarn over with Color B and pull through both loops on your hook to complete the dc. Now, with Color B, sl st into the top of the initial Ch 3 to join the round.
- FO Color A, leaving a tail to weave in.

Round 2: Color B (First Outer Round)
- (You are already joined with Color B in the top of the initial Ch 3 from Round 1. This is usually between two clusters).
- Sl st into the first ch-2 corner space from Round 1. (This moves your hook to the correct starting point in the corner).
- Ch 3 (counts as 1st dc). Work (2 dc, ch 2, 3 dc) all into the same ch-2 corner space. (This forms your first corner:
(3dc, ch2, 3dc)). - Ch 1 (this creates the chain space for the side of your square).
- Move to the next ch-2 corner space. Work (3dc, ch 2, 3dc) into this corner space.
- Ch 1.
- Repeat steps 4 and 5 around the square until you reach your starting point.
- After your last
(3dc, ch2, 3dc)in the corner, ch 1. - To join and change color: Work the last dc of this round. Drop Color B. Pick up Color C. Yarn over with Color C and pull through both loops on your hook to complete the dc. Now, with Color C, sl st into the top of the initial Ch 3 to join the round.
- FO Color B, leaving a tail to weave in.
Round 3: Color C (Second Outer Round)
- (You are already joined with Color C. Sl st into the first ch-2 corner space from Round 2.)
- Ch 3 (counts as 1st dc). Work (2 dc, ch 2, 3 dc) all into the same ch-2 corner space.
- Ch 1.
- Work 3 dc into the next ch-1 side space from Round 2. (This fills the first side of your square).
- Ch 1.
- Move to the next ch-2 corner space. Work (3dc, ch 2, 3dc) into this corner space.
- Ch 1.
- Work 3 dc into the next ch-1 side space.
- Ch 1.
- Repeat around until you reach your starting point. You will have two 3dc clusters on each side of the square this round.
- After your last
(3dc, ch2, 3dc)in the corner, ch 1. - To join and change color: Work the last dc of this round. Drop Color C. Pick up Color A (or your next desired color in the rotation). Yarn over with Color A and pull through both loops on your hook to complete the dc. Now, with Color A, sl st into the top of the initial Ch 3 to join the round.
- FO Color C, leaving a tail to weave in.

Round 4: Color A (Third Outer Round)
- (You are already joined with Color A. Sl st into the first ch-2 corner space from Round 3.)
- Ch 3 (counts as 1st dc). Work (2 dc, ch 2, 3 dc) all into the same ch-2 corner space.
- Ch 1.
- Work 3 dc into the next ch-1 side space from Round 3.
- Ch 1.
- Work 3 dc into the next ch-1 side space from Round 3.
- Ch 1.
- Move to the next ch-2 corner space. Work (3dc, ch 2, 3dc) into this corner space.
- Ch 1.
- Continue repeating around the square. Each side will now have three 3dc clusters.
- After your last
(3dc, ch2, 3dc)in the corner, ch 1. - Join with a sl st into the top of the initial Ch 3.
- Fasten Off Color A, leaving a 6-inch tail. Yarn over and pull the tail completely through the loop on your hook. Pull tight to secure.
Finishing Your Granny Square
- Weave in ALL Ends NEATLY: This is absolutely critical for a polished and durable finish, especially with all the color changes. Use your yarn needle to carefully weave in every single yarn tail. Go back and forth through stitches a few times to secure them. Try to weave the tail into stitches of the same color if possible, to make it less visible.
- Blocking (Optional but Recommended): For a truly flat and perfectly square shape, you can block your granny square.
- Gently wet the square (you can spritz it or immerse it and squeeze out excess water).
- Lay it flat on a blocking mat or towel, gently shaping it into a perfect square. Use rust-proof pins to hold the corners and sides in place if needed.
- Allow it to air dry completely. Blocking helps even out your stitches and gives the square a more finished look.
Tips for Success
- Consistent Tension: Maintaining even tension throughout each round is key to a symmetrical granny square.
- Counting Stitches: Always count your stitches at the end of each round, especially the clusters and chain spaces, to ensure your square is growing correctly.
- Practice Color Changes: The “changing color at the last yarn over” technique takes a little practice but results in a cleaner transition.
- Scrap Yarn Fun: Don’t be afraid to mix and match colors! The beauty of striped granny squares is in their vibrant, eclectic look.
Now you have a beautifully striped classic granny square! What do you plan to make with your collection of colorful squares?