 by
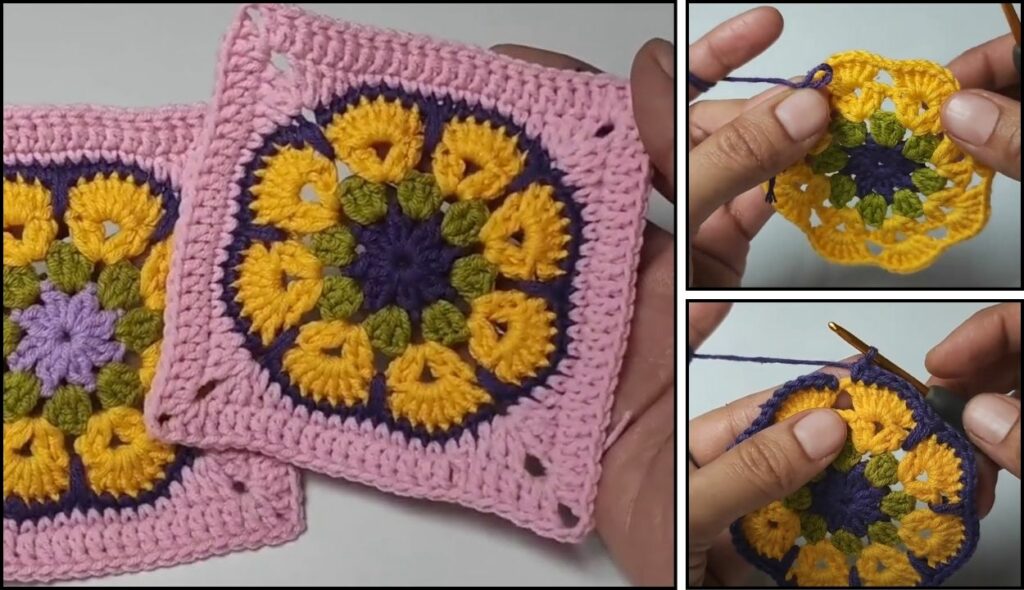
by That sounds like a wonderfully vibrant project! Learning to crochet a colorful flower square is a fantastic way to combine basic stitches with color work, leading to a beautiful and versatile motif. These squares are perfect for joining into blankets, cushions, bags, or even as stand-alone coasters or appliqués.
Given that it’s warm in Phnom Penh, 100% cotton yarn or a smooth acrylic yarn would be excellent choices for this project. Cotton provides crisp stitch definition and a lovely feel, while acrylic offers a vast array of colors and is generally easy to work with. Both are suitable for decorative items and washable.
How to Crochet This Colorful Flower Square Step by Step
This tutorial will guide you through creating a charming flower square, often called a “granny square” variation, that features a distinct flower design at its center. We’ll use multiple colors to make it truly vibrant.
1. Essential Materials You’ll Need
- Yarn: You’ll need at least three colors for a vibrant flower square.
- Color A (Flower Center): Yellow or a contrasting bright color. Worsted Weight (Aran / Medium / Category 4) Cotton or Acrylic Yarn.
- Color B (Petals): Pink, red, orange, or another vibrant flower color. Worsted Weight.
- Color C (Square Border): Green, white, or a coordinating background color. Worsted Weight.
- You’ll only need small amounts of each color, making this a great scrap yarn project!
- Crochet Hook: A 4.0mm (US G/6) or 4.5mm (US 7) hook. Choose a hook size that creates a fabric that isn’t too stiff or too loose.
- Scissors: For cutting yarn.
- Yarn Needle (Tapestry Needle): Essential for weaving in ends.
- Stitch Marker (Optional but helpful): To mark the beginning of rounds, especially for beginners.

2. Basic Crochet Stitches You’ll Use
This pattern utilizes fundamental crochet stitches and working in rounds:
- Magic Ring (MR) / Adjustable Ring: (Highly Recommended!) Creates a tight, hole-free center for your flower. Alternatively, you can
ch 2, then work all stitches of Round 1 into the 2nd ch from the hook. - Chain (ch): For foundation, turning, and creating spaces.
- Slip Stitch (sl st): For joining rounds and neatly moving across stitches.
- Single Crochet (sc): A dense, short stitch.
- Half Double Crochet (hdc): A medium-height stitch.
- Double Crochet (dc): A taller stitch, used frequently in granny squares and flower petals.
- Treble Crochet (tr) / Triple Crochet: An even taller stitch (optional, for larger petals).
- Working in Rounds (Joined): You’ll join each round with a slip stitch.
- Color Changes: You’ll change colors at the end of several rounds.
- Working into Chain Spaces (ch-sps): You’ll work groups of stitches into the spaces created by chains in previous rounds.
- Fasten Off: To securely end your work.
- Weaving in Ends: Hiding yarn tails for a neat and professional finish.
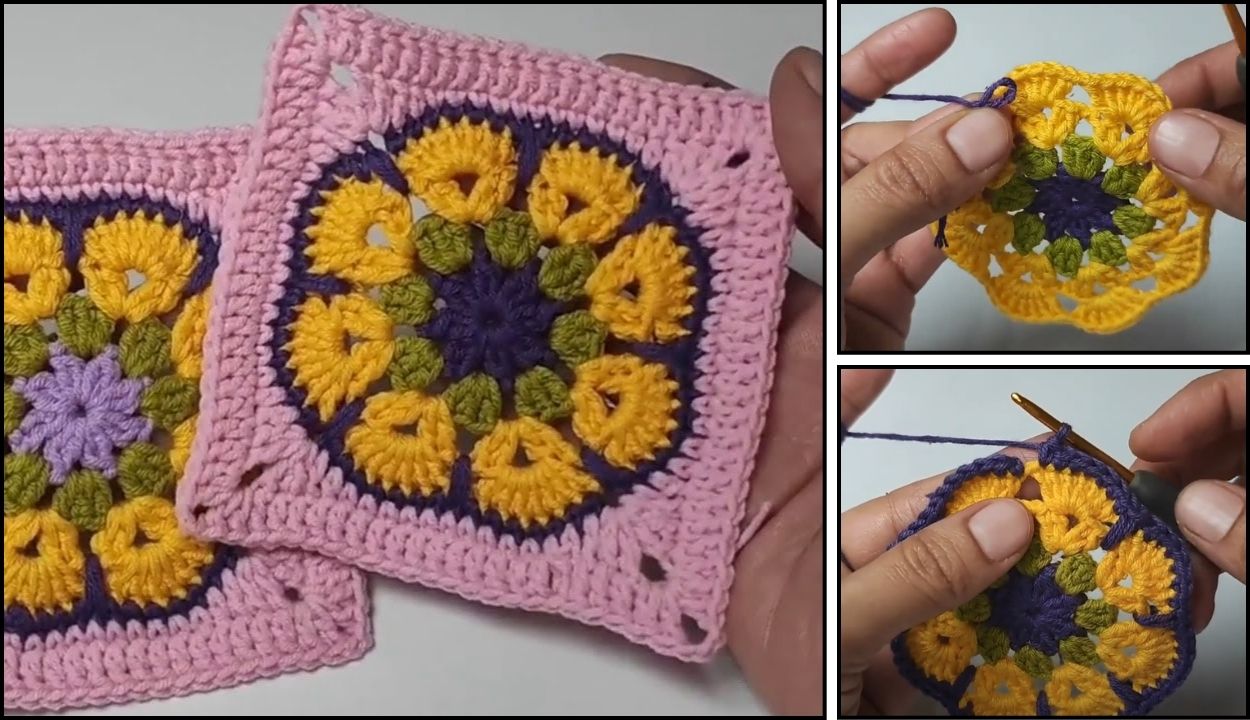
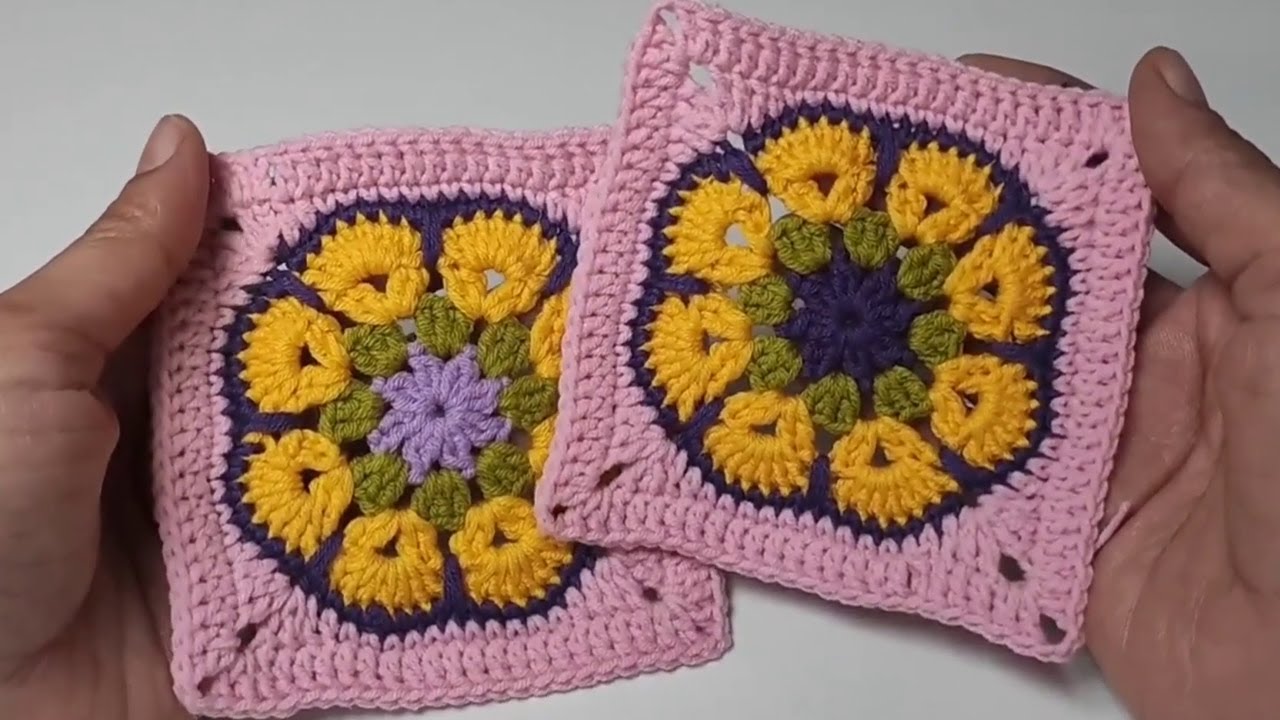
Colorful Flower Square Pattern
This pattern creates a square that’s approximately 4-5 inches (10-12.5 cm) per side, depending on your yarn and tension.
Abbreviations (US Crochet Terms):
- MR: Magic Ring
- ch: chain
- sl st: slip stitch
- sc: single crochet
- hdc: half double crochet
- dc: double crochet
- tr: treble crochet
- st(s): stitch(es)
- ch-sp: chain space
(...): work stitches into the same stitch or space[...]: repeat instructions in brackets- FO: Fasten off
Understanding Color Changes in Joined Rounds
When changing colors at the end of a joined round:
- Work the last stitch of the round (e.g., the last dc) up to the last yarn over. You should have 2 loops on your hook.
- Drop the current color. Pick up your new color.
- Yarn over with the new color and pull through both loops on your hook to complete the stitch.
- Now, with the new color, make your sl st to join the round and then chain up for the next round.
- Cut the old color yarn, leaving a 4-6 inch tail to weave in later.
Part 1: Flower Center (Color A)
Use Color A (e.g., Yellow) yarn.
- Round 1: Create a MR. Ch 2 (does not count as a stitch). Work 12 hdc into the MR. Join with a sl st to the top of the first hdc. (12 hdc)
- Gently pull the MR tail to close the center hole tightly.
- Change color to Color B (e.g., Pink) as you make the last sl st to join. FO Color A, leaving a tail for weaving in.
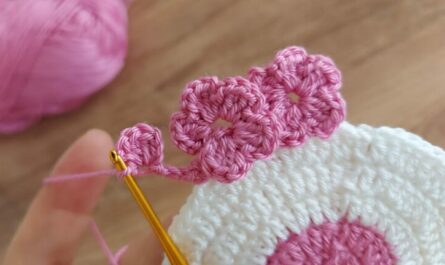
Part 2: Petals (Color B)
Use Color B (e.g., Pink) yarn.
- Round 2: Ch 1 (does not count as a stitch).
*Work (sc, ch 2, sc) all into the same stitch. Sl st into the next stitch.*Repeat from*to*around. You should create 6 distinct petals.- Join with a sl st to the first sc. (6 petals formed by (sc, ch 2, sc) and 6 sl sts)
- Change color to Color C (e.g., Green) as you make the last sl st to join. FO Color B, leaving a tail for weaving in.
- You might need to adjust the number of stitches in your petals if you want them fuller or flatter. For very full petals, you could try (hdc, dc, hdc) or (dc, tr, dc) in each ch-2 space.

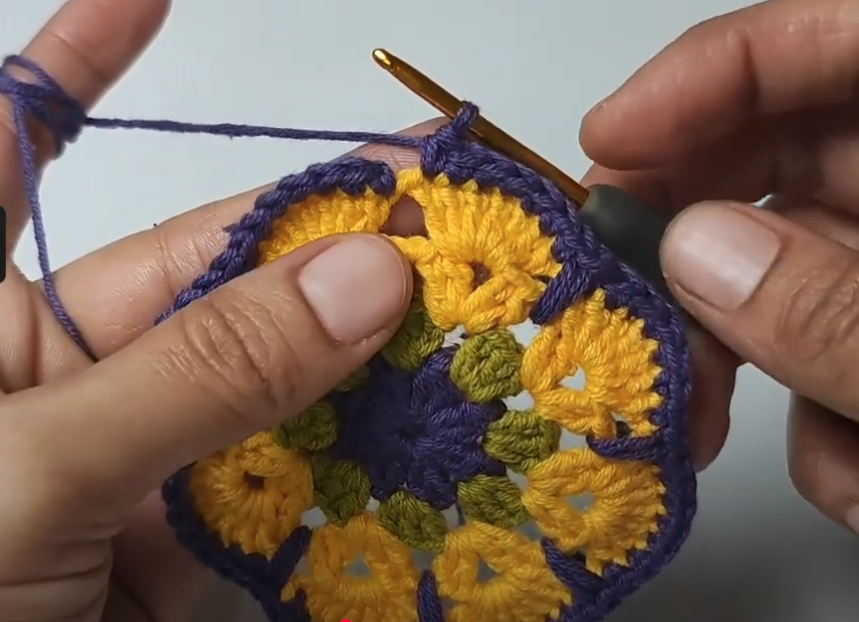
Part 3: Forming the Square (Color C)
Now we’ll transform the round flower into a square shape. Use Color C (e.g., Green) yarn.
- Round 3: Ch 3 (counts as 1 dc).
- Work (2 dc, ch 2, 3 dc) into the first ch-2 space of any petal from the previous round. (This forms your first corner).
*Sc in the sl st between the next two petals (look for the stitch that connected the two sc in the previous round).- Work (3 dc, ch 2, 3 dc) into the ch-2 space of the next petal (this forms your next corner).
* - Repeat from
*to*2 more times. - Sc in the sl st between the next two petals.
- Join with a sl st to the top of the beginning ch 3.
- FO Color C, leaving a tail for weaving in.
- You should now have a distinct square shape with 4 corners and flat sides. If your square seems to curl, try using a slightly larger hook for this round.
Part 4: Expanding the Square (Optional, for a larger square)
If you want a larger square, you can add more rounds, continuing the classic granny square method. Rejoin Color C or a new color.
- Round 4 (Example): Rejoin yarn with a sl st into any ch-2 corner space.
- Ch 3 (counts as 1 dc). Work (2 dc, ch 2, 3 dc) into the same corner space.
*Ch 1. Work 3 dc into the next side space (the sc from the previous round).- Ch 1. Work (3 dc, ch 2, 3 dc) into the next ch-2 corner space.
* - Repeat from
*to*2 more times. - Ch 1. Work 3 dc into the last side space.
- Ch 1. Join with a sl st to the top of the beginning ch 3.
- FO Color C, or continue with another round in the same or a new color.
- You can continue adding rounds using this same pattern:
(3 dc, ch 2, 3 dc)in each corner space, and3 dcin each ch-1 space along the sides, separating each 3-dc cluster with ach 1.
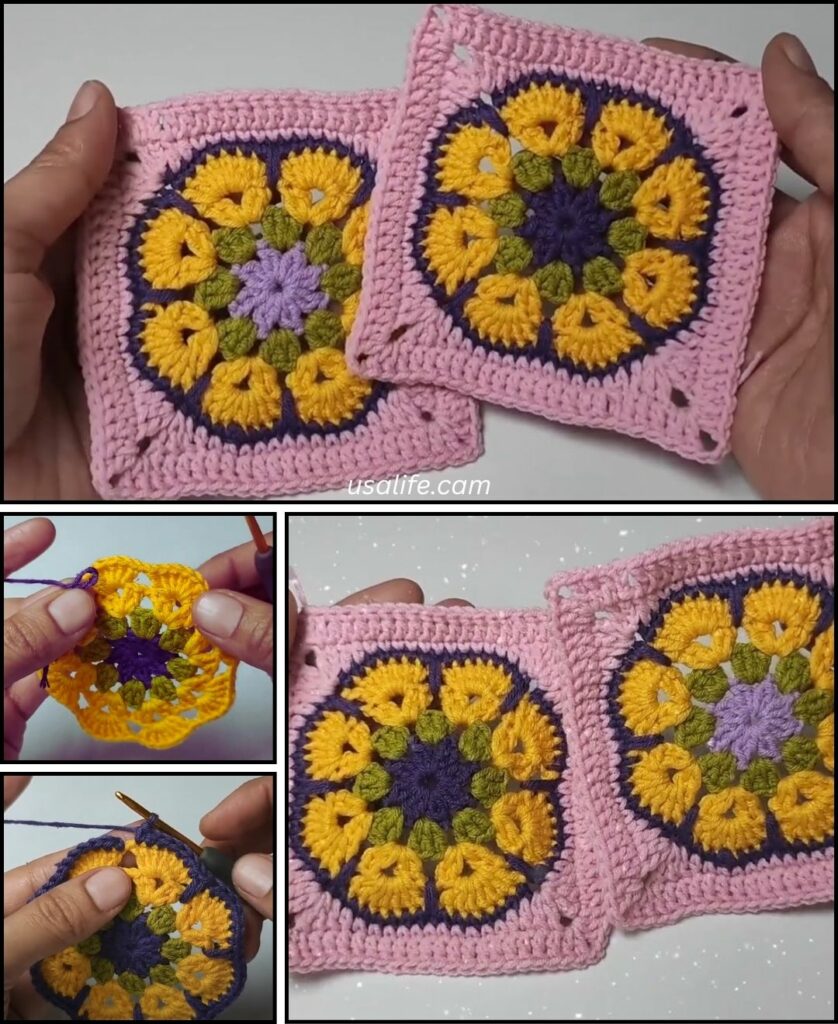
Part 5: Finishing Your Colorful Flower Square
- Weave in ALL Ends NEATLY: This is absolutely crucial for a polished, professional-looking square, especially with multiple color changes.
- Use your yarn needle to carefully weave in every single yarn tail on the wrong side of your square. Go back and forth through stitches for at least 1-2 inches to ensure they are hidden and won’t unravel.
- Pay special attention to the center, making sure the Magic Ring is pulled tightly closed.
- Blocking (Highly Recommended!): Blocking will really make your flower square shine! It helps to:
- Even out your stitches and tension.
- Flatten the square so it lies perfectly flat.
- Define the corners and stitch pattern.
- Method:
- Gently wet your finished square (you can submerge it in cool water with a tiny bit of mild soap, then gently squeeze out excess water, or simply mist it thoroughly with a spray bottle).
- Lay it flat on a blocking mat or a clean towel.
- Gently stretch and shape the square into a perfect square, making sure the corners are sharp. Use rust-proof pins to hold it in place.
- Allow it to air dry completely. This might take several hours or even overnight. Do not use heat (like a hairdryer) as it can distort the yarn.
Tips for a Beautiful Flower Square
- Consistent Tension: This is key for a flat, even square that doesn’t buckle or pull. Practice helps!
- Counting Stitches: Pay close attention to your stitch counts at the end of each round, especially in the initial rounds, to ensure your flower stays round and then transforms neatly into a square.
- Neat Color Changes: Practice the color change technique (completing the last yarn over with the new color) for seamless transitions.
- Experiment with Colors: Don’t be afraid to try different color combinations! Bright centers, contrasting petals, and a neutral background or vice versa can all create stunning effects.
- Uses: Once you master this square, you can make many to join together for blankets, scarves, or bags. Or, use them individually as coasters, appliqués, or decorative elements.
You’ve now got the detailed instructions to crochet a beautiful, colorful flower square! What wonderful project will you make with your new squares?