 by
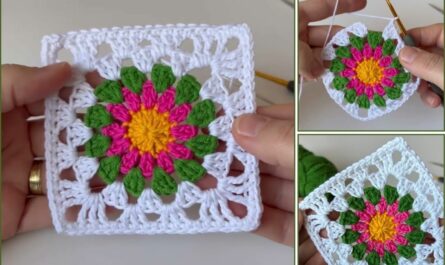
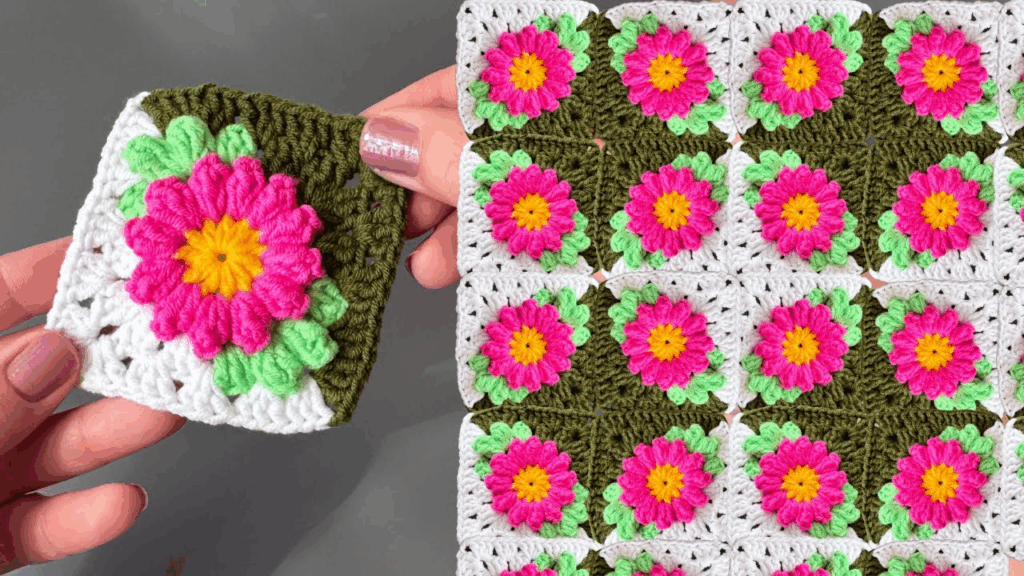
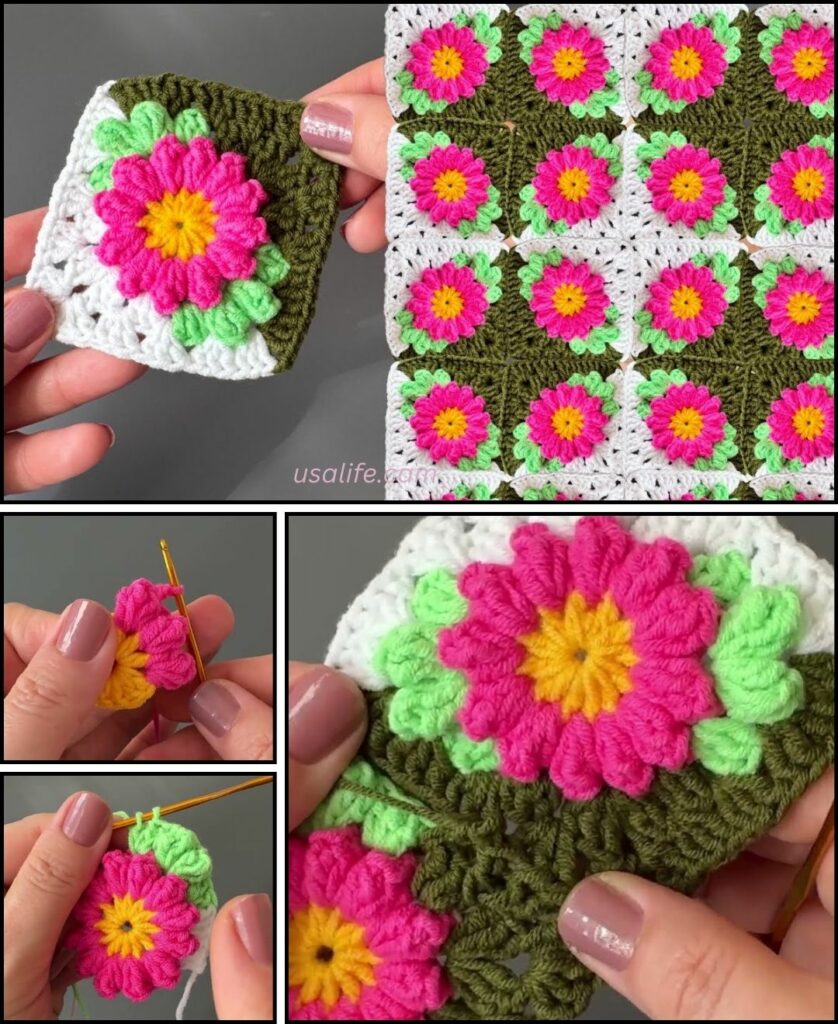
by Crocheting a multi-colored floral motif is a fantastic way to practice color changes and create a stunning, layered design. We’ll use the popular African Flower motif as an example, as it naturally incorporates several color changes to highlight its unique geometric shape.
Here is a detailed, step-by-step tutorial on how to crochet this beautiful, multi-colored floral motif.
🌻 Materials and Abbreviations
- Yarn: Medium-weight yarn (worsted/size 4) is recommended for ease. Choose at least three or four contrasting colors (A, B, C, D).
- Crochet Hook: Size recommended for your yarn.
- Scissors
- Tapestry Needle: Essential for weaving in ends.
- Stitch Marker (Optional): To mark the beginning of rounds.
Key Crochet Terms
| Abbreviation | Stitch Name |
| ch | Chain |
| sl st | Slip Stitch |
| dc | Double Crochet |
| tr | Treble Crochet (Triple Crochet) |
| st(s) | Stitch(es) |
Part 1: The Center and Inner Petals (Colors A & B)
This motif starts by creating eight distinct “petals” or sides.
Round 1 (Center – Color A)
- Start: With Color A, make a Magic Ring (or ch 4 and sl st to join).
- Base: ch 3 (counts as first dc). Work 15 dc into the ring. (16 sts)
- Finish: Pull the tail to close the ring. Join with a sl st to the top of the beginning ch 3. Fasten off Color A.
Round 2 (Petal Foundation – Color B)
- Join: Join Color B into any stitch with a sl st. ch 3 (counts as dc).
- First Petal: Work 1 dc into the same stitch. ch 1.
- Repeat: [2 dc in the next st, ch 1] 15 times. (You will have 16 pairs of dc separated by ch 1).
- Finish: Join with a sl st to the top of the beginning ch 3. Fasten off Color B.
Part 2: Defining the Flower Shape (Color C)
This round creates the distinctive “puff” of the petals and defines the final edges.
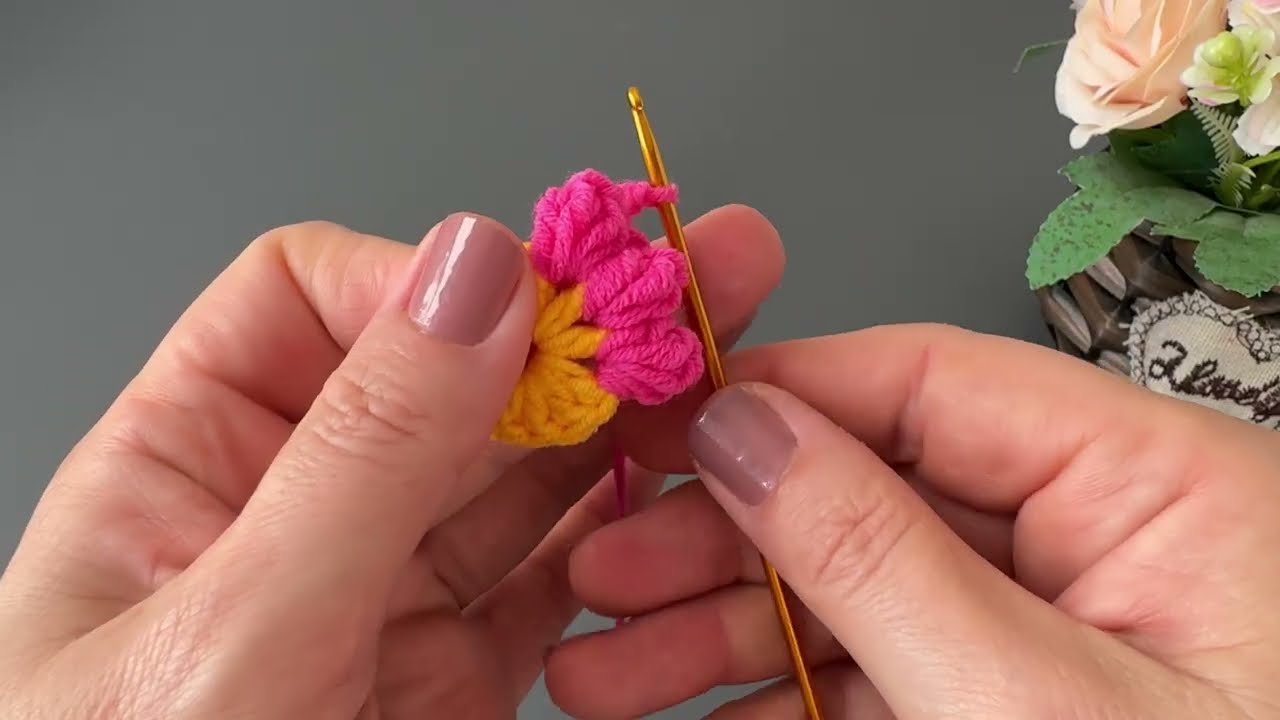
Round 3 (Petal Puff – Color C)
- Join: Join Color C into any ch-1 space from the previous round with a sl st.
- First Puff: ch 3 (counts as dc). Work 6 dc into the same ch-1 space. (This creates a 7-dc shell).
- Anchor: Work sc into the next ch-1 space.
- Repeat: [7 dc in the next ch-1 sp, sc in the next ch-1 sp] 7 times. (You will have 8 total 7-dc petals).
- Finish: Join with a sl st to the top of the beginning ch 3. Fasten off Color C.
Part 3: Squaring Off and Finishing (Color D)
The flower shape is now turned into a geometric octagon, and the final color is used to square off the shape so it can be easily joined to others.
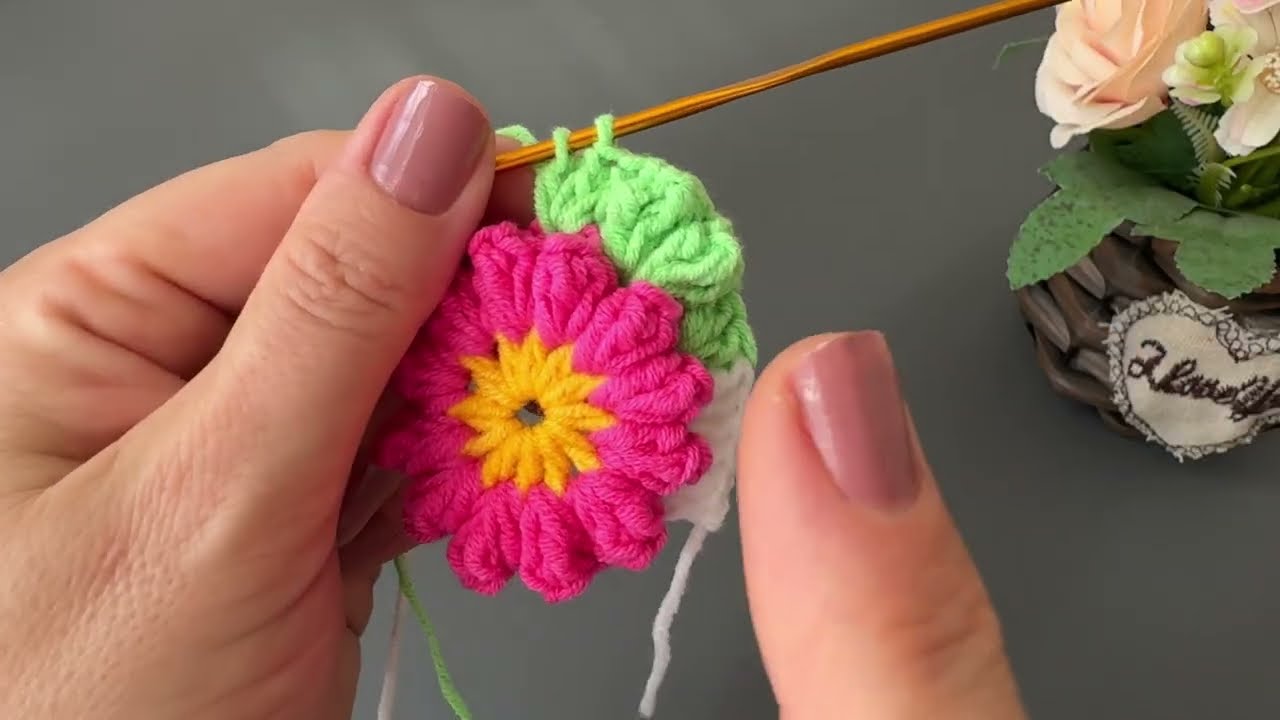
Round 4 (Defining Octagon – Color D)
- Join: Join Color D into the top center stitch of any 7-dc petal (the 4th dc of the 7-dc shell) with a sl st.
- Point Chain: ch 1 (does not count as st). sc in the same stitch.
- Chains: ch 5.
- Repeat: [sc in the center (4th) dc of the next petal, ch 5] 7 times. (You should have 8 ch-5 loops).
- Finish: Join with a sl st to the first sc.
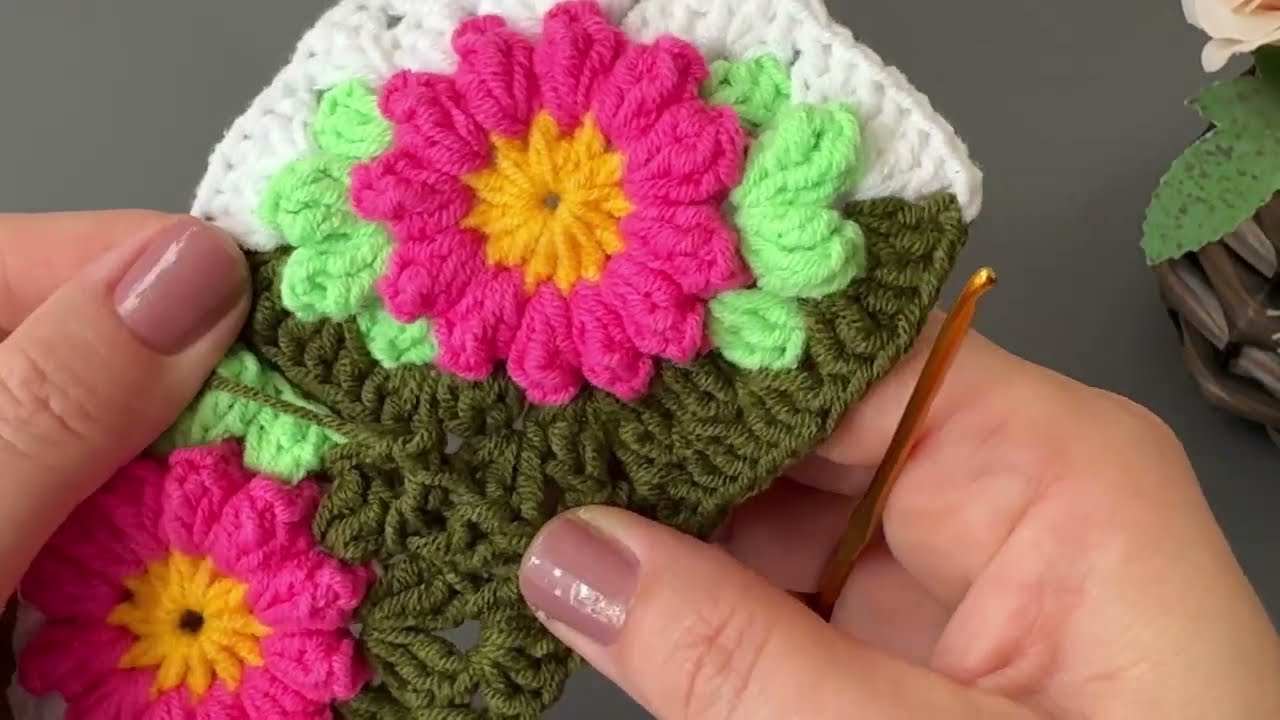
Round 5 (Squaring Off – Color D)
We now use varying stitch heights within the ch-5 loops to pull the octagon into a square.
- Move to Loop: sl st into the first ch-5 space.
- Side Cluster: ch 3 (counts as dc). Work 3 dc into the same loop. ch 1.
- Corner (Creating the Square): Work [4 tr, ch 2, 4 tr] into the next ch-5 loop.
- Side: ch 1. Work 4 dc into the next ch-5 loop. ch 1.
- Side: Work 4 hdc into the next ch-5 loop. ch 1.
- Side: Work 4 dc into the next ch-5 loop. ch 1.
- Repeat Corner and Sides:
- Corner: [4 tr, ch 2, 4 tr] into the next loop.
- Side: ch 1. 4 dc into the next loop. ch 1.
- Side: 4 hdc into the next loop. ch 1.
- Side: 4 dc into the next loop. ch 1.
- Finish: Join with a sl st to the top of the beginning ch 3. Fasten off Color D.
Finishing Your Motif
- Weaving: Use your tapestry needle to securely weave in all those colorful tails on the back of the motif. Because you changed colors frequently, this step is important!
- Blocking: For the best shape, gently wet the motif and pin it flat, stretching the corners outward to clearly define the square shape. Let it dry completely.
This multi-colored African Flower motif is now ready to be joined with others to create a blanket, bag, or scarf! Which colors did you choose for your first motif
Video tutorial: