 by
by That’s an ambitious and beautiful request! A crocheted doily pattern can certainly be scaled up to create an elegant tablecloth or even adapted for the yoke or panels of a stunning dress. The key is finding a lace pattern that expands well and using the appropriate materials for the final item.
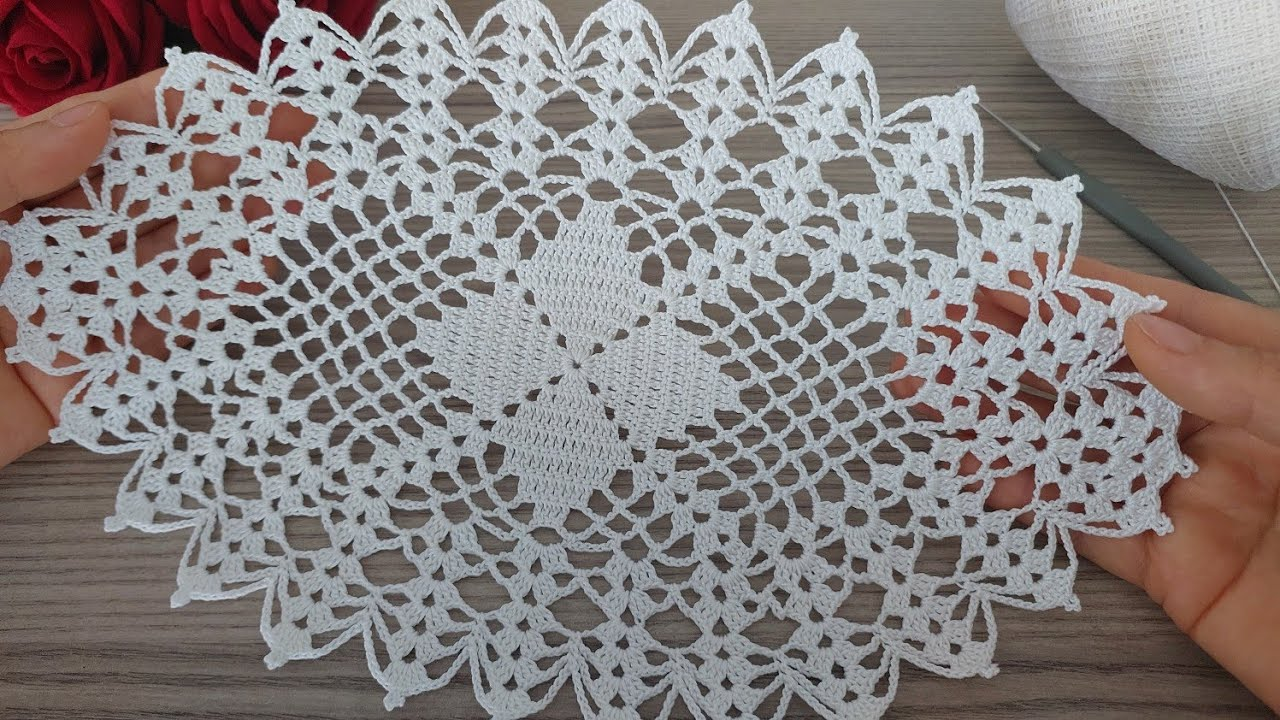
Here is a detailed guide focusing on a versatile Circular Petal Lace Doily Pattern that can be scaled up to a tablecloth. I’ll also explain how to adapt it for a dress.

🌸 Scalable Petal Lace Doily Pattern
This pattern uses a recurring Shell/Picot motif to create defined, flower-like sections that increase in number and size as the circle expands.
Materials Needed
- For a Doily/Table Center: Size 10 or 20 Cotton Thread (for fine lace).
- For a Tablecloth/Dress: Fingering or Sport weight yarn (Size 1 or 2) in cotton or a blend for drape.
- Hook: Appropriate size for your chosen material.
- Stitch Marker & Tapestry Needle.
Key Crochet Terms
| Abbreviation | Stitch Name |
| ch | Chain |
| sl st | Slip Stitch |
| sc | Single Crochet |
| dc | Double Crochet |
| tr | Treble Crochet |
| sp | Space (refers to a chain space) |
| picot | Ch 3, sl st into the 1st ch (creates a small loop/point) |
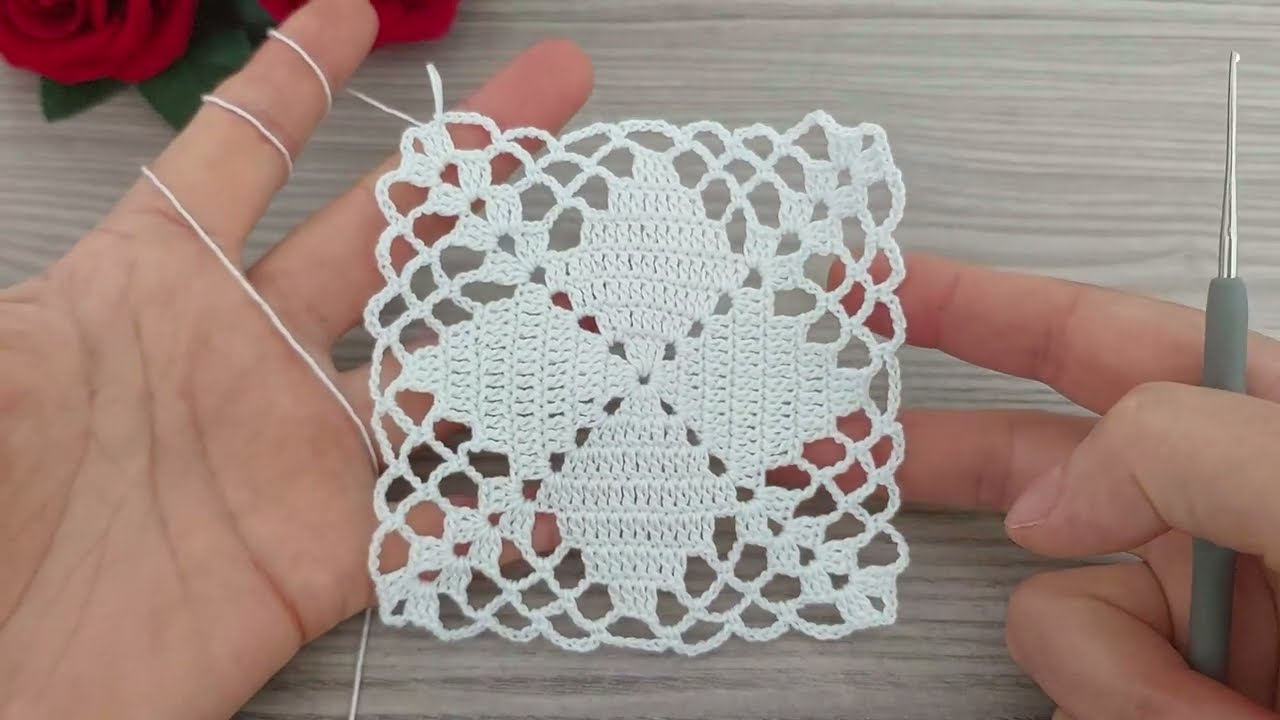
Part 1: The Doily Foundation (Establishing 8 Motifs)
We begin by establishing a circle with 8 points, which will become our repeated petal/shell sections.
- Round 1 (Center): Make a Magic Ring. ch 3 (counts as dc). Work 15 dc into the ring. Join with a sl st to the top of the ch 3. (16 sts)
- Round 2 (Mesh): ch 1 (does not count as st). sc in the same st. ch 3. Skip 1 st. Repeat [sc in the next st, ch 3, sk 1 st] around. Join with a sl st to the first sc. (8 sc anchors, 8 ch-3 loops).
- Round 3 (First Shell): sl st into the first ch-3 loop. ch 3 (counts as dc).1 Work [2 dc, ch 1, 3 dc] into the same loop. ch 1. Repeat [Shell (3 dc, ch 1, 3 dc) in the next ch-3 sp, ch 1] around. Join with a sl st to the top of the ch 3. (8 Shells).

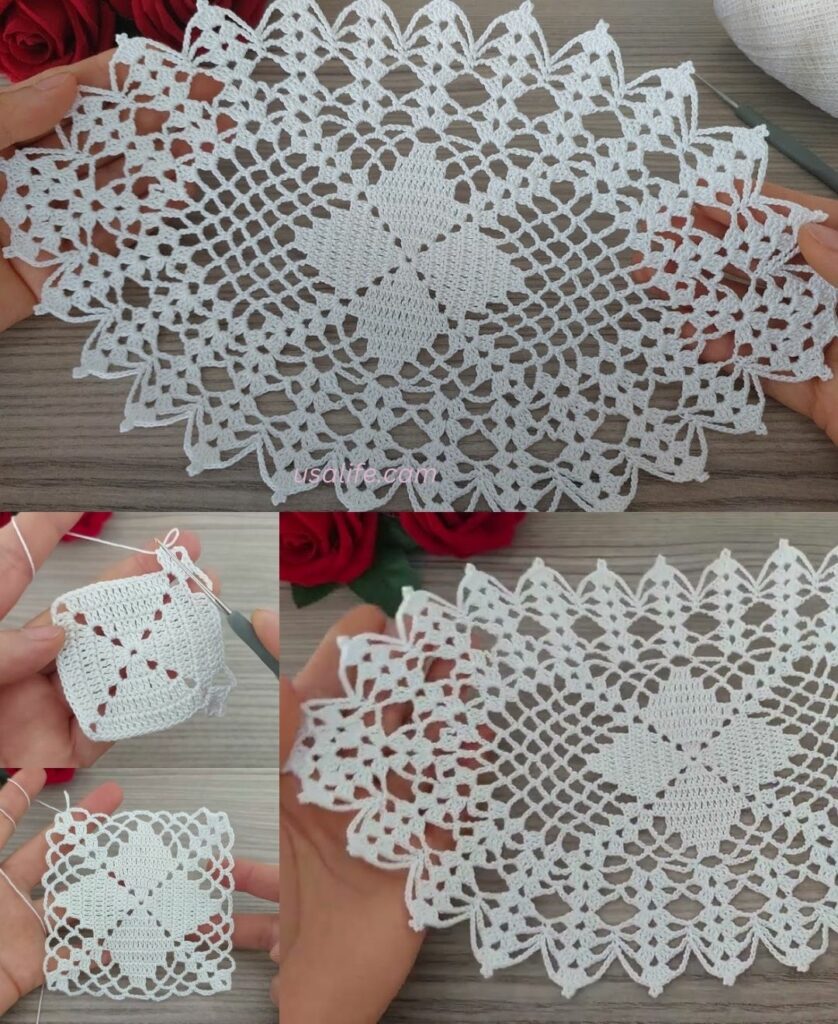
Part 2: Lace Expansion and Petal Definition
This section increases the diameter and defines the petals using taller stitches and more chain space.
- Round 4 (Separation): sl st across the next 3 dc’s, and sl st into the ch-1 peak. ch 1. sc in the peak. ch 5. Repeat [sc in the ch-1 peak of the next shell, ch 5] around. Join with a sl st to the first sc.
- Round 5 (Tall Shell): sl st into the ch-5 loop. ch 4 (counts as tr). Work [4 tr, ch 2, 5 tr] into the same ch-5 loop. sc into the next sc anchor. Repeat [Large Shell (5 tr, ch 2, 5 tr) in the ch-5 loop, sc in the sc anchor] around. Join with a sl st to the top of the ch 4. (8 Large Petals).
- Round 6 (Deep Mesh): sl st to the ch-2 peak. ch 1. sc in the peak. ch 7. Repeat [sc in the ch-2 peak of the next shell, ch 7] around. Join with a sl st to the first sc.
Part 3: Scaling Up (For Tablecloth/Large Doily)
To expand the pattern to a tablecloth, you must repeat the concept of (Tall Shells) anchored by (Deep Mesh).
- Round 7 (Next Shell Size): sl st into the ch-7 loop. Work a Large Shell (using tr or even double treble (dtr) for extra height) into the loop. sc in the next sc anchor. Repeat around.
- Round 8 (Next Mesh Size): sl st to the shell peak. ch 8 (or ch 9). sc in the next shell peak. Repeat around.
- Continue: Alternate Shell Rounds (working shells into the chain loops) and Mesh Rounds (creating larger chains between shell peaks). The number of stitches and chains must increase consistently to keep the circle flat.
Scaling Tip: As the circle grows, you may need to add more petals (e.g., increase from 8 to 12) or work two sets of shells into one large chain loop every few rounds to keep the circle from bowing.

Adaptation for a Dress
To use this pattern for a dress, you would typically make one of two adaptations:
1. The Yoke (Top-Down Circular Section)
- Work the pattern as detailed above (Rounds 1-6) until the diameter is large enough to fit across the shoulders and the bust.
- Once the desired chest circumference is reached, divide the circle into four sections (back, front, two armholes).
- Continue working the pattern in rows only across the front and back sections, using chain stitches to bridge the armhole gaps. Then, join the rows into the round again to continue the body of the dress.
2. Lace Panels (Rectangular Sections)
- Conversion: You can modify the shell pattern (Part 2, Round 5) to work back and forth in rows rather than rounds. This creates straight lace panels.
- Assembly: Crochet two large rectangular panels for the front and back of the skirt or bodice and seam them together, using a plain fabric lining underneath to contrast the lace.
Finishing: Blocking (Essential)
For a doily or a tablecloth, blocking is non-negotiable.
- Wet/Starch: Soak the finished piece (especially a tablecloth) in water or a diluted starch solution.
- Pin: Pin the piece to a flat surface, meticulously stretching every chain and shell peak into place.
- Dry: Let it dry completely to ensure the lace pattern is crisp and holds its shape.
This scalable pattern offers a beautiful foundation for your project! Are you leaning toward making a tablecloth or adapting it for a dress?
Video tutorial: