 by
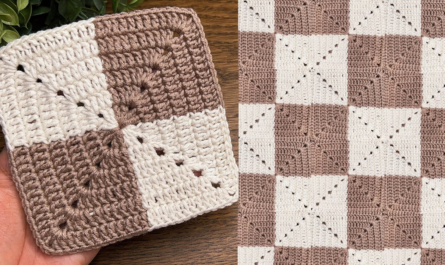
by That is a fantastic request! Creating a Unique Crochet Square Motif allows you to move beyond the traditional Granny Square structure and add special texture and visual depth.
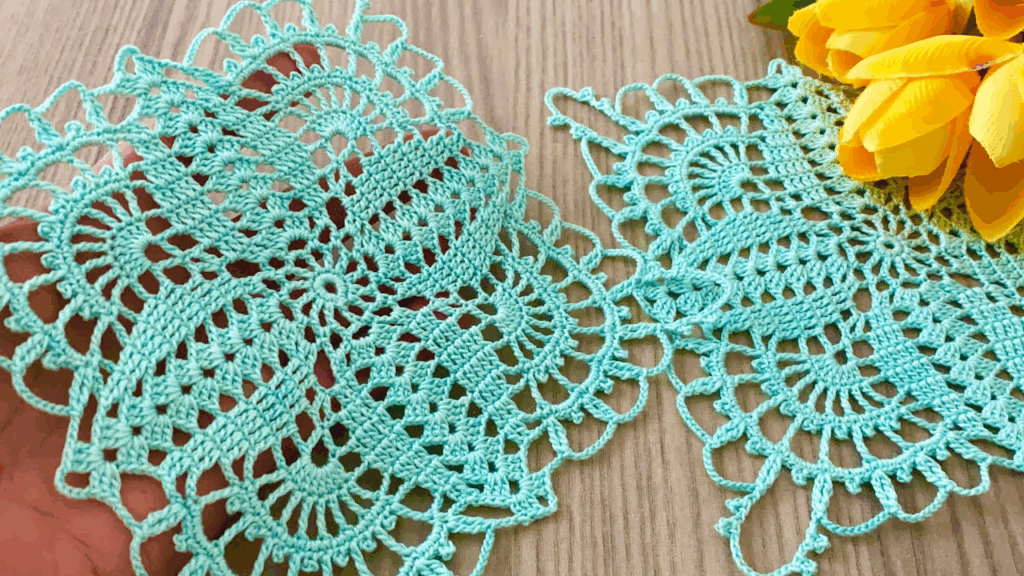
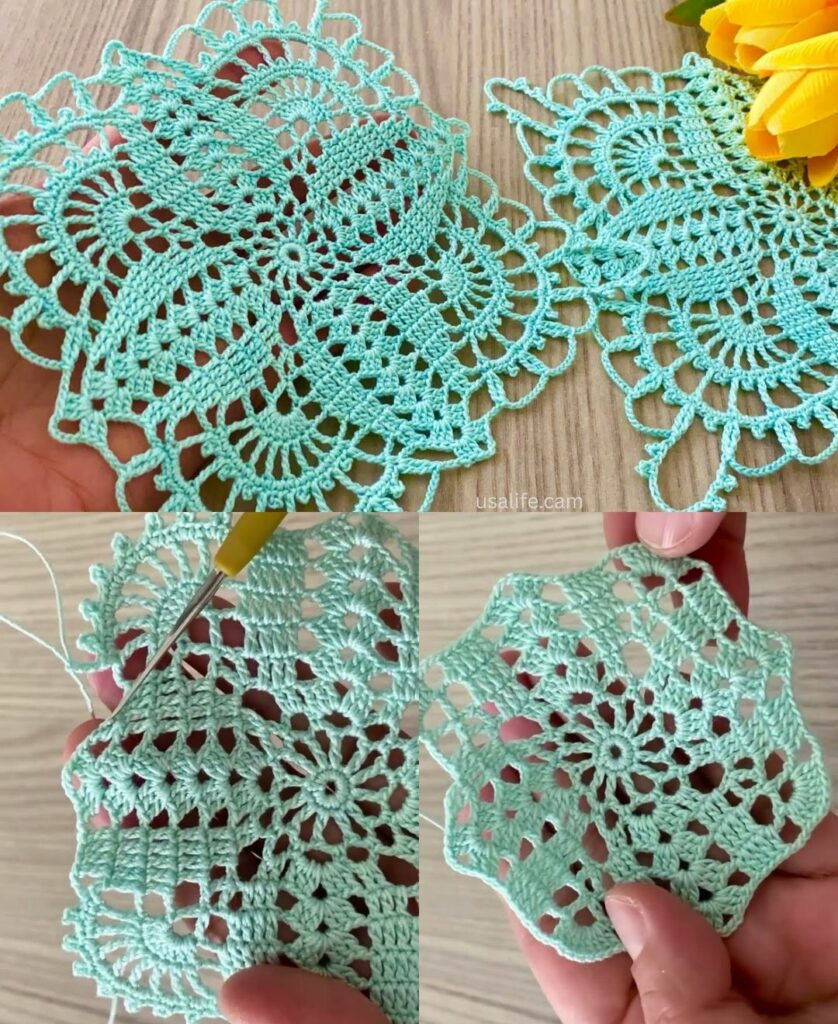
I will detail a step-by-step tutorial for the “Sunburst Shell Square,” which features a beautiful, dimensional circular center before being squared off with lacy V-stitches, creating a truly dazzling and unique look.
☀️ Sunburst Shell Square Motif Tutorial
This motif combines the dense texture of shell stitches in the center with the airy feel of V-stitches to achieve a distinct look, perfect for blankets or garments.
Materials You’ll Need
- Yarn: Medium-weight yarn (worsted/size 4). Using a contrasting color for the center (Rounds 1-3) enhances the “sunburst” effect.
- Crochet Hook: The size appropriate for your yarn (e.g., 5.0 mm or H/8).
- Scissors, Tapestry Needle.
Key Crochet Terms
| Abbreviation | Stitch Name |
| ch | Chain |
| sl st | Slip Stitch |
| sc | Single Crochet |
| dc | Double Crochet |
| V-st | V-Stitch (dc, ch 1, dc) |
| Shell | 5 dc worked into the same space |
Part 1: The Dimensional Sunburst Center
Round 1: Foundation
- Start: Make a Magic Ring. ch 3 (counts as dc). Work 11 dc into the ring.
- Finish: Pull the tail tight. Join with a sl st to the top of the ch 3. (12 sts).
Round 2: Creating the Rays
- ch 1. Work sc in the same st.
- Ray: ch 3. Skip 1 stitch.
- Repeat: [sc in the next st, ch 3, skip 1 st] 5 more times.
- Finish: ch 3. Join with a sl st to the first sc. (6 ch-3 loops).

Round 3: The Sunburst Shells
We work dimensional shells into the ch-3 spaces from the row below.
- sl st into the first ch-3 loop. ch 3 (counts as dc). Work 4 dc into the same ch-3 loop (First Shell).
- Shell: Work Shell (5 dc) into the next ch-3 loop.
- Repeat: Work [Shell (5 dc) into the next ch-3 loop] 4 more times.
- Finish: Join with a sl st to the top of the beginning ch 3. (6 Shells, 30 dc total). Fasten off Color A (optional).
Part 2: Squaring the Motif (Color B)
Round 4: Introducing the Square Frame
We join the new color and strategically use chains and V-stitches to pull the 6-sided circle into a 4-sided square.
- Join Color B into the space between any two shell clusters with a sl st.
- First Side: ch 3 (counts as dc). Work 2 dc in the same space.
- Corner: ch 3. Work V-st (dc, ch 1, dc) in the space between the next two shell clusters. ch 3.
- Side: Work 3 dc into the space between the next two shell clusters.
- Corner: ch 3. Work V-st in the space between the next two shell clusters. ch 3.
- Repeat: Continue the sequence [3 dc in next space, ch 3, V-st, ch 3] two more times.
- Finish: Join with a sl st to the top of the beginning ch 3. (4 corners established).

Round 5: Final Lace Edge
This final round increases the size while providing a clean, easy-to-join edge.
- ch 3 (counts as dc). Work 2 dc in the same space (over the 3 dc from R4).
- Side Lace: ch 1. Work 3 dc into the next ch-3 space. ch 1.
- Corner Shell: Work (3 dc, ch 2, 3 dc) into the ch-1 space of the V-st (this is the new corner).
- Side Lace: ch 1. Work 3 dc into the next ch-3 space. ch 1.
- Side: Work 3 dc into the next 3 dc cluster.
- Repeat: Continue the sequence [ch 1, 3 dc in ch-3 sp, ch 1, Corner Shell in V-st, ch 1, 3 dc in ch-3 sp, ch 1, 3 dc in next cluster] around.
- Finish: Join with a sl st to the top of the ch 3. Fasten off.
Final Steps: Blocking
Blocking is highly recommended for this unique motif. The dense center and the lacy edge often cause curling. Wet the square, pin the four corners sharply outward, and let it dry completely to flatten the lace and make the “sunburst” pop out dimensionally.
Would you like instructions on how to join these unique squares together for a blanket or runner?
Video tutorial: