 by
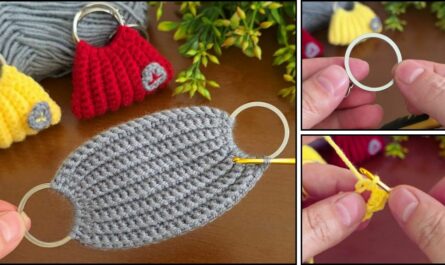
by That is a beautiful request! A Crochet Lace Square Motif is a stunning and versatile pattern, perfect for creating lightweight garments like a blouse or decorative home items like a runner.
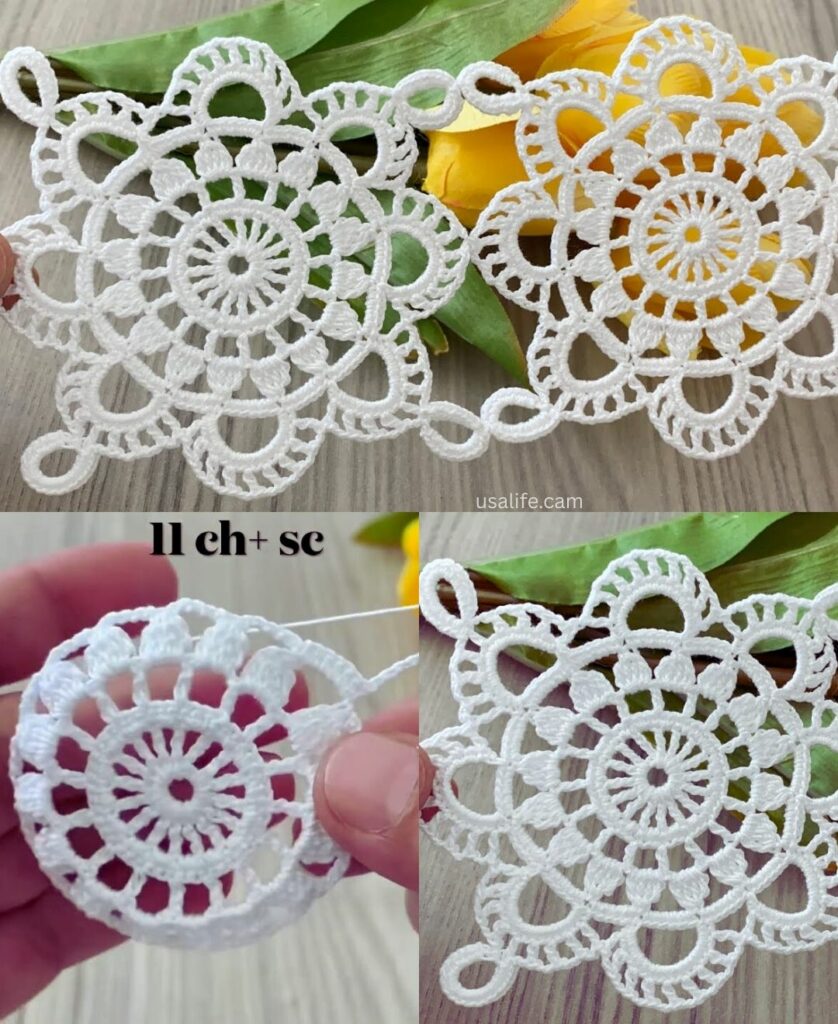
I will detail the pattern for the “Airy Fan Lace Square,” which uses large chain spaces and delicate shell stitches to create a highly breathable and easily joinable fabric.
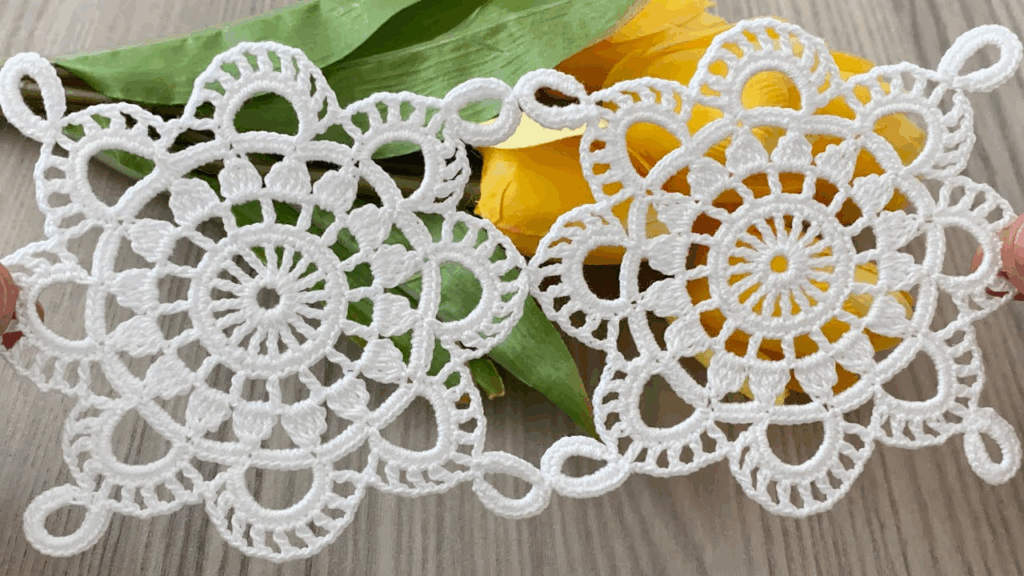
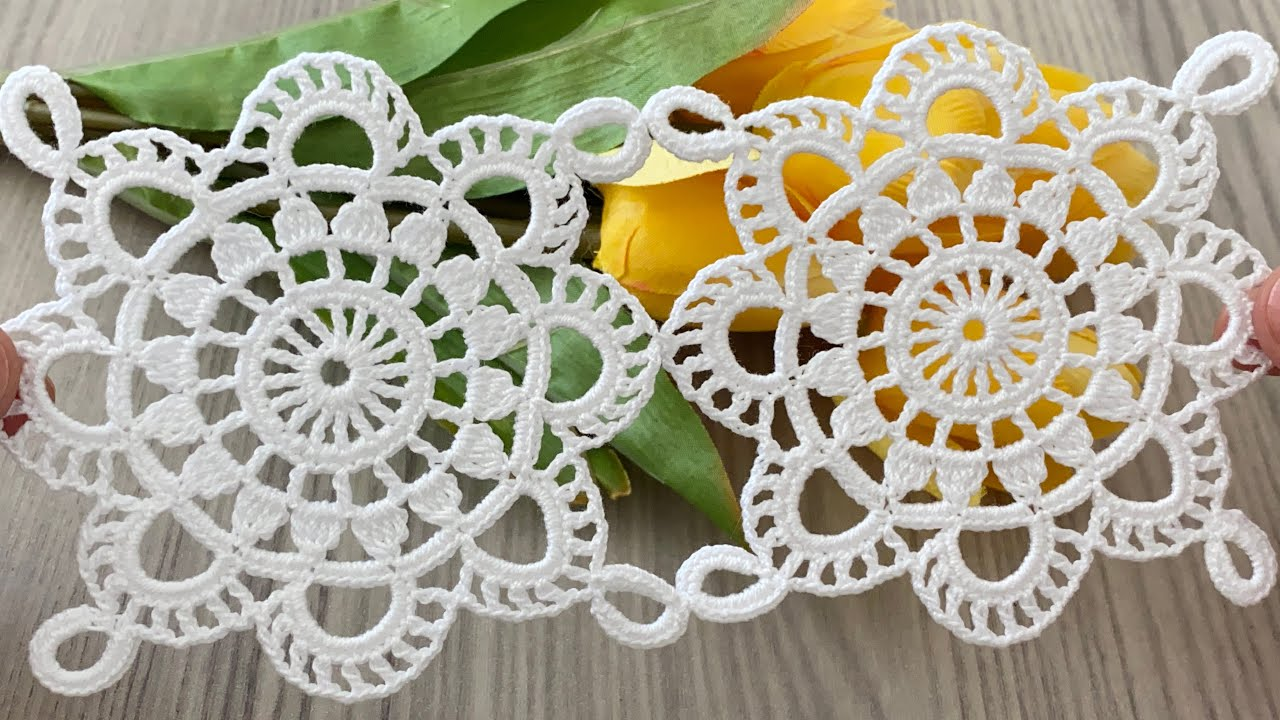
🌬️ Airy Fan Lace Square Motif Tutorial
This motif combines the structure of a square with the flowing delicacy of fan shells and long chain loops, resulting in a lightweight, lacy fabric.
Materials You’ll Need
- Yarn/Thread:
- For a Blouse: DK Weight (Size 3) or Sport Weight (Size 2) cotton or a blend for excellent drape.
- For a Runner: Size 10 or 20 Cotton Thread for a crisp, detailed look.
- Crochet Hook: The size appropriate for your material (e.g., 3.5 mm – 4.0 mm for yarn, or a steel hook for thread).
- Scissors, Tapestry Needle, Blocking Pins.
Key Crochet Terms
| Abbreviation | Stitch Name |
| ch | Chain |
| sl st | Slip Stitch |
| sc | Single Crochet |
| dc | Double Crochet |
| Shell | 5 dc worked into the same space |
| V-st | V-Stitch (dc, ch 3, dc) |
Part 1: Crocheting the Motif
Round 1: Foundation (Center)
- Start: Make a Magic Ring. ch 3 (counts as dc). Work 15 dc into the ring.
- Finish: Pull the tail tight. Join with a sl st to the top of the ch 3. (16 sts).

Round 2: Creating the First Lacy Arches
- ch 1. Work sc in the same st.
- Lace Arch: ch 5. Skip 3 stitches.
- Repeat: [sc in the next st, ch 5, skip 3 sts] 3 more times. (4 ch-5 loops).
- Finish: Join with a sl st to the first sc.
Round 3: Building the Fan Corners
We use the large chain loops to create the four corners, transforming the circle into a square.
- sl st into the first ch-5 loop.
- First Corner: ch 3 (counts as dc). Work Shell (4 dc, ch 3, 5 dc) into the same ch-5 loop.
- Side Anchor: Work sc into the next sc anchor.
- Side V-Stitch: ch 5. Work V-st (dc, ch 3, dc) into the center stitch of the next ch-5 loop. ch 5.
- Side Anchor: Work sc into the next sc anchor.
- Repeat: Continue the sequence [Corner Shell (5 dc, ch 3, 5 dc) in the ch-5 loop, sc in anchor, ch 5, V-st, ch 5, sc in anchor] 3 more times.
- Finish: Join with a sl st to the top of the beginning ch 3.

Round 4: Final Edging and Joining Points
This round ensures the edges are clean and provides strong joining points.
- sl st over the next 2 dc to reach the center of the shell. ch 1. Work sc in the center dc.
- Corner: ch 3. Work (sc, Picot, sc) into the ch-3 corner space. ch 3.
- Side: sc in the next center dc of the shell. ch 5.
- Work sc into the next ch-5 space. ch 3.
- Work sc, Picot, sc into the ch-3 space of the V-st. ch 3.
- Work sc into the next ch-5 space. ch 5.
- Repeat: Continue the sequence [sc in center dc, ch 3, (sc, Picot, sc) in corner, ch 3, sc in center dc, ch 5, sc in ch-5 sp, ch 3, (sc, Picot, sc) in V-st, ch 3, sc in ch-5 sp, ch 5] 3 more times.
- Finish: Join with a sl st to the first sc. Fasten off.
Part 2: Blouse & Runner Assembly
1. Joining the Motifs
Use the Join-as-You-Go (JAYG) method while working the final round (Round 4) of the second motif.
- Corner Join: Replace the
ch 3before and after the Picot withch 1, sl st into the corresponding ch-3 space on the finished motif, ch 1. - Side Join (on ch-5 loops): Replace the
ch 5withch 2, sl st into the corresponding ch-5 loop, ch 2.
2. Project Layouts
| Project | Shape/Layout | Customization Notes |
| Lace Runner | Shape: A long, narrow rectangular strip (e.g., 2 motifs wide by 8-12 motifs long). | Edging: Add a simple SC or Picot border around the entire perimeter. Blocking is essential to ensure the runner lies flat. |
| Summer Blouse | Construction: Join motifs into a T-shape or a Yoke-down design. Typically, 3-4 motifs wide for the body panels. | Fit: The airy nature of the lace means it drapes well. Use the motif edges for the armholes and neckline, joining the side seams only partially to leave room for the arms. |

3. Final Blocking (Crucial)
For lace work, blocking is non-negotiable. Wet the finished item (use starch for a stiff runner), pin all four corners of the squares sharply, and let it dry completely. This step opens up the lace arches and ensures the final project maintains a clean, elegant structure.
Would you like a tutorial on how to work a simple lace trim around the edges of your finished project?
Video tutorial: