by
by 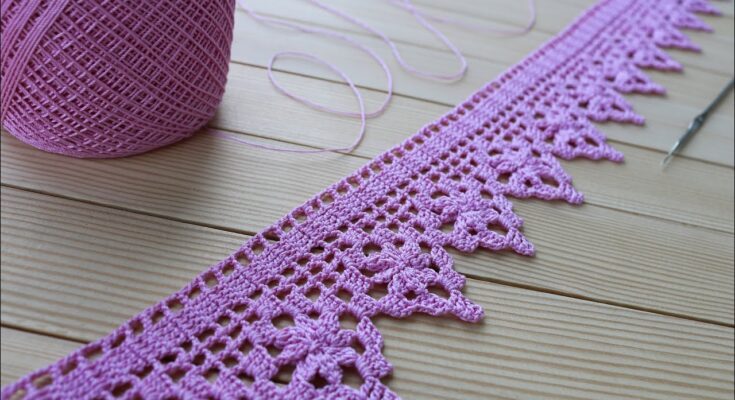
Adding a border to your finished blanket is the perfect way to elevate its look, add visual interest, and prevent stretching. But with so many beautiful border options available, choosing the right one can feel overwhelming!
Don’t worry, crocheters! This blog post will guide you through the process of crocheting a versatile and stylish stitch border that works with various blanket styles.
Before we begin, gather your materials:
- Yarn: Choose a yarn that complements the color and texture of your blanket. Consider using a slightly thicker yarn for a more pronounced border.
- Crochet hook: Select the hook size recommended for your chosen yarn.
- Scissors
- Tapestry needle (optional): For weaving in ends.
Now, let’s get crocheting!
Step 1: Choose your stitch:
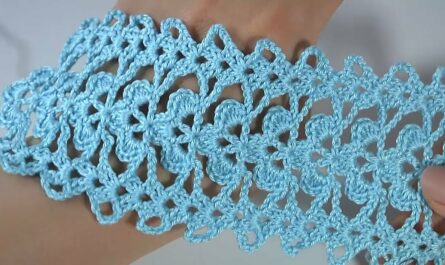
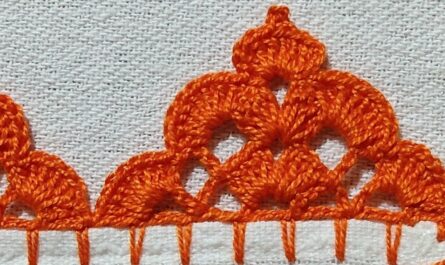
For this border, we’ll use the Shell Stitch, a classic and elegant option. However, feel free to explore other stitch patterns like the Crab Stitch, Picot Stitch, or Scallop Stitch based on your preference and blanket style.
Step 2: Foundation round:
- With your chosen yarn and hook, attach to a corner of your blanket.
- Make a slip knot and chain 2.
- Work a single crochet (sc) in the corner space between the blanket and the chain 2.
- Chain 2, then work a sc in the next stitch along the blanket edge.
- Repeat step 4 until you reach the next corner.
- In the corner space, work 3 sc.
- Continue working sc and chain 2 spaces around the entire blanket, making 3 sc in each corner space.
- Join with a slip stitch to the first sc you made.
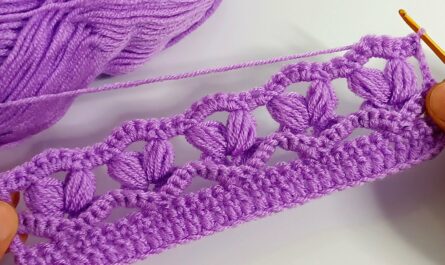
Step 3: Shell stitch row:
- Chain 3 (counts as first dc).
- Skip 2 stitches along the foundation round, then work 2 double crochets (dc) in the next stitch.
- Chain 1, then work 2 dc in the same stitch.
- Chain 2, skip 2 stitches along the foundation round, then work 5 dc in the next stitch.
- Chain 1, then work 5 dc in the same stitch.
- Repeat steps 4 and 5 around the entire blanket, creating a “shell” with 5 dc in each space between the chain 2 spaces of the foundation round.
- In the corner space, work 3 dc, 3 chain 1 spaces, and 3 dc.
- Join with a slip stitch to the top of the first chain 3.
Step 4: Optional additional rows:
You can add more rows of shells or other stitch patterns to create a wider border. Just remember to adjust the number of stitches in each “shell” or pattern repeat based on your desired width.
Step 5: Finishing touches:
- Weave in any yarn ends with a tapestry needle.
- Block your blanket to even out stitches and give it a polished look.
Tips and tricks:
- Use stitch markers to mark the beginning and end of each row, especially if working intricate patterns.
- Pay attention to your tension to ensure a consistent and even border.
- Experiment with different yarn colors and textures to create unique combinations.
- This border pattern is easily customizable. Adjust the number of rows, stitch types, and corner details to match your vision.
With a little practice and creativity, you can crochet a beautiful and personalized border that takes your blanket from ordinary to extraordinary!
Additional resources:
- Video tutorial on Shell Stitch Border: [Link to video tutorial]
- Free printable pattern for Shell Stitch Border: [Link to printable pattern]
- More crochet border inspiration: [Link to website with border patterns]
I hope this blog post inspires you to create your own stunning blanket border! Feel free to share your creations and ask any questions in the comments below. Happy crocheting!tunesharemore_vert
Video tutorial