by
by 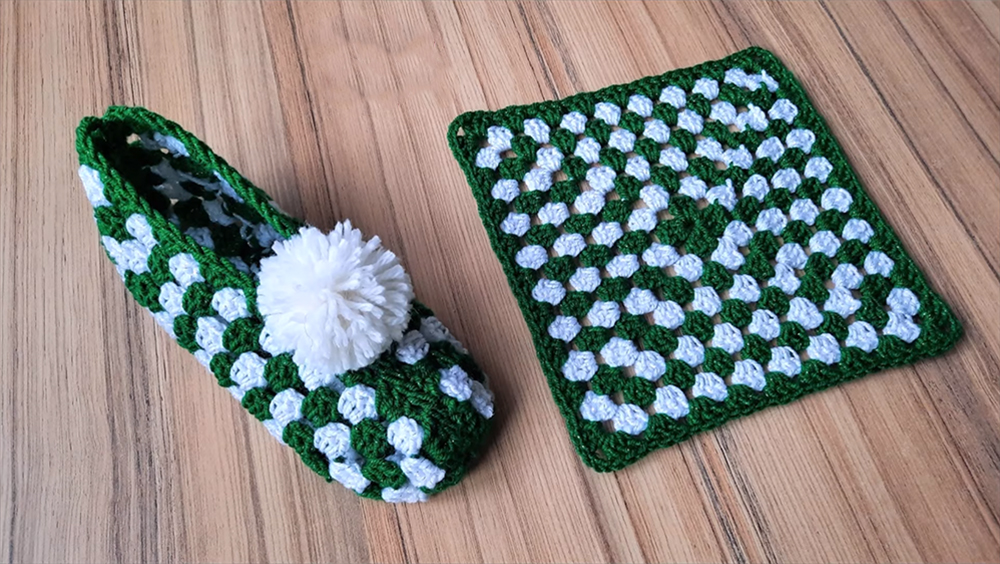
Crochet is a wonderful craft for creating comfy and personalized items, and what’s cozier than a pair of handmade slippers? This pattern guides you through crocheting adorable granny square slippers, perfect for padding around the house in pure comfort.
Skill Level: Beginner-friendly (assuming knowledge of basic crochet stitches)
Materials:
- Worsted weight yarn in 2-3 colors of your choice (around 200-300 yards each)
- Crochet hook appropriate for chosen yarn weight (typically H/8 – 5mm)
- Yarn needle
- Stitch markers (optional)
- Scissors
- Tape measure (optional)
Gauge:
4 granny squares = 5 inches (12.5 cm)
Sizing:
This pattern is adjustable to fit most adult sizes. Measure the widest part of your foot (without socks) to determine the desired sole length.
Instructions:
1. Granny Squares:
Start by crocheting granny squares using your chosen colors. Here’s a basic granny square pattern:
Round 1: Chain 4, slip stitch into first chain to form a ring. Chain 2, work 3 double crochets into ring, chain 2, 3 double crochets into ring. Turn. (8 dc) Round 2: Chain 2, 2 double crochets in first chain space, chain 2, 3 double crochets in each chain space around. Turn. (16 dc) Round 3: Chain 2, 2 double crochets in first chain space, chain 2, 2 double crochets in next chain space, chain 2, 3 double crochets in next chain space. Repeat from * to * around. Turn. (24 dc) Round 4: Chain 2, 2 double crochets in first chain space, chain 2, 3 double crochets in each of the next 2 chain spaces. Repeat from * to * around. Turn. (32 dc) Repeat Round 4 until your granny square reaches the desired size.
2. Sole:
- Join granny squares together using slip stitches or your preferred method. Aim for a rectangular shape slightly longer and wider than your foot measurement.
- To create the heel, crochet single crochets around the back edge of the joined squares, increasing stitches as needed to curve the heel. Work a few rows up the sides of the heel.
3. Sides and Top:
- Starting from the heel corner, work single crochets along the side edge of the squares, joining them to the top edge of the heel section.
- Continue crocheting single crochets around the top edge of the slipper, increasing stitches as needed to shape the toe opening.
- You can work a few extra rows around the top edge for a sturdier finish.
4. Finishing Touches:
- Weave in all yarn ends.
- Optional: Add an extra row of contrasting color around the top edge for decoration.
- You can also embellish your slippers with pom-poms, buttons, or other creative touches.
Tips:
- Use a stitch marker to mark the beginning of each round for easier counting.
- Adjust the size of the granny squares and the number of rows to customize the fit for your feet.
- Experiment with different color combinations and stitch patterns to create unique slippers.
- This pattern can be easily adapted to create slippers for children by using smaller yarn and adjusting the dimensions.
Enjoy your cozy new crochet granny square slippers!
Additional Resources:
- For visual learners, check out these helpful video tutorials:
- Explore different granny square patterns for inspiration:
- Find more crochet slipper patterns online and in craft books.
Remember, practice makes perfect! Don’t be discouraged if your first pair isn’t exactly how you envisioned. Crochet is a relaxing and rewarding hobby, so have fun and enjoy the process!
Video tutorial