 by
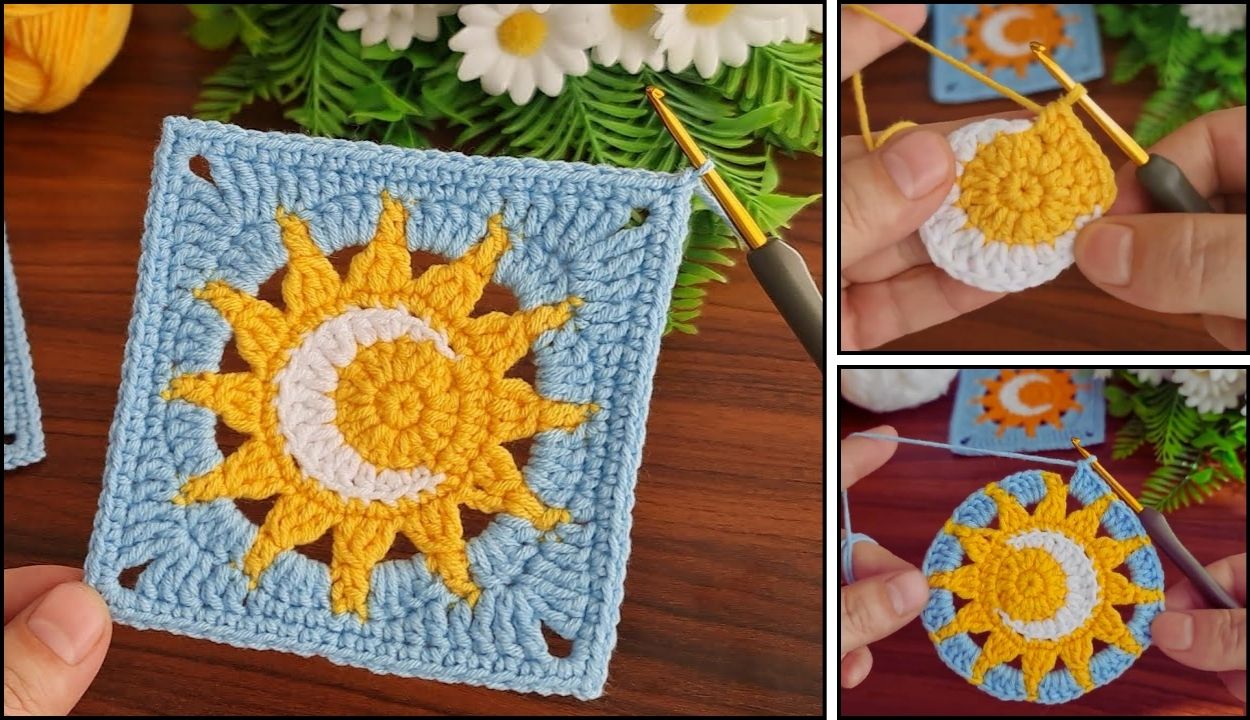
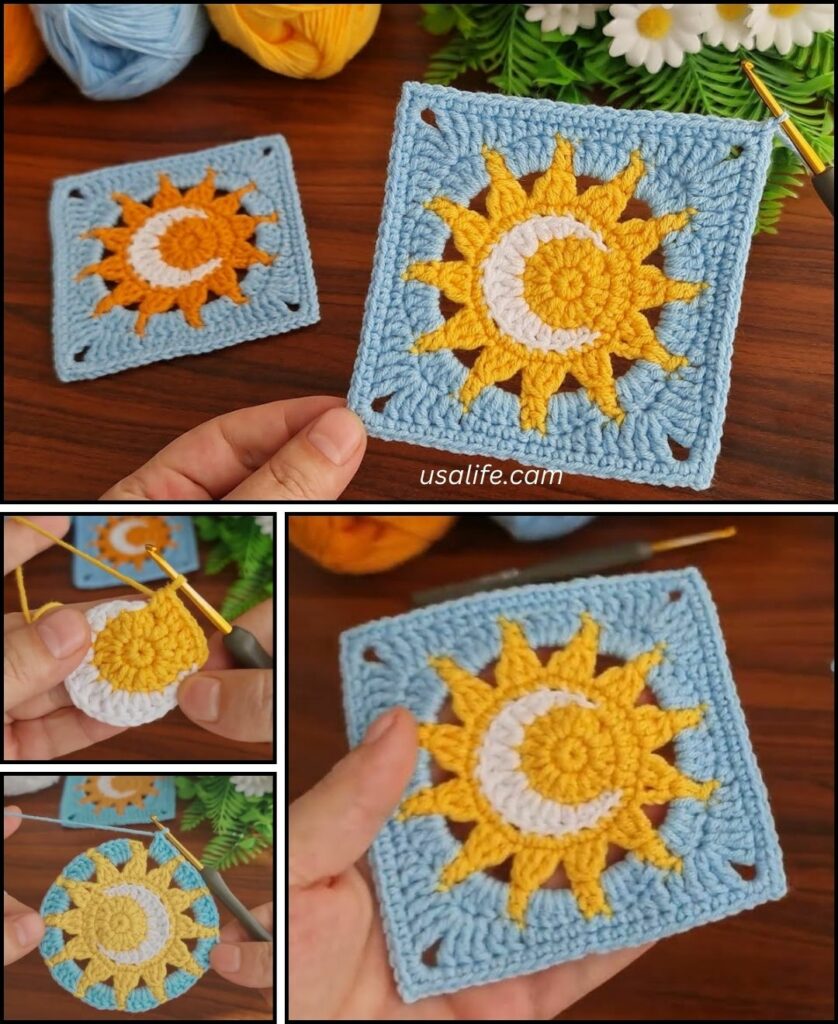
by Creating a “Sun and Moon” granny square is a beautiful way to combine the classic crochet technique with a celestial design. This project typically uses a solid circle in the center for the sun, and then adds a crescent moon and stars in the subsequent rounds. The result is a unique, eye-catching motif that’s perfect for blankets, wall hangings, and bags.
Here is a detailed guide on how to crochet a “Sun and Moon” granny square.

Materials Needed
- Yarn:
- Color A (Sun): A vibrant yellow or orange.
- Color B (Sky): A dark blue, black, or deep purple.
- Color C (Moon & Stars): A light color like white, cream, or silver.
- Crochet Hook: The size that matches your yarn.
- Scissors
- Tapestry Needle: For weaving in ends.
Abbreviations
- ch: chain
- sl st: slip stitch
- sc: single crochet
- dc: double crochet
- hdc: half double crochet
- tr: treble crochet
- bobble: bobble stitch (explained below)
- sk: skip
The Pattern
This pattern is worked in rounds, with each element (sun, moon, and square) being added in sequence.
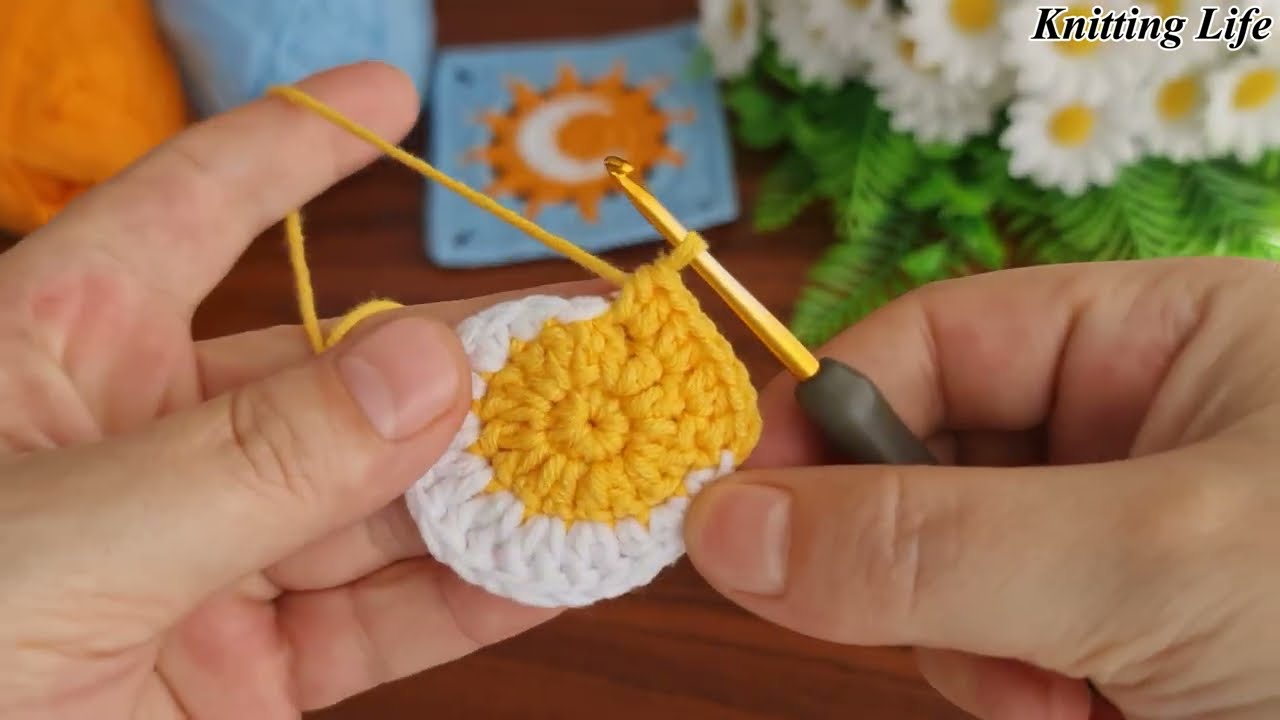
Round 1: The Sun
- Start: With Color A, create a magic ring or
ch 4and join with asl stto form a ring. - Make the circle:
ch 3(counts as firstdc), then work11 dcinto the ring. - Join with a
sl stto the top of the beginningch 3. You should have a total of 12dcstitches. - Cut the yarn and tie off, or leave the yarn attached if you want a subtle sunburst effect on the next round.
Round 2: The Sky (Beginning the Square)
- Join Color B in any stitch from the previous round.
ch 3(counts as firstdc).- Work 1 dc into the same stitch.
- Work 2 dc into the next stitch.
- Repeat
[2 dc in the next stitch]around the circle. You will now have 24 stitches. - Join with a
sl stto the top of the beginningch 3. ch 1and turn your work.
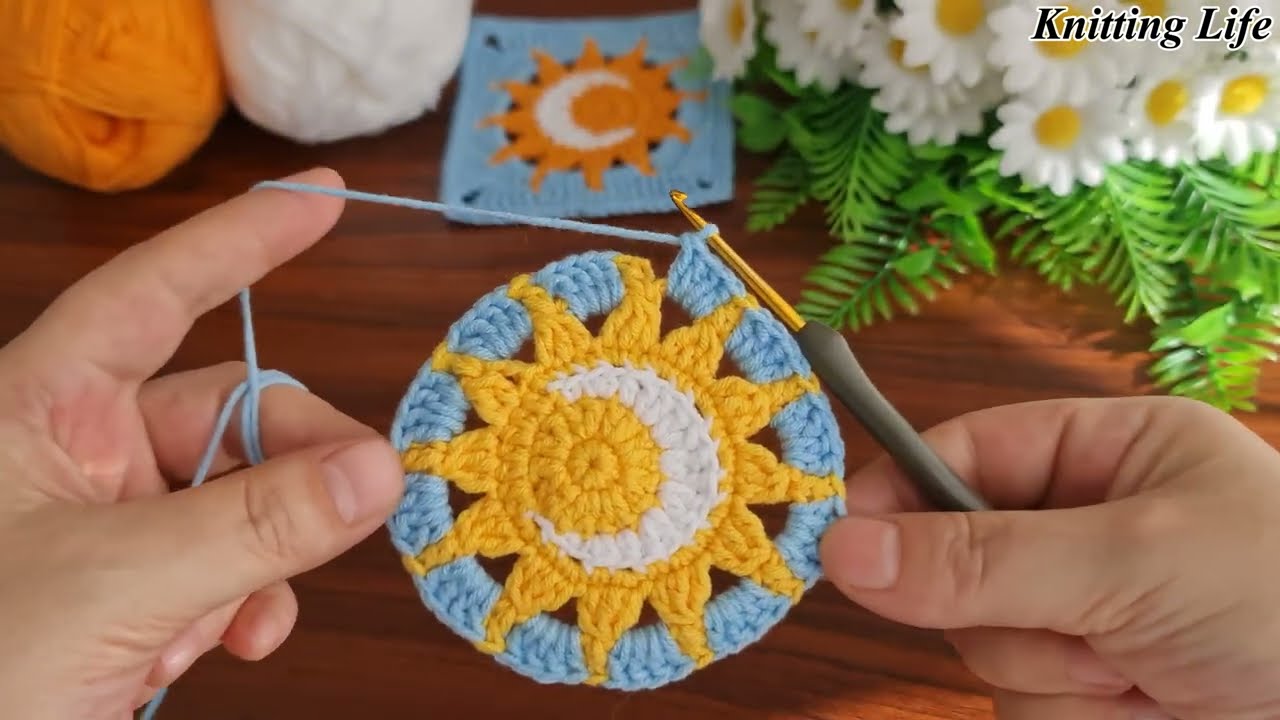
Round 3: The Moon
This round forms the crescent moon shape using a mix of short and tall stitches, creating a curved edge.
- With Color B,
scinto the first 3 stitches. - Join Color C.
scinto the next 2 stitches.hdcinto the next 2 stitches.dcinto the next 2 stitches.trinto the next 2 stitches.dcinto the next 2 stitches.hdcinto the next 2 stitches.scinto the next 2 stitches.- Cut Color C and re-join Color B.
scin the remaining 6 stitches.- Join with a
sl stto the firstscof the round.ch 1and turn.
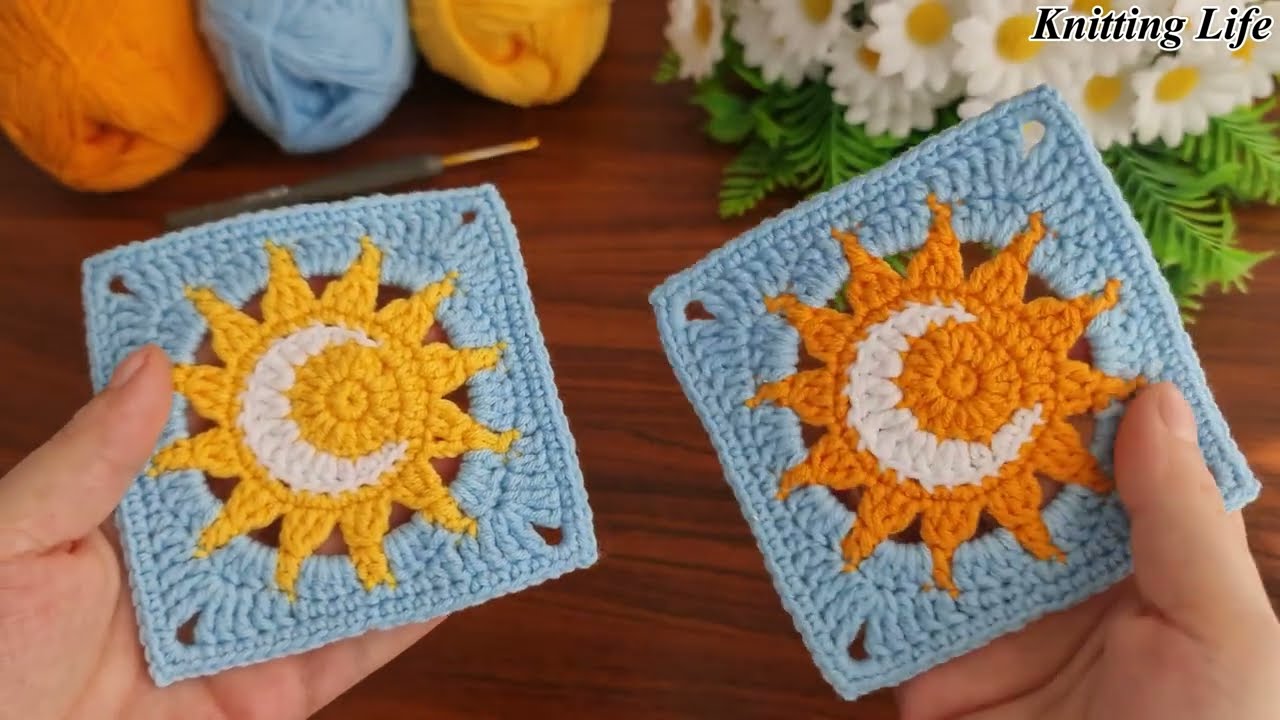
Round 4: The Square and Stars
This round transforms the circle into a square by adding corners and creates “stars” using bobble stitches.
- With Color B,
scinto the first stitch. - Work a corner:
hdc,dc,tr,ch 2,tr,dc,hdcall into the same stitch. scin the next 5 stitches.- Work a corner:
[hdc, dc, tr, ch 2, tr, dc, hdc]all into the same stitch. scin the next 5 stitches.- Work a corner:
[hdc, dc, tr, ch 2, tr, dc, hdc]all into the same stitch. scin the next 5 stitches.- Work a corner:
[hdc, dc, tr, ch 2, tr, dc, hdc]all into the same stitch. scin the remaining 4 stitches.- Join with a
sl stto the firstscof the round.
Adding the Stars: Now, using Color C, you will embroider or crochet bobbles to represent stars in the “sky” section.
- Bobble Stitch (5-dc bobble): Yo, insert hook into stitch, yo, pull up a loop, yo, pull through two loops. Repeat 4 more times in the same stitch. Yo and pull through all 6 loops.
- Join Color C in a stitch within a sky section. Work a bobble. Fasten off and weave in ends. Repeat for as many stars as you’d like.
Finishing Your Square
- Weave in Ends: Use a tapestry needle to neatly weave in all the yarn ends. This is crucial for a clean, finished look.
- Blocking: For a professional finish, gently block your granny square. Pin it to a flat surface, mist it with water, and let it dry completely.
This “Sun and Moon” granny square pattern allows you to create a small piece of celestial art with your crochet hook. You can repeat the pattern to make an entire blanket or use a single square as a centerpiece for a pillow or bag.