by
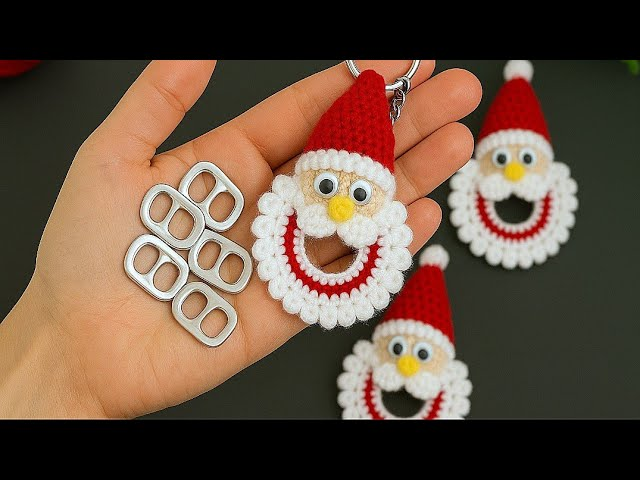
by That’s a wonderfully creative and unique way to combine crochet with recycling! Using can tabs (or soda tabs) inside your Amigurumi not only provides structure but also makes the piece eco-friendly and sturdy for a keychain.
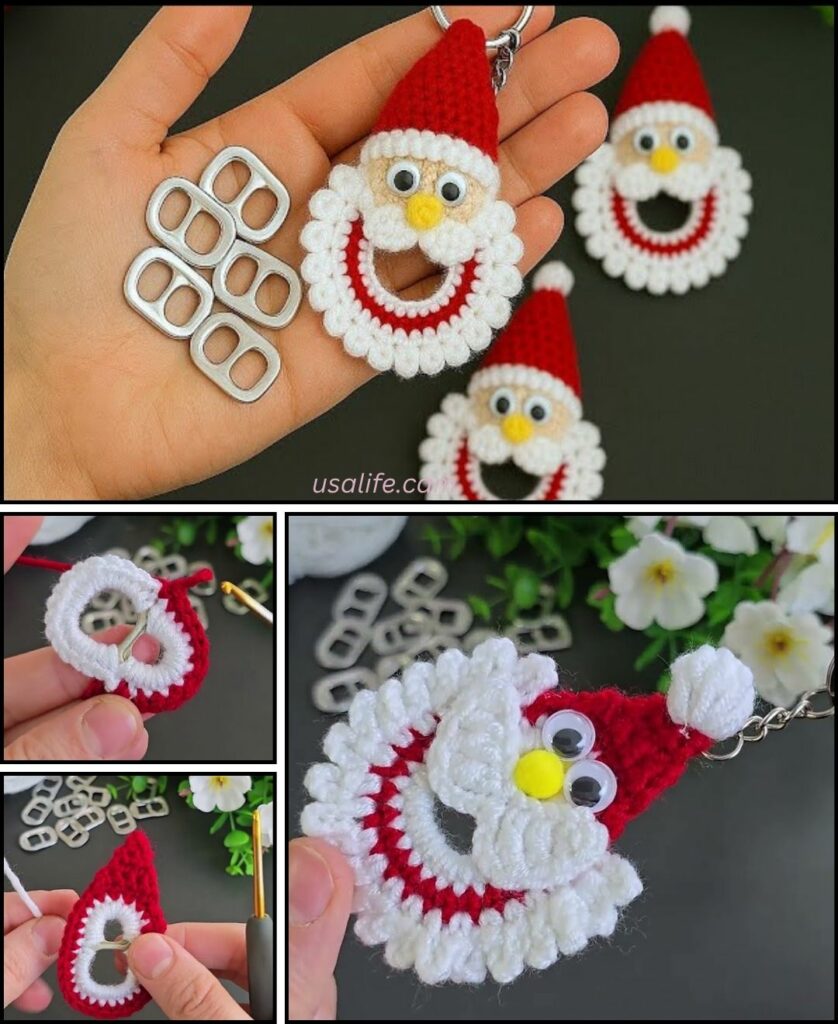
Here is a detailed guide on how to crochet a Santa keychain that incorporates a can tab for stability, focusing on the head and hat.
Materials Needed
- Yarn: Small amounts of medium-weight yarn (worsted/size 4).
- Color A: Red (Hat/Body)
- Color B: White (Beard/Trim)
- Color C: Peach/Beige (Skin Tone)
- Crochet Hook: A size smaller than recommended for your yarn (e.g., 3.5 mm) for a tight fabric.
- The Can Tab: One standard aluminum can tab, thoroughly cleaned.
- Stuffing: A very small amount of fiberfill for the hat and face.
- Safety Eyes (optional): Small plastic eyes (5-6mm).
- Keychain Hardware: A key ring or clip.
- Scissors, Tapestry Needle, Stitch Marker.
Abbreviations
- ch: chain
- sl st: slip stitch
- sc: single crochet
- inc: increase (2 sc in one st)
- dec: decrease (sc2tog)
- st(s): stitch(es)

Part 1: Crocheting the Santa Face (Head)
We will crochet a small, flat circle for the face that covers the can tab.
- Round 1: With Color C (Skin Tone), start with a magic ring. Work 6 sc into the ring. (6 sts)
- Round 2: inc in each stitch around. (12 sts)
- Round 3: [sc in the next st, inc] 6 times. (18 sts)
- Round 4 (Can Tab Inclusion):
- sc in each stitch around. (18 sts)
- Do NOT Fasten Off. This piece should now be slightly larger than your can tab.

Part 2: Attaching the Beard and Can Tab
The can tab will be inserted inside the two layers of the face/beard.
- Crochet the Back/Beard: Drop Color C. Join Color B (White).
- Round 5: inc in each stitch around. (36 sts)
- Round 6 (Ruffle Beard): In the Front Loop Only (FLO), work [ch 2, 2 dc, ch 2, sl st] in the next two stitches. Repeat this petal sequence around the circle. (This creates a ruffled beard effect around the edge.)
- Prepare to Sew: Fasten off Color B, leaving a long tail for sewing.
- Insert the Tab: Place the can tab on the wrong side (back) of the white circle (Round 4).
- Sew Together: Using the long white tail, fold the white circle over the can tab and use a simple running stitch or whip stitch to sew the edges of the white circle together, securing the tab inside. This creates the flat, sturdy base for the keychain.
Part 3: Adding Facial Features and Hat Trim
- Eyes: Using your tapestry needle and black yarn (or the safety eyes), place the eyes slightly above the center of the face (on the skin-tone part).
- Attaching the Trim: Rejoin Color B (White) yarn to the top edge of the skin-tone circle (Round 4), where you want the hat to begin.
- ch 1, sc evenly across the top half (about 9-10 stitches) to create the furry hat trim edge.
- Fasten off, leaving the ends to weave in.

Part 4: The Santa Hat
The hat is worked separately and sewn on top of the head.
- Hat Foundation (Red A): ch 12.
- Row 1: dc in the 3rd ch from the hook and dc across. (10 dc)
- Row 2 (Decrease): ch 2 (does not count as st) and turn. dec in the first two sts. dc until the last two sts. dec in the last two sts. (8 dc)
- Row 3: ch 2 and turn. dc across. (8 dc)
- Row 4 (Decrease): Repeat the decrease pattern from Row 2. (6 dc)
- Continue decreasing every second row until you have only 2 dc left.
- Finish: Fasten off, leaving a long tail. Fold the hat piece in half lengthwise and sew the side seam together using the tail.
Part 5: Final Assembly
- Attach Hat: Position the open, wide edge of the hat onto the top of the head, covering the white sc trim you created earlier. Use the red tail to securely sew the hat to the head piece.
- Pom-Pom: With the remaining red tail, create a small knot or sl st on the tip of the hat. Wrap a small amount of white yarn around two fingers, tie it off, and sew the resulting mini-pom-pom securely to the hat’s tip.
- Hanging Loop: Using the red yarn, join it securely to the top edge of the hat. ch 15 for the loop. sl st back into the same stitch and fasten off.
- Hardware: Attach your key ring or clasp to the crocheted loop.
Your unique, sturdy, can-tab-reinforced Santa keychain is complete! Would you like a pattern for a different holiday character that uses the same recycled tab technique?
Video tutorial: