by
by That’s a wonderful request! A Delicate and Stylish Crochet Square Motif usually means a design that incorporates intricate, lacy stitches and good structure, often achieved through techniques like filet or shell stitches.
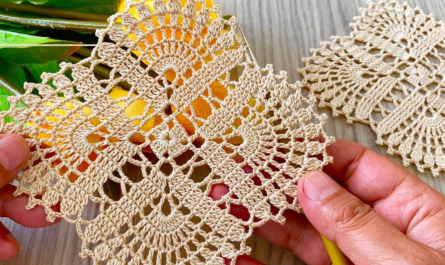
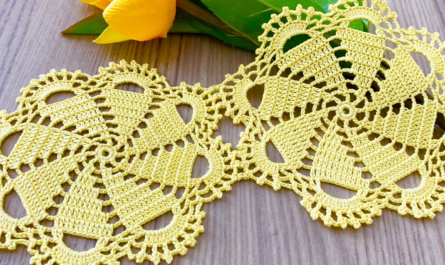
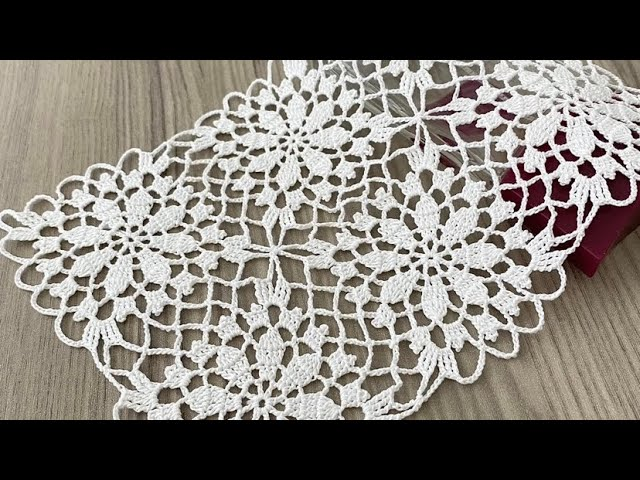
I will detail a pattern for a beautiful Flower Lace Square Motif, which has a lovely floral center and a lacy, elegant border.
Materials You’ll Need
- Yarn/Thread: Use Size 10 Cotton Thread for a truly delicate and elegant look, or Sport Weight Yarn (Size 2) for a larger, lacy square with good drape.
- Crochet Hook: The size appropriate for your chosen material (e.g., 1.75 mm for thread, 3.5 mm for yarn).
- Scissors
- Tapestry Needle: For weaving in ends.
Key Crochet Terms
| Abbreviation | Stitch Name |
| ch | Chain |
| sl st | Slip Stitch |
| sc | Single Crochet |
| dc | Double Crochet |
| tr | Treble Crochet |
| sp | Space (chain space) |
| picot | Ch 3, sl st into the first ch |
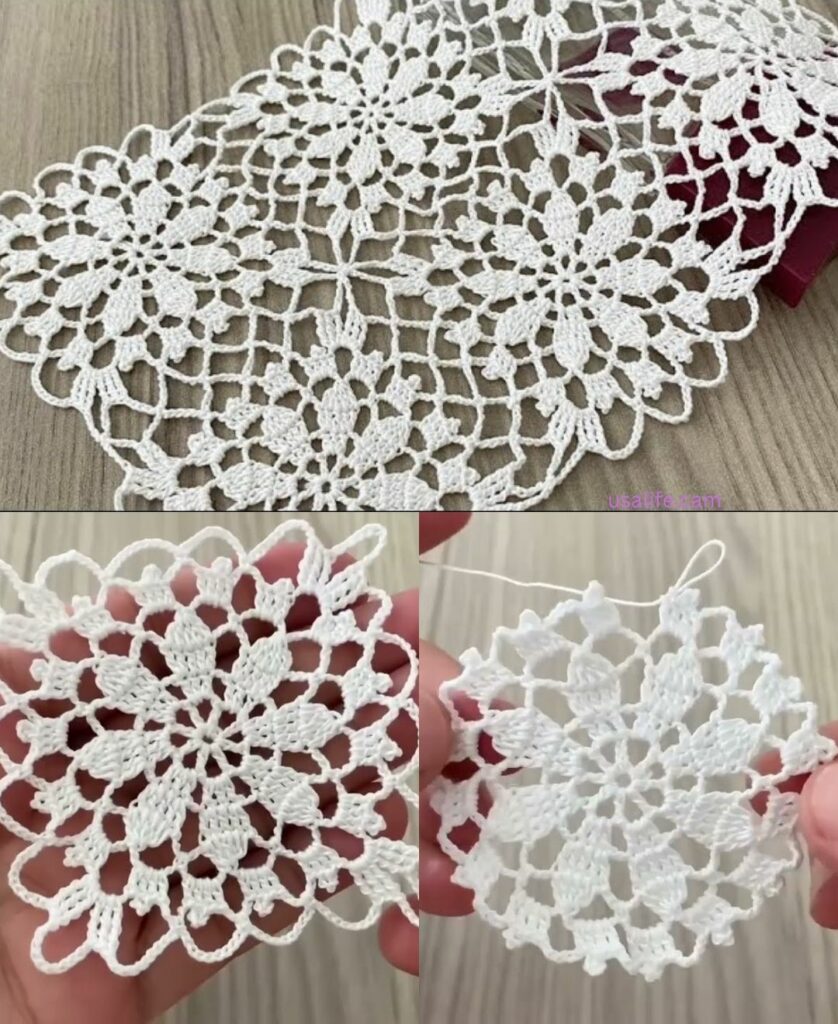
Part 1: The Closed Center (Flower Foundation)
We start by creating a tight circular base that will define the center of the square.
- Round 1 (Center): Make a Magic Ring. ch 3 (counts as dc). Work 15 dc into the ring. Join with a sl st to the top of the ch 3. (16 sts)
- Round 2 (Shells/Petals): ch 1. Work sc in the same st. Skip 1 st. Work [5 dc] into the next stitch (Shell). Skip 1 st. Repeat [sc in the next st, sk 1 st, 5 dc in the next st, sk 1 st] around. You should finish with a shell. Join with a sl st to the first sc. (8 small shells/petals).

Part 2: Squaring Up the Circle
This is the crucial step where the circular flower shape is pulled into a square using chain loops and height variations.
- Round 3 (Mesh Foundation):sl st to the center (3rd dc) of the first shell. ch 1. sc in the same st.
- Corner Loop: ch 7.
- Anchor: Work sc into the center (3rd dc) of the next shell.
- Side Loop: ch 5.
- Anchor: Work sc into the center (3rd dc) of the next shell.
- Side Loop: ch 5.
- Repeat: Continue the sequence [sc in center of shell, ch 7 (Corner), sc in center of shell, ch 5 (Side), sc in center of shell, ch 5 (Side)] two more times.
- Finish: Join with a sl st to the first sc. (4 ch-7 corners, 8 ch-5 sides).

Part 3: Creating the Lacy Border and Points
This section fills the chain spaces with elegant stitches and defines the final structure.
- Round 4 (Corner Blocks):sl st into the first ch-7 corner loop.
- Corner Shell: ch 3 (counts as dc). Work [4 dc, ch 3, 5 dc] into the same ch-7 loop.
- Side: ch 1. Work 5 dc into the next ch-5 side loop. ch 1. Work 5 dc into the next ch-5 side loop.
- Repeat: Continue the sequence [Corner Shell (5 dc, ch 3, 5 dc) in ch-7 sp, ch 1, 5 dc in ch-5 sp, ch 1, 5 dc in ch-5 sp, ch 1] around the square.
- Finish: Join with a sl st to the top of the beginning ch 3.
- Round 5 (Final Edge):sl st over to the ch-3 corner sp.
- Corner: ch 1. Work [sc, picot, sc] into the corner sp.
- Side Detail: ch 3. Skip 5 sts (the first cluster). Work sc in the next ch-1 sp. ch 3. Work sc in the next space between clusters. ch 3. Work sc in the next space between clusters.
- Repeat: Continue the sequence [Corner (sc, picot, sc), ch 3, sc in next sp, ch 3, sc in next sp, ch 3, sc in next sp, ch 3] around the square.
- Finish: Join with a sl st to the first sc. Fasten off.
Finishing and Blocking (Highly Recommended)
- Weave in Ends: Use your tapestry needle to securely weave in all ends on the back of the square.
- Blocking: To make the lace pattern crisp and ensure perfect joining, you must block the square. Wet the square, gently pull each corner and side straight, and pin it to a mat until completely dry.
This elegant square motif is perfect for joining into a shawl, table runner, or cushion cover!
Video tutorial: