by
by That’s a wonderful goal! Creating a gorgeous, multi-purpose motif suitable for a blouse, tunic, or runner requires a design that is elegant, easy to repeat, and has clean edges for joining.
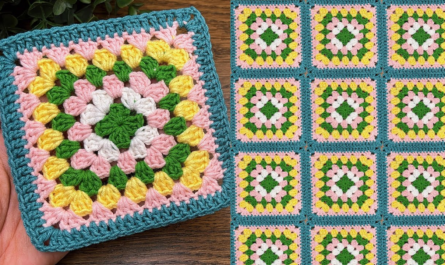
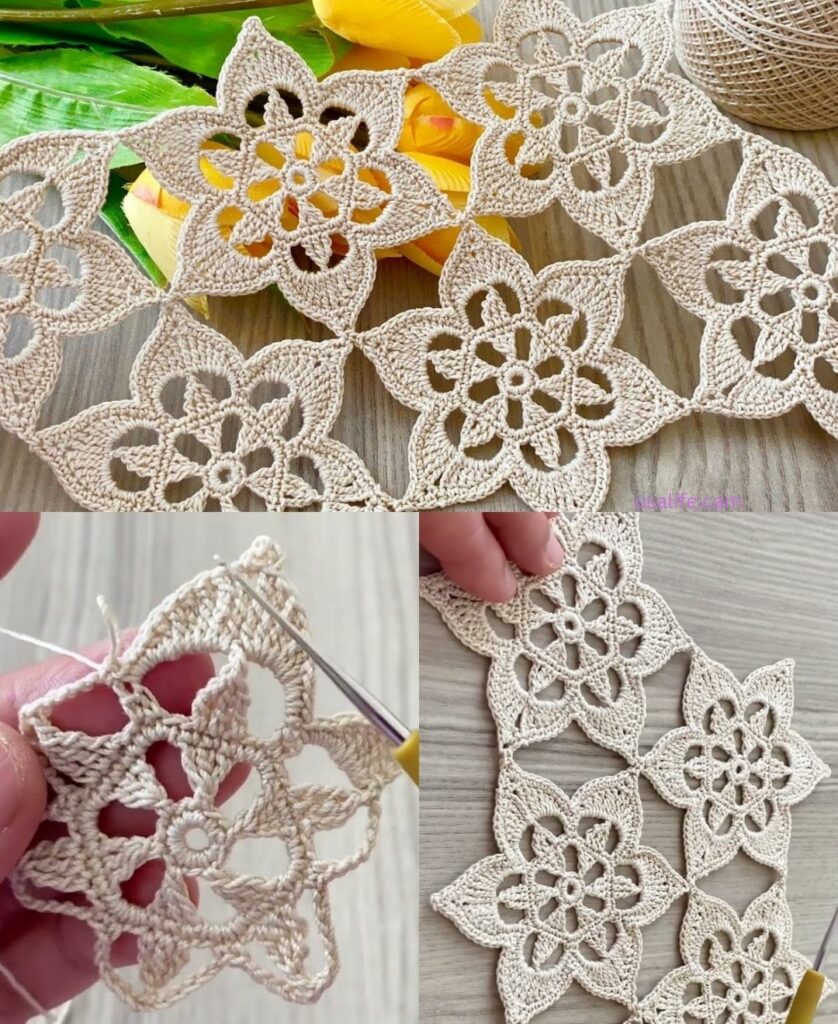
I will detail a pattern for a Sunburst Flower Square Motif. This design is beginner-friendly, visually striking, and versatile enough for all your project ideas.
☀️ Gorgeous Sunburst Flower Square Motif Tutorial
This motif features a textured center (the “sunburst”) surrounded by a classic granny square framework, making it perfect for both lightweight garments and home décor.
Materials You’ll Need
- Yarn: Medium-weight yarn (worsted/size 4) is easiest to start with. Use soft cotton or acrylic blends.
- Color A (Center): Bright Yellow or Orange.
- Color B (Petals): A contrasting color (e.g., Pink, Teal, or White).
- Color C (Background/Joining): The main color for your project (e.g., Cream or Green).
- Crochet Hook: The size appropriate for your yarn (e.g., 5.0 mm).
- Scissors, Tapestry Needle.
Key Crochet Terms
| Abbreviation | Stitch Name |
| ch | Chain |
| sl st | Slip Stitch |
| dc | Double Crochet |
| st(s) | Stitch(es) |
| Cluster | 4 DC worked together (special stitch) |
| Shell | (3 dc, ch 2, 3 dc) in one space (for corners) |
Special Stitch: 4 DC Cluster
This stitch creates the puffy, textured “sunburst” effect.
- (Yarn over, insert hook into stitch/space, yarn over, pull up loop, yarn over, pull through 2 loops) 4 times. (5 loops on hook).
- Yarn over and pull through all 5 loops on the hook.

Part 1: Creating the Sunburst Center
Round 1: Foundation (Color A)
- Start: With Color A, make a Magic Ring.
- Base: ch 2 (does not count as st). Work 12 dc into the Magic Ring.
- Finish: Pull the tail tight. Join with a sl st to the top of the first dc. Fasten off Color A. (12 sts).
Round 2: The Petals (Color B)
This round creates the texture using the Cluster stitch. We work the clusters into the spaces between the dc stitches from R1.
- Join: Join Color B into the space between any two dc stitches with a sl st.
- First Cluster: ch 2 (does not count as st). Work a 4 DC Cluster into the same space. ch 2 (separates the petals).
- Repeat: [4 DC Cluster into the next space between dc’s, ch 2] 11 more times. (12 clusters).
- Finish: Join with a sl st to the top of the first cluster. Fasten off Color B.
Part 2: Squaring Up the Motif (Granny Style)
Round 3: Defining the Corners (Color C)
This round uses the ch-2 spaces to define the four corners of the square.
- Join: Join Color C into any ch-2 space with a sl st.
- First Corner: ch 3 (counts as dc). Work (2 dc, ch 2, 3 dc) into the same ch-2 space (Corner Shell).
- Side 1 (Side Cluster): Work 3 dc into the next ch-2 space.
- Side 2 (Side Cluster): Work 3 dc into the next ch-2 space.
- Side 3 (Side Cluster): Work 3 dc into the next ch-2 space.
- Next Corner: Work (3 dc, ch 2, 3 dc) into the next ch-2 space.
- Repeat: Continue the sequence [Corner Shell, 3 side clusters] two more times. (You should have 4 corners and 12 side clusters total).
- Finish: Join with a sl st to the top of the beginning ch 3.
Round 4: Final Joining Edge (Color C)
- Move to Corner: sl st over to the ch-2 corner space.
- Corner: ch 3. Work (2 dc, ch 2, 3 dc) into the corner space.
- Side: ch 1. Work 3 dc into the space between the first two 3-dc clusters. ch 1. Work 3 dc into the space between the next two clusters. ch 1. Work 3 dc into the space between the next two clusters. ch 1.
- Repeat: Continue the sequence [Corner Shell, (ch 1, 3 dc in next space) three times, ch 1] around the square.
- Finish: Join with a sl st to the top of the beginning ch 3. Fasten off Color C.

Part 3: Adapting the Motif to Projects
1. Runner (Home Décor)
- Construction: Determine the length of your runner. Make the required number of motifs (e.g., 6–10 motifs) and join them in a single straight line using the Join-as-You-Go (JAYG) method along the side edges.
- Border: Once joined, work 2–3 rounds of a continuous border (simple SC or small shell pattern) around the entire perimeter of the runner to give it structure and a neat finish.
2. Blouse or Tunic (Garment)
- Construction: Motifs are joined into large rectangular panels for the front and back.
- Sizing: Measure your final motif size. Calculate how many motifs wide (for your chest) and how many motifs long (for your preferred tunic length) you need.
- Assembly: Join the front and back panels, leaving openings for the neckline, armholes, and sleeves.
- Shaping: Use half-motifs (motifs worked in turning rows instead of rounds) to fill gaps at the neckline for better shaping, or simply border the open edges with a few rounds of single crochet for stabilization.
Final Step: Blocking
Blocking is essential for any motif-based project. Wet the finished squares or the assembled garment, gently stretch them into their perfect final shape, pin them, and allow them to dry completely. This relaxes the stitches and ensures flat, easy-to-join motifs.
Video tutorial: