 by
by That is a fantastic request! To create an Eye-Catching Crochet Square Motif, we need a design that incorporates high texture and dynamic geometric contrast. I will detail a tutorial for the Starburst Textured Square Motif, which uses the popular puff stitch and front post stitches to achieve incredible visual interest and depth.

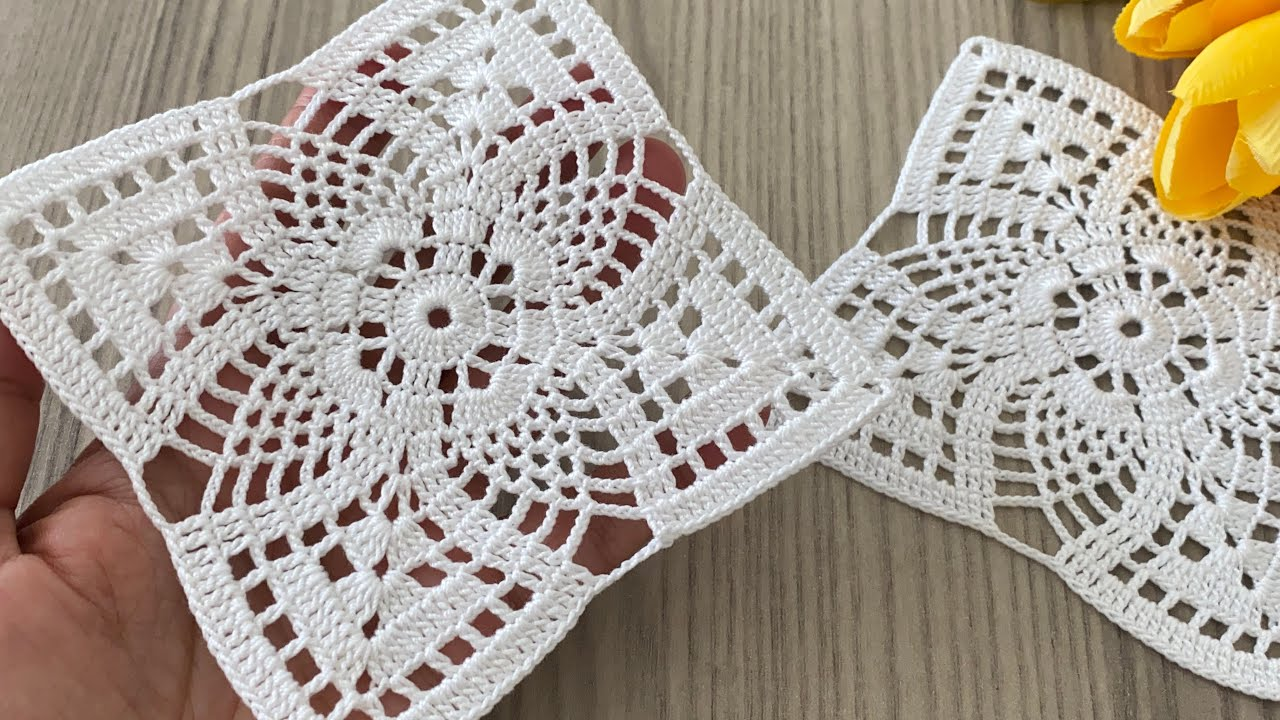
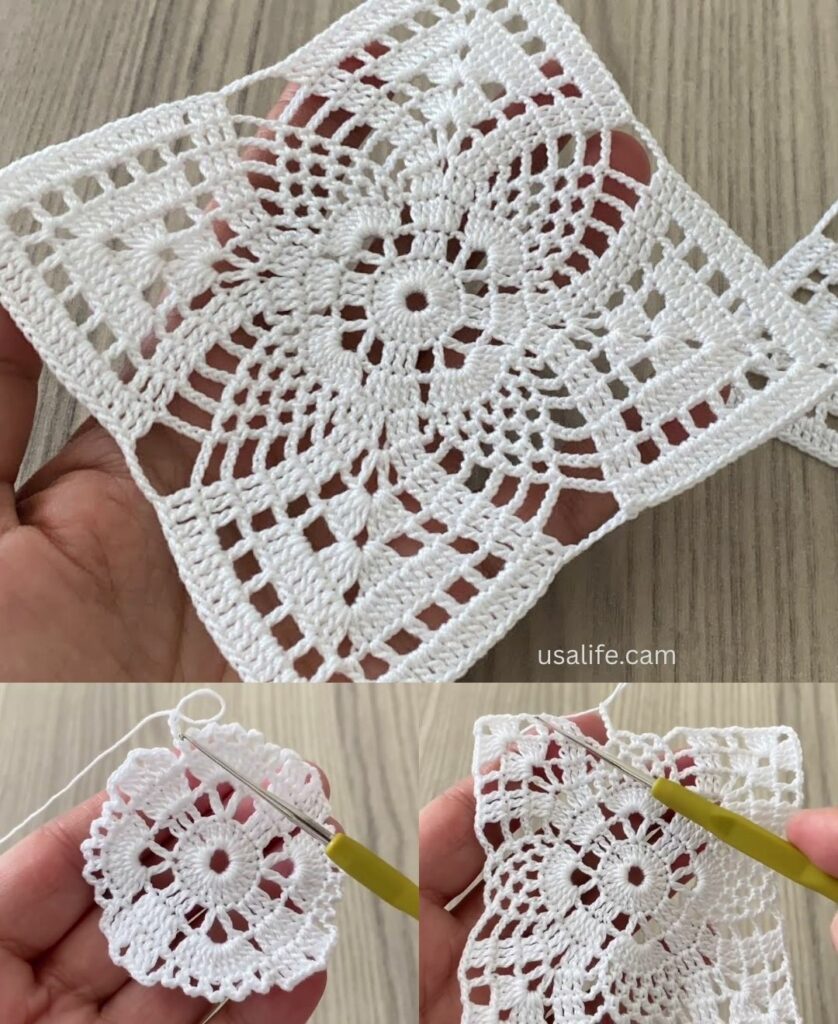
🤩 Eye-Catching Starburst Textured Square Motif Tutorial
This pattern is a brilliant blend of a dimensional, circular center and a clean, traditional square frame, making it perfect for blankets, pillows, and garments where you want the motifs to pop.
Materials You’ll Need
- Yarn: Medium-weight yarn (worsted/size 4) works well for a sturdy project. Using Color A for the center and Color B for the frame creates maximum contrast.
- Crochet Hook: The size appropriate for your yarn (e.g., 5.0 mm).
- Scissors, Tapestry Needle.
Key Crochet Terms
| Abbreviation | Stitch Name |
| ch | Chain |
| sl st | Slip Stitch |
| sc | Single Crochet |
| dc | Double Crochet |
| PS | Puff Stitch (Special Stitch) |
| FPdc | Front Post Double Crochet |
| Shell | (3 dc, ch 2, 3 dc) |
Special Stitches
- Puff Stitch (PS): (YO, insert hook, YO, pull up loop) 3 times into the same stitch/space (7 loops on hook). YO, pull through all 7 loops. Ch 1 to close.
- Front Post Double Crochet (FPdc): YO, insert hook from the front to the back, then out to the front again around the post of the specified stitch, YO and complete the dc as usual.

Part 1: Creating the Textured Starburst Center
Round 1: Foundation (Color A)
- Start: With Color A, make a Magic Ring.
- Base: ch 2 (does not count as st). Work 12 dc into the Magic Ring.
- Finish: Pull the tail tight. Join with a sl st to the top of the first dc. (12 sts).
Round 2: The Starburst Petals (Color A)
This round introduces the dimensional Puff Stitch.
- ch 1. Work sc in the same stitch.
- First Petal: ch 2. Work PS in the next stitch. ch 2.
- Repeat: [sc in the next stitch, ch 2, PS in the next stitch, ch 2] 5 more times. (6 PS petals and 6 sc anchors).
- Finish: Join with a sl st to the first sc. Fasten off Color A.
Round 3: Raising the Texture (Color B)
This round uses the contrasting color and FPdc to frame the petals and prepare for squaring.
- Join: Join Color B into any sc anchor from Round 2 with a sl st.
- Side: ch 3 (counts as dc). Work 2 dc in the same sc anchor (3 dc cluster).
- Post Stitch: Work FPdc around the post of the next Puff Stitch.
- Repeat: [3 dc into the next sc anchor, FPdc around the next Puff Stitch post] 5 more times.
- Finish: Join with a sl st to the top of the beginning ch 3. (18 dc, 6 FPdc total).

Part 2: Squaring the Motif
Round 4: Establishing Corners (Color B)
We define the four corners by placing tr (treble crochet) stitches precisely over the FPdc stitches.
- sl st over the next 3 dc stitches (to move to the cluster before the FPdc). ch 3 (counts as dc).
- Side Cluster: Work 2 dc in the same stitch.
- First Corner: Work [tr, ch 2, tr] into the next FPdc stitch.
- Side: Work dc in the next 3 dc stitches. ch 1. Work dc in the next 3 dc stitches.
- Repeat: Continue the sequence: [Corner (tr, ch 2, tr) in FPdc, dc 3, ch 1, dc 3] three more times.
- Finish: Join with a sl st to the top of the beginning ch 3.
Round 5: Final Frame (Color B)
This round evens out the square with a classic granny shell border, making joining easy.
- Move to Corner: sl st over to the ch-2 corner space.
- Corner: ch 3. Work (2 dc, ch 2, 3 dc) into the corner space.
- Side: ch 1. Work 3 dc into the next ch-1 space. ch 1.
- Repeat: Continue the sequence [Corner Shell (3 dc, ch 2, 3 dc), ch 1, 3 dc in next ch-1 sp, ch 1] around the square.
- Finish: Join with a sl st to the top of the beginning ch 3. Fasten off.
Finishing the Motif
- Weave in Ends: Secure all tails on the back side of the motif.
- Blocking is Essential! To make this motif truly eye-catching, blocking is vital. The combination of post stitches and the heavy corner definition will cause the square to slightly buckle. Wet the square, pin the corners firmly to create sharp 90-degree angles, and allow it to dry completely. This process will flatten the motif and make the central starburst texture stand out dramatically.
Your incredible Starburst Textured Square Motif is complete!
Video tutorial: