 by
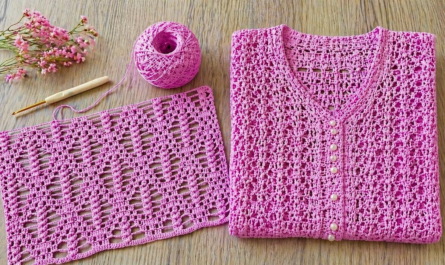
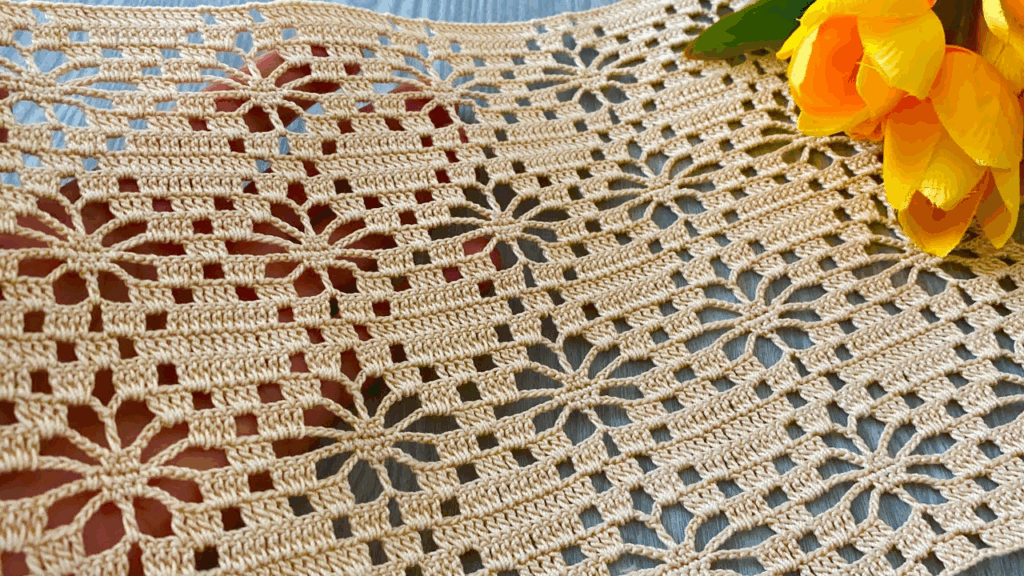
by That sounds like a beautiful and very practical project! The Gorgeous Tile Crochet Pattern often refers to a design that uses small, repeating geometric squares or blocks, which is perfect for creating a structured yet stylish blouse or tunic.
The “Easiest Way” to achieve this is by using the Solid Granny Square Motif as the tile and assembling the garment in simple rectangular panels.
Here is a detailed tutorial on how to achieve a stunning, tiled blouse or tunic using the simplest possible square motif.
◻️ Gorgeous Tile Crochet Blouse/Tunic Tutorial
This method utilizes the Solid Square Motif for a clean, tile-like look and a straightforward, beginner-friendly assembly process.
Materials You’ll Need
- Yarn:DK (Size 3) or Sport Weight (Size 2) Cotton or Cotton Blend yarn. This provides excellent drape and definition, which is key for a tiled garment.
- Tip: Use a single color for a chic, monochrome tiled effect, or two alternating colors for a checkerboard tile pattern.
- Crochet Hook: The size recommended for your yarn (e.g., 3.5 mm – 4.0 mm).
- Scissors, Tapestry Needle, Stitch Markers.

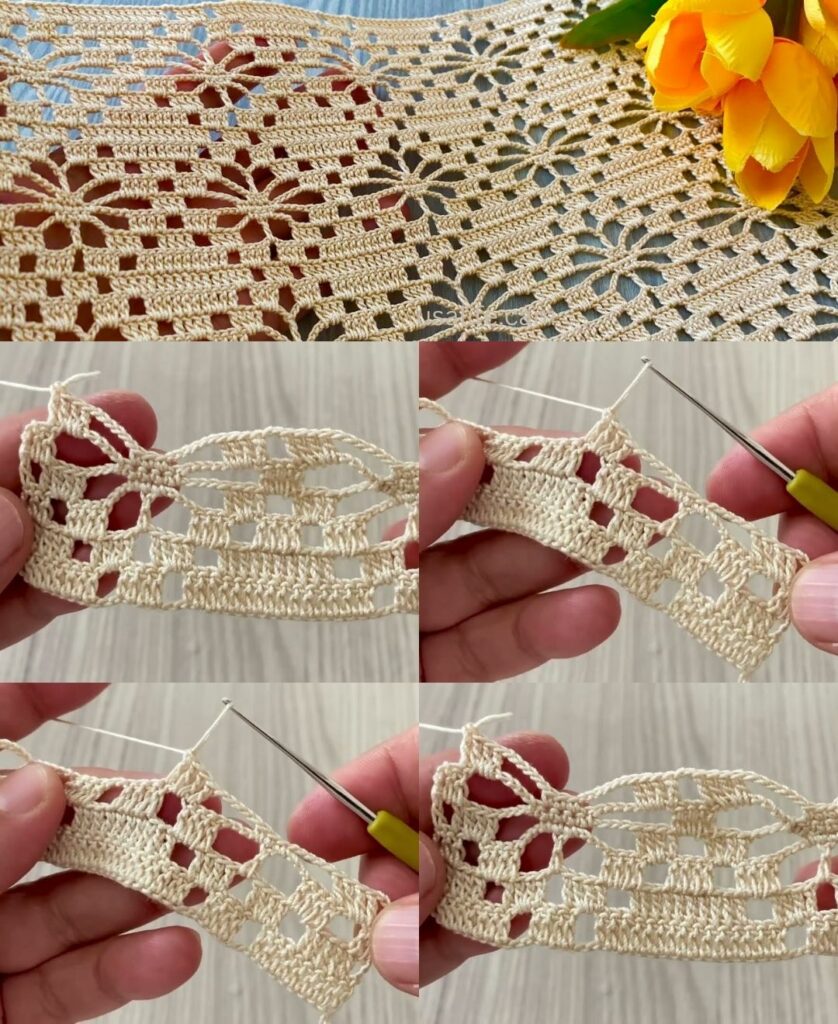
Part 1: The Solid Tile Motif Pattern (Easiest Way)
We will use the Solid Square Motif to create a dense, easily joinable “tile.”
- Round 1 (Center): Make a Magic Ring. ch 3 (counts as dc). Work [2 dc, ch 2] 4 times into the ring. Join with a sl st to the top of the ch 3. (12 dc, 4 corner spaces).
- Round 2 (Squaring): ch 3 (counts as dc). Work dc in the next 2 sts. Work Corner (dc, ch 2, dc) into the ch-2 corner space.
- Repeat: Work [dc in the next 3 sts, Corner (dc, ch 2, dc)] 3 more times. Join with a sl st to the top of the ch 3.
- Round 3 (Expansion): ch 3. Work dc in every stitch along the side until you reach the corner space. Work Corner (dc, ch 2, dc) into the ch-2 corner space. Repeat this pattern around.
- Continue: Repeat Round 3 until your tile reaches the desired size (e.g., 4 inches for a blouse, 5-6 inches for a looser tunic).
Crucial Sizing Note: Measure your finished motif carefully. This measurement determines the entire size of your garment.
Part 2: Determining Motif Count and Assembly
The easiest garment construction uses simple Front and Back rectangular panels.
- Measure Chest: Measure your Chest/Bust Circumference (e.g., 40 inches).
- Calculate Width: Divide your chest measurement by 2 (20 inches for the front panel). Divide the panel width by the motif width (e.g., 20 inches / 4 inches = 5 motifs wide).
- Calculate Length: Measure your desired Blouse/Tunic Length (from shoulder to hip/thigh). Divide this by the motif width (e.g., 24 inches / 4 inches = 6 motifs long).
- Front Panel: 5 motifs wide x 6 motifs long = 30 motifs.
- Back Panel: 5 motifs wide x 6 motifs long = 30 motifs.
4. Joining the Motifs (The Easiest Method)
The Whipstitch Join or Slip Stitch Join is easiest for beginners:
- Lay two finished motifs side-by-side, face up.
- Join yarn at a corner.
- Working through the back loops of both motifs, slip stitch or single crochet across, matching stitch-for-stitch.
- Repeat until all motifs are joined into the two large rectangular panels (Front and Back).

Part 3: Garment Assembly and Finishing
- Shoulder Seams: Lay the Front and Back panels together, right sides facing inward. Join the top 2-3 motifs wide at the shoulders using a slip stitch or whipstitch. Leave the remaining central space open for the neckline.
- Side Seams: Join the panels down the sides, leaving an opening at the top for the armholes (usually 3-4 motifs deep).
- Edging (Stabilization): All open edges (Neckline, Armholes, and Hem) must be stabilized to prevent stretching.
- Neckline & Armholes: Work 1-2 rounds of simple Single Crochet (sc) evenly around the opening. Use the scs sparingly (skip one stitch for every 4-5 stitches) to pull the edge in slightly for a better fit.
- Hem (Optional Tunic Length): For a tunic, you may want to add 2-3 extra solid rounds of DC around the bottom hem for weight and finish.
Final Step: Blocking
Blocking is crucial for a tiled garment. It ensures all the motifs are the same size, the seams lie flat, and the yarn drapes beautifully. Wet the finished garment, gently stretch and pin it into the correct shape (especially the armholes and neckline), and allow it to dry completely.
Your beautiful, tiled blouse or tunic is now ready!
Video tutorial: