by
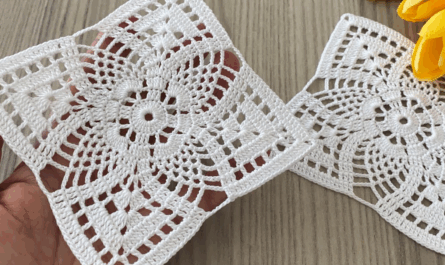
by That is a wonderful and elegant project idea! A Round Motif is highly versatile; when joined, it creates beautiful openwork and drape, making it ideal for everything from delicate runners to airy, bohemian blouses.
I will detail a pattern for the Vintage Wheel Motif, which is simple, stylish, and easily joinable.
⭕ Vintage Wheel Round Motif Tutorial
This motif features a solid center, a delicate spoke-and-chain pattern, and a decorative final round that makes assembly straightforward.
Materials You’ll Need
- Yarn/Thread:
- For a Runner: Use size 10 cotton thread for fine lace, or Sport Weight yarn for a more substantial look.
- For a Blouse: Use soft DK (Size 3) or Sport Weight yarn in cotton or a blend for drape.
- Crochet Hook: The size appropriate for your material (e.g., 3.5 mm – 4.0 mm).
- Scissors, Tapestry Needle.
Key Crochet Terms
| Abbreviation | Stitch Name |
| ch | Chain |
| sl st | Slip Stitch |
| sc | Single Crochet |
| dc | Double Crochet |
| tr | Treble Crochet (Triple Crochet) |
| Shell | (3 dc, ch 2, 3 dc) in one space |
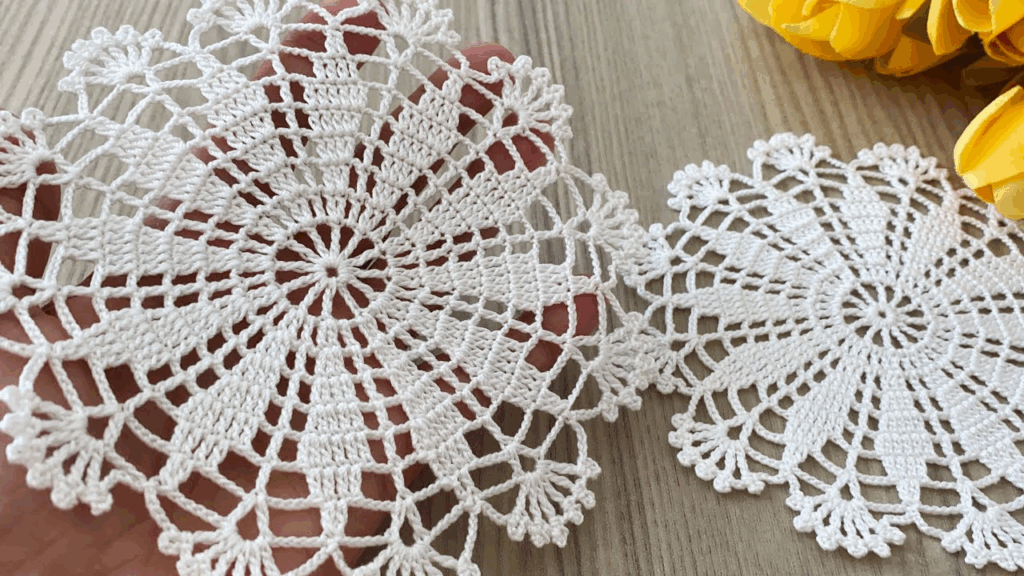
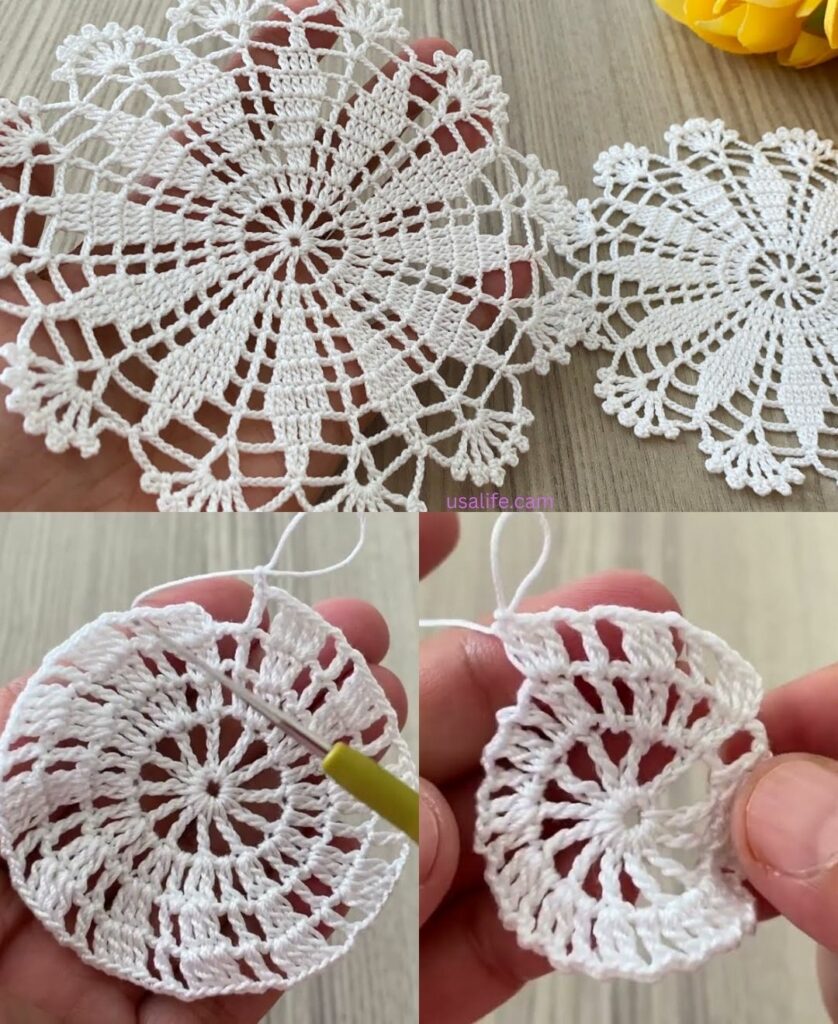
Part 1: Crocheting the Round Motif
Round 1: Foundation (The Solid Center)
- Start: Make a Magic Ring (or ch 4, sl st to join).
- Base: ch 3 (counts as dc). Work 15 dc into the ring.
- Finish: Pull the tail tight. Join with a sl st to the top of the ch 3. (16 sts).

Round 2: Creating the Spokes
This round establishes the radiating chains that give the motif its “wheel” structure.
- ch 1. sc in the same st.
- Spoke: ch 5. Skip 1 stitch.
- Repeat: Work [sc in the next st, ch 5, skip 1 st] 7 more times. (8 ch-5 loops, 8 sc anchors).
- Finish: Join with a sl st to the first sc.
Round 3: Building the Inner Shells
We work taller shells into the ch-5 loops to expand the size quickly.
- sl st into the first ch-5 loop.
- First Shell: ch 4 (counts as tr). Work (2 tr, ch 1, 3 tr) into the same ch-5 loop.
- Anchor: Work sc into the next sc anchor between the loops.
- Repeat: Work [Shell (3 tr, ch 1, 3 tr) into the next ch-5 loop, sc into the next sc anchor] 7 more times.
- Finish: Join with a sl st to the top of the beginning ch 4.

Round 4: The Joining Round (Mesh Frame)
This round creates the simple, consistent mesh that facilitates easy assembly.
- sl st over the next 3 tr stitches (to move to the ch-1 peak).
- Anchor: ch 1. Work sc into the ch-1 peak of the shell.
- Side Mesh: ch 3. Work sc into the sc anchor between the shells. ch 3.
- Repeat: Continue the sequence [sc into the ch-1 peak of the shell, ch 3, sc into the sc anchor, ch 3] around the motif.
- Finish: Join with a sl st to the first sc. Fasten off.
Part 2: Project Assembly
A. Constructing a Simple Runner
Round motifs joined linearly create a delicate, lacy strip perfect for a runner.
- Determine Length: Calculate the number of motifs needed for your desired length.
- Joining: Use the Join-as-You-Go (JAYG) method on the final round (Round 4) for a seamless finish.
- When working a joining side, replace the center chain of the joining sequence (
ch 3) with:ch 1, sl st into the corresponding ch-3 space of the finished motif, ch 1.
- When working a joining side, replace the center chain of the joining sequence (
- Edging: Work 1-2 rounds of simple single crochet (sc) around the entire perimeter of the finished strip to stabilize the open, wavy edges.

B. Constructing a Simple Blouse
Joining round motifs is ideal for creating an open, airy yoke or a simple rectangular body panel with excellent drape.
- Sizing: The garment is usually made by joining motifs into two large rectangles (Front and Back) that match your desired chest width and length.
- Assembly: Join the motifs, ensuring they are tightly packed to create a sturdy fabric.
- Shaping:
- Shoulder/Neck: Join the top edges of the front and back panels together, leaving a central gap for the neckline opening.
- Side Seams: Join the panels down the sides, leaving ample space open for the armholes.
- Finishing:
- Armholes/Neckline/Hem: Work 1-2 rounds of simple single crochet (sc) or slip stitch around all openings. This prevents the delicate lace from stretching out and ensures the fit is neat and tidy.
Final Step: Blocking
Blocking is essential for all lace motifs. Wet the finished motif or garment and gently pull it into its intended shape, defining the edges and opening up the spoke pattern. Allow it to dry completely to set the stitches for a professional, stylish finish.
Video tutorial: