 by
by That is a wonderful and timely request! Crocheting snowflakes is a rewarding project, resulting in beautiful, delicate decorations, ornaments, or appliqués.
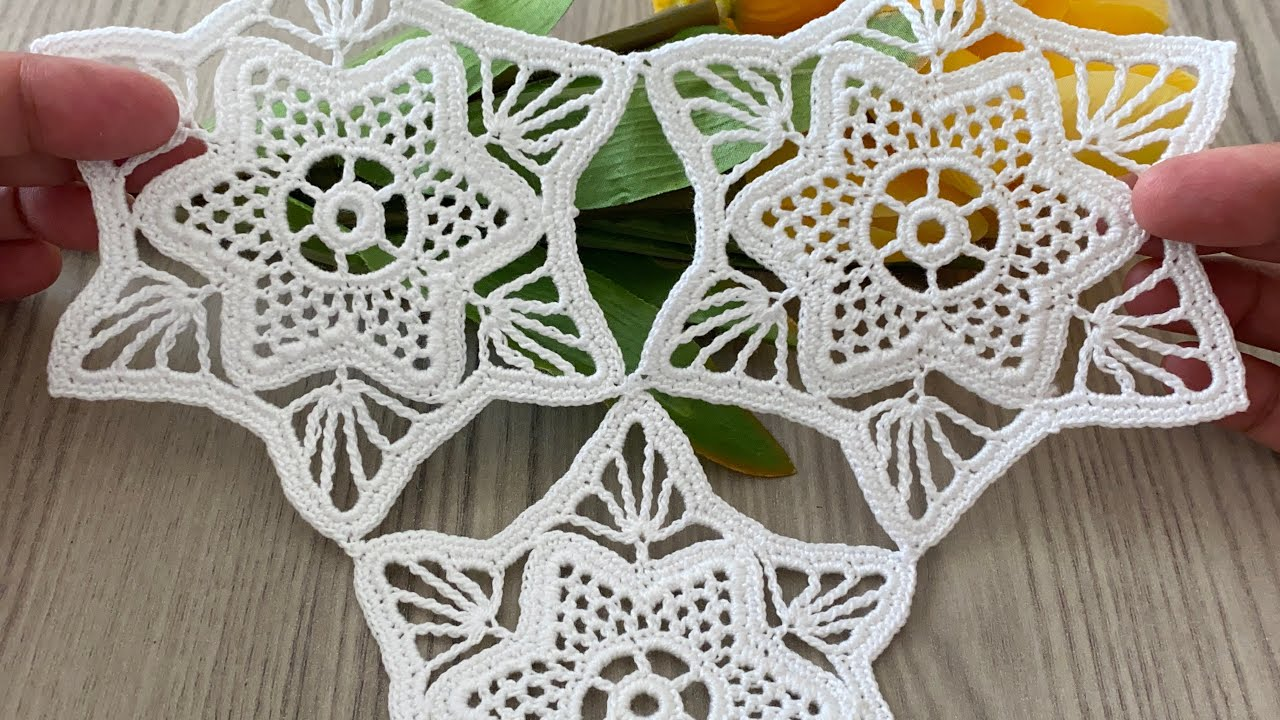
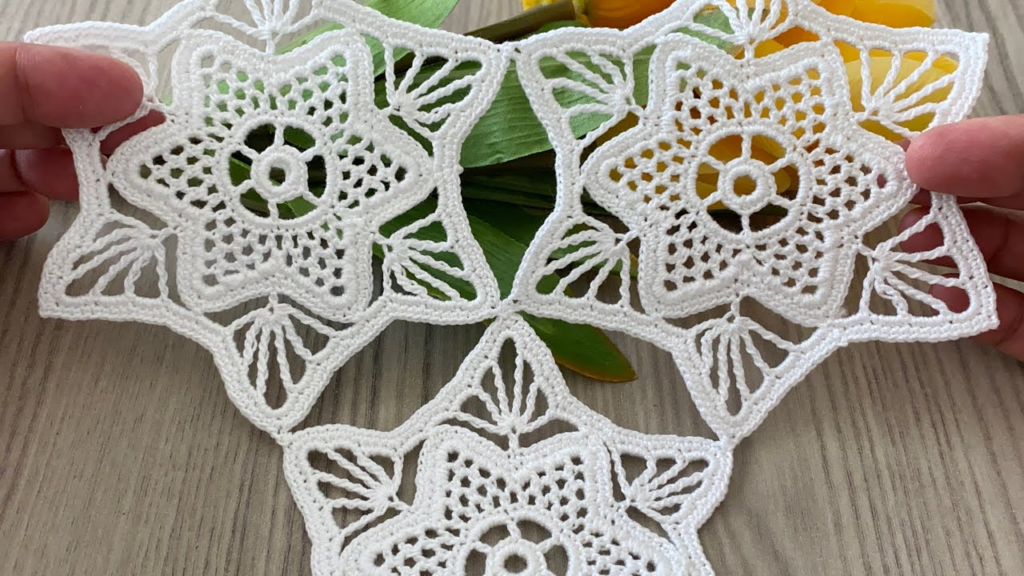
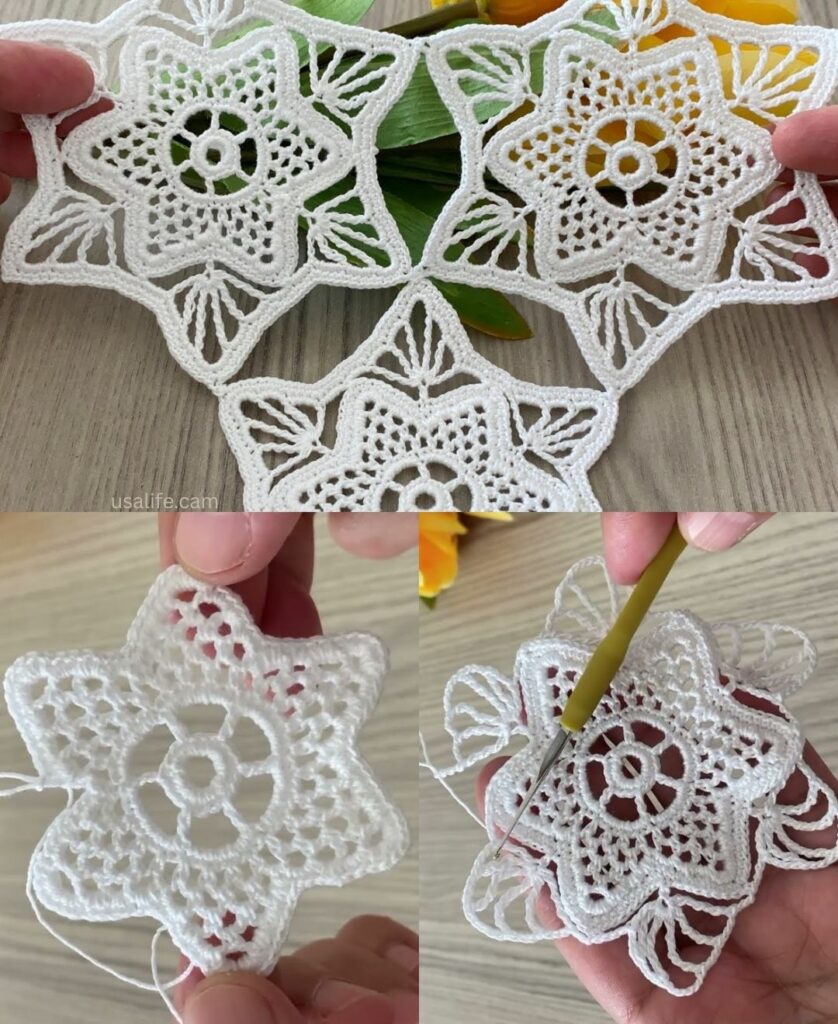
I will provide a detailed, step-by-step tutorial for the Classic Lacy Six-Point Snowflake, which is a beginner-friendly design that utilizes picot stitches to create the characteristic icy points.
❄️ Classic Lacy Six-Point Snowflake Tutorial
This pattern starts with a solid center and builds out six symmetrical points using chain spaces and simple decorative stitches.
Materials You’ll Need
- Thread: Size 10 or 20 Mercerized Cotton Thread (White or light blue works best).
- Crochet Hook: A Steel Crochet Hook appropriate for the thread (e.g., 1.5 mm – 2.0 mm, or Size 7-9).
- Scissors, Tapestry Needle.
- Stiffening Solution/Spray Starch (Essential for the final shape).
Key Crochet Terms
| Abbreviation | Stitch Name |
| ch | Chain |
| sl st | Slip Stitch |
| sc | Single Crochet |
| dc | Double Crochet |
| tr | Treble Crochet |
| Picot | ch 3, sl st into the first ch |
Export to Sheets
Step-by-Step Instructions
Round 1: Creating the Center Ring
- Start: Make a Magic Ring (or ch 6 and sl st into the first ch).
- First Points: ch 3 (counts as dc). Work (dc, ch 3) 5 times into the ring.
- Finish: Work dc into the ring. Join with a sl st to the top of the beginning ch 3. (You should have 6 dc and 6 ch-3 spaces).

Round 2: Building the Base of the Points
We work into the ch-3 spaces to create the anchors for the six main arms.
- sl st into the first ch-3 space. ch 1 (does not count as st).
- Anchor: Work (sc, ch 5, sc) into the same ch-3 space.
- Repeat: Work (sc, ch 5, sc) into the next ch-3 space 5 more times.
- Finish: Join with a sl st to the first sc. (6 ch-5 loops).
Round 3: Creating the First Tier of Arms
We work into the ch-5 spaces, using a combination of tr and dc for height.
- sl st into the first ch-5 loop. ch 3 (counts as dc).
- Arm Base: Work (dc, ch 1, tr, ch 1, dc, dc) into the same ch-5 loop.
- Anchor: Work sc into the sc anchor between the ch-5 loops.
- Repeat: Work [(dc, dc, ch 1, tr, ch 1, dc, dc) into the next ch-5 loop, sc in the next sc anchor] 5 more times.
- Finish: Join with a sl st to the top of the beginning ch 3. (6 arms established).

Round 4: Finalizing the Icy Tips
This round uses picot stitches to create the sharp, decorative points.
- ch 1. Work sc in the same st (the first dc of the arm).
- Work sc in the next dc. ch 1.
- Small Point: Work sc into the ch-1 space. Picot.
- Center Peak: Work sc into the tr stitch. Picot. Work sc into the same tr stitch.
- Small Point: Work Picot into the next ch-1 space. sc into the same space.
- Descent: ch 1. Work sc in the next 2 dc stitches.
- Anchor/Valley: sl st into the sc anchor between the arms.
- Repeat: Continue the sequence [sc in next 2 dc, ch 1, sc in ch-1 sp, Picot, sc in tr, Picot, sc in tr, Picot, sc in ch-1 sp, ch 1, sc in next 2 dc, sl st in anchor] 5 more times around the motif.
- Finish: Join with a sl st to the first sc. Fasten off.

Final Step: Stiffening and Blocking (Crucial!)
This step is absolutely necessary to make the snowflake hold its delicate shape.
- Preparation: Mix a solution of liquid starch or use a stiffening spray (A 50/50 mix of white glue and water also works well).
- Soak: Submerge the finished snowflake completely in the solution. Gently squeeze out the excess liquid.
- Pinning: Lay the damp snowflake on a blocking board or towel. Using rust-proof pins, carefully pin out every single one of the six arms and every Picot point, stretching the lace tautly.
- Dry: Allow the piece to dry completely (may take 12–24 hours). The snowflake will be stiff and will hold its precise shape when removed.
Would you like instructions for adapting this pattern for a larger, more dense decorative piece?
Video tutorial: