by
by That is a wonderful and classic request! The Popcorn Stitch adds incredible texture and dimension to any motif, making it feel luxurious and substantial.
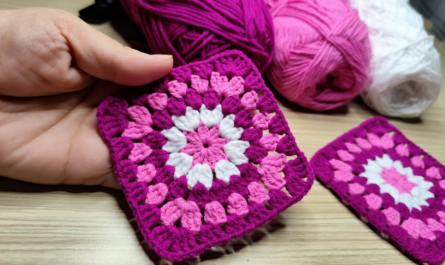
I will detail a step-by-step tutorial for the Textured Popcorn-Corner Square Motif, which uses popcorn stitches specifically in the corners to give the square definition and a beautiful, raised accent, while keeping the sides simple for easy joining.
🍿 Textured Popcorn-Corner Square Motif Tutorial
This square uses the classic Granny Square structure but substitutes the corner double crochet clusters with dimensional popcorn stitches.
Materials You’ll Need
- Yarn: Medium-weight yarn (worsted/size 4) is excellent for showing off the texture of the popcorn stitch.
- Crochet Hook: The size appropriate for your yarn (e.g., 5.0 mm or H/8).
- Scissors, Tapestry Needle.
Key Crochet Terms
| Abbreviation | Stitch Name |
| ch | Chain |
| sl st | Slip Stitch |
| dc | Double Crochet |
| Cl | 3 dc worked into the same space |
| Popcorn | Popcorn Stitch (Special Stitch) |
Special Stitch: Popcorn Stitch (PC)
The Popcorn Stitch creates a three-dimensional bobble that “pops” out from the fabric.
- Work 5 dc into the specified stitch or space.
- Drop the loop from the hook.
- Insert the hook into the top of the very first dc of the 5-dc group.
- Catch the dropped loop and pull it through the first dc stitch.
- ch 1 to close (this locks the stitch and creates the “pop”).

Step-by-Step Instructions
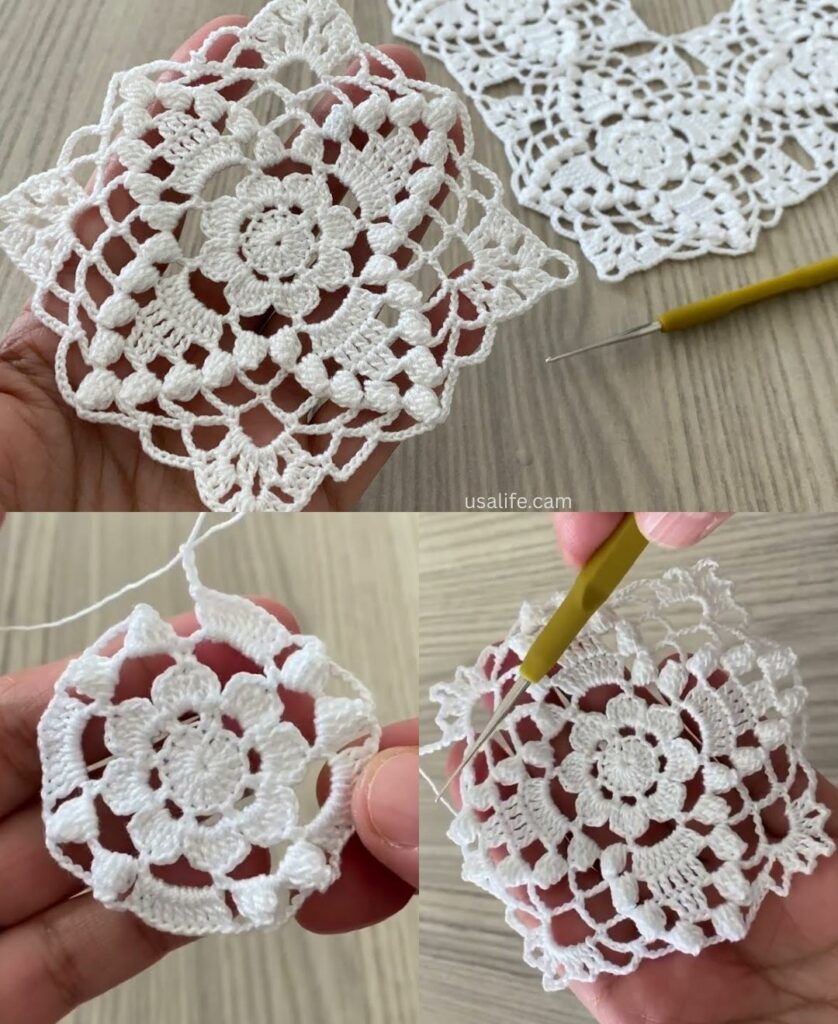
Round 1: Foundation (The Center)
- Start: Make a Magic Ring. ch 3 (counts as dc). Work 11 dc into the ring.
- Finish: Pull the tail tight. Join with a sl st to the top of the ch 3. (12 sts).
Round 2: Setting the Sides and Popcorn Corners
We define the four corners using the Popcorn Stitch.
- ch 3 (counts as dc). Work dc in the next 2 sts (First side cluster of 3 dc).
- First Corner: Work Popcorn in the next stitch. ch 2.
- Side: Work dc in the next 3 sts.
- Repeat: Continue the sequence [Popcorn in the next st, ch 2, dc in the next 3 sts] 3 more times.
- Finish: Join with a sl st to the top of the beginning ch 3.
Round 3: Expanding the Sides (Granny Frame)
We transition to the open-cluster Granny structure for easy expansion and joining.
- Move to Corner: sl st over the next 2 dc stitches and sl st into the ch-2 corner space (this centers you).
- First Corner: ch 3 (counts as dc). Work (2 dc, ch 2, 3 dc) into the corner space.
- Side Space: ch 1. Work Cluster (3 dc) into the next ch-1 space (the locking chain on top of the popcorn stitch from R2). ch 1.
- Repeat: Continue the sequence [Corner (3 dc, ch 2, 3 dc) in the next ch-2 space, ch 1, Cluster (3 dc) in the popcorn’s ch-1 lock, ch 1] 3 more times.
- Finish: Join with a sl st to the top of the beginning ch 3.

Round 4: Final Expansion
- Move to Corner: sl st to the ch-2 corner space. ch 3. Work (2 dc, ch 2, 3 dc) into the corner.
- Side: Work [ch 1, 3 dc in next ch-1 space] across the side until you reach the next corner.
- Repeat: Continue the sequence [Corner, (ch 1, 3 dc in next space) across the side] around the square.
- Finish: Join with a sl st to the top of the ch 3. Fasten off.
Finishing the Motif
- Blocking: Blocking is essential for popcorn motifs. Pin the square sharply at the corners to ensure the popcorn stitches really stand out and the square lies flat.
- Popcorn Direction: The popcorn stitches naturally “pop” out on the side you were facing when you closed them. Ensure all popcorns face the same direction (the front of the work).
Your beautiful, textured Popcorn-Corner Square Motif is complete! Would you like to know how to join these squares together?
Video tutorial: