by
by Crocheting both a blouse and a shawl are wonderful projects, and they often use overlapping skills, particularly when dealing with stitch patterns, drape, and sizing.
Given the warm climate in Phnom Penh, it is highly recommended to use 100% cotton, cotton/bamboo blend, or a very light acrylic yarn in a Sport (Category 2) or DK (Category 3) weight. This ensures both the blouse and shawl will be breathable and comfortable.
Here is a detailed tutorial focusing on the two main construction types for these items: Garment Construction (Blouse) and Freeform Lace Construction (Shawl).

1. Crochet Blouse Pattern Tutorial: Top-Down Construction
The top-down method (starting at the neck/yoke) is highly recommended for blouses because it allows you to adjust the fit around the shoulders and body easily, and it minimizes seaming.
A. Essential Materials & Key Concepts
- Yarn: Soft, light fiber (cotton/bamboo, DK weight).
- Hook: Size that matches your chosen pattern/gauge (e.g., 3.5mm to 4.0mm).
- Stitch: Simple, draping stitches like Double Crochet (dc), V-Stitch (
[dc, ch 1, dc]in one space), or a simple Shell Stitch. Avoid very dense stitches (like post stitches) for the main body to maintain airflow. - Crucial: Gauge Swatch and Body Measurements (chest, sleeve length, shoulder-to-shoulder).
B. Step-by-Step Top-Down Blouse Outline
Step 1: Gauge and Foundation
- Gauge Swatch: Crochet a sample using your chosen stitch. Measure it against the pattern’s gauge. Adjust your hook size until you match, ensuring the finished garment will be the correct size.
- Foundation Chain (Neckline): Chain the specified number of stitches that matches the neckline circumference based on your gauge. Join with a slip stitch (sl st) or work in turning rows, depending on the pattern.

Step 2: Crocheting the Yoke (Increases)
The yoke is the section from the neckline to the armpit. It must increase evenly to accommodate the shoulders and bust.
- Establish Yoke Points: The pattern will instruct you to place 4 increase points (for the two shoulders, the back, and the front/chest) or multiple increase points in a circle (for a rounded yoke). Use stitch markers at these points.
- Increase Rounds/Rows: Work in your chosen stitch, and at each marked increase point, work an increase (e.g.,
[dc, ch 2, dc]or2 dc in one stitch). - Continue Increasing until the yoke lies flat (it should not cup or ruffle) and the total circumference fits comfortably over the widest part of the wearer’s chest/shoulder.
- Reach Armhole Depth: Stop increasing when the yoke reaches the armpit level.
Step 3: Divide for Body and Sleeves
- Dividing Row: Work across the Back section.
- Chain Underarm: Chain 2-4 stitches (the underarm space).
- Skip Sleeve Stitches: Skip all the stitches of the first Sleeve section.
- Work across the Front section (if a closed front) or the front panels (if a cardigan/open front).
- Repeat the Chain Underarm and Skip Sleeve Stitches for the second sleeve.
- Join the round (or turn) to begin the body.

Step 4: Body and Sleeves
- Body: Work straight rounds (or turning rows) without further increases, working into the underarm chain spaces. Continue until the blouse reaches the desired length. Finish with an edge (sc, sl st, or a simple rib).
- Sleeves: Rejoin yarn at the underarm. Work in rounds, gradually decreasing a stitch or two every few rounds to taper the sleeve towards the wrist/cuff. Finish with a cuff or simple border.
Step 5: Finishing (Crucial for Garments)
- Neckline/Placket: Work 2-3 rows of single crochet (sc) around the neckline and front opening (if applicable) for stability.
- Weave in Ends: Secure all tails neatly.
- Blocking: Wet block the finished blouse, pinning it to the correct shape and size. This will relax the yarn and drastically improve the drape and fit.
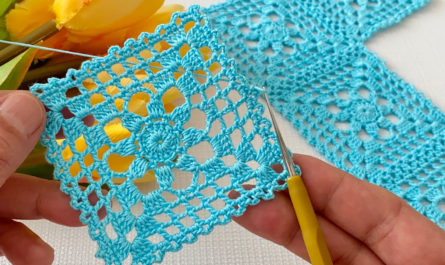
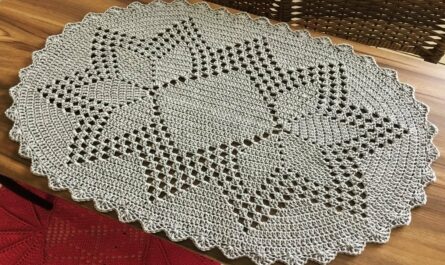
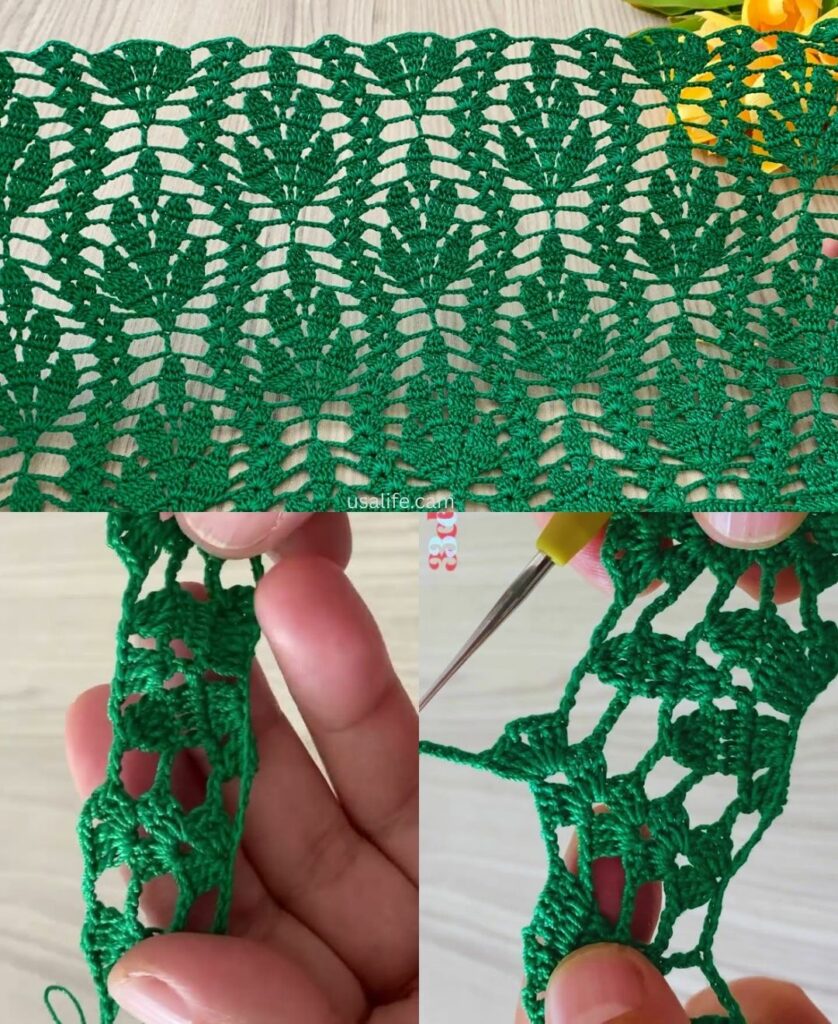
2. Crochet Shawl Pattern Tutorial: Triangular Lace Construction
A crochet shawl is defined by its beautiful drape and typically intricate patterns. The triangular shape is the most common and versatile.

A. Essential Materials & Key Concepts
- Yarn: Soft, light yarn (Cotton/Bamboo blend, Lace or Fingering weight) for maximum drape and softness.
- Hook: Often one size larger than recommended for the yarn, to create a loose, airy fabric.
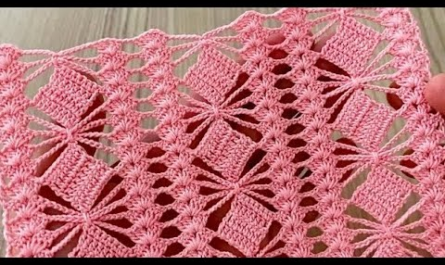
- Stitch: Lace patterns like the Pineapple, Shell/Scallop, or a simple V-Stitch mesh are ideal.
- Crucial: Stitch Markers (for center spine and edges) and Blocking Supplies.
B. Step-by-Step Triangular Shawl Outline
Step 1: Foundation and Center Spine
- Start: Create a Magic Ring (MR) or
ch 4and join with asl st. - Row 1: Work a small initial stitch count into the ring to establish the base (e.g.,
ch 3, 3 dc, ch 3, 3 dc, ch 3, sl st). - Center Spine: Place a stitch marker in the center chain space (
ch 3) of the spine.
Step 2: The Increase Rows
The triangle is formed by increasing at three points in every row: the center spine, and both edges.
- Edges: To begin the row,
ch 3(or the appropriate number for your stitch) and then work an increase into the corner space (e.g.,[dc, ch 1, dc]). - Center Spine: When you reach the center marked chain space, work an increase here (e.g.,
[3 dc, ch 2, 3 dc]or[dc, ch 2, dc]) and move the marker to the new ch-2 space. - Work the Stitch Pattern: The stitch pattern (e.g., V-stitches or shells) is worked on the body of the shawl between the edges and the center spine.
- Final Edge: At the end of the row, work an increase into the final corner space,
ch 3, and turn. - Growth: Each row, the space between the center spine and the edges grows, creating the expanding triangle shape.
Step 3: Pattern Integration
- If using a repeatable lace pattern (like the V-stitch mesh), continue working the repeat across the growing body of the shawl.
- If using a large motif pattern (like the Pineapple), the pattern will instruct you to integrate new motifs on the wider rows.
Step 4: Finishing and Blocking (CRITICAL)
- Final Edge: Once the shawl reaches the desired size, finish the edge with a deep, decorative border (e.g., scallops, picots, or long tassels).
- Weave in Ends: Secure all tails.
- Blocking: This step is essential for lace. Wet the entire shawl and pin it out firmly on a flat surface, aggressively stretching the edges and points. Let it dry completely. Blocking opens the lace holes, evens the tension, and defines the final shape and drape of the shawl.
Pattern Integration Tips for Both Projects
| Feature | Blouse Tip (Structure Focus) | Shawl Tip (Drape Focus) |
| Color Changes | Best done at the start/end of a row/round for clean seams. | Often done every few rows/sections to create subtle color blocks. |
| Texture | Use texture (like cables or bobbles) sparingly, near the cuffs or yoke, to avoid overheating the wearer. | Use texture (like popcorn or puff stitches) combined with ample chain space to maintain lightness. |
| Shaping | Achieved through precise increases/decreases (yoke, armholes, bust darts). | Achieved through increasing chain spaces and center stitches (spine/edges). |
Do you have a specific stitch pattern (like V-stitch, Shell, or a dense stitch) in mind for either the blouse or the shawl?
Video tutorial: