by
by Creating a Square Motif Model is the perfect starting point for designing your own crochet projects. A square is a mathematical building block: once you master one square, you can multiply it to create a Runner (joining them in a line) or a Blouse (joining them into panels).
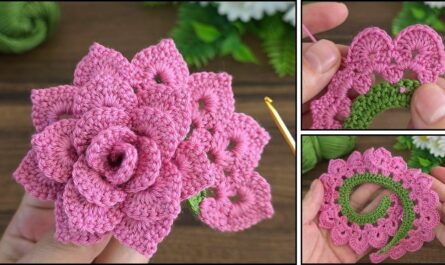
Here is a detailed guide on how to design and crochet a Classic Sunburst Square Motif, which is modern, unique, and stunning when used in garments.

Phase 1: Choosing Your Materials
For a professional “Model” look, consistency is key:
- Yarn: 100% Mercerized Cotton (DK weight). It has a slight shine and doesn’t “fuzz,” which makes the motif look high-end.
- Hook: 3.5mm or 4.0mm. A slightly smaller hook creates “tight” stitches that hold their shape.
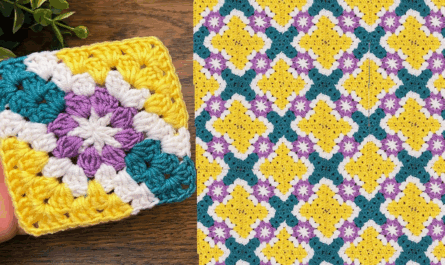
- Colors: Choose 3 colors (e.g., Cream, Tan, and Terracotta) to make the design pop.
Phase 2: The Sunburst Motif Model (Step-by-Step)
Round 1: The Core (Color A)
- Make a Magic Ring.
- Ch 3 (counts as 1 dc), work 15 dc into the ring.
- Join with a sl st to the top of the ch-3. Fasten off. (16 stitches total).
Round 2: The Puff Stitches (Color B)
- Join Color B in any stitch.
- Puff Stitch: Yarn over, insert hook, pull up a loop (repeat 3 times in the same stitch). Yarn over and pull through all loops on hook. Ch 1 to close.
- Repeat this Puff Stitch in every stitch around.
- Join with a sl st. Fasten off. (16 puffs total).

Round 3: The Clusters (Color C)
- Join Color C in any ch-1 space between puffs.
- Bobble Stitch: Work a 4-dc cluster (start 4 dc but leave the last loop of each on the hook, then pull through all loops at once). Ch 2.
- Repeat around in every space. Join and fasten off. (16 clusters).
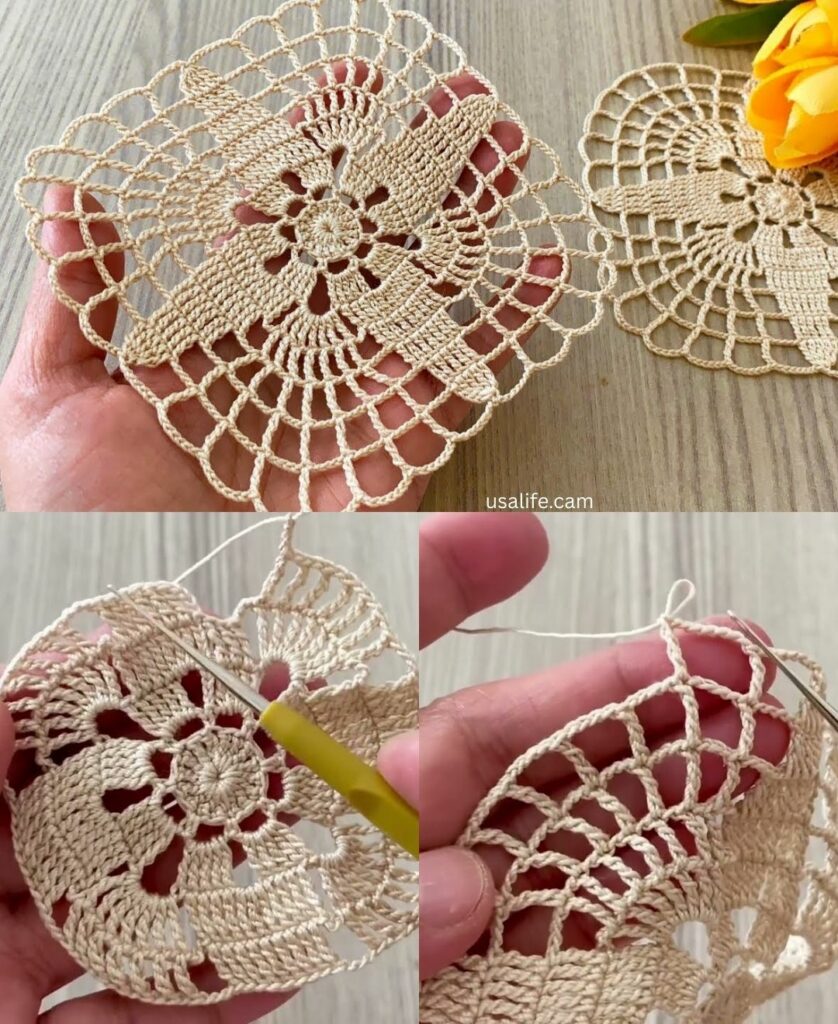
Round 4: Squaring the Circle (Color A or D)
This is the “Model” step where the circle becomes a square.
- Join yarn in any ch-2 space.
- Corner: Ch 4 (counts as 1 tr), 2 tr, ch 2, 3 tr in the same space.
- Side: 3 dc in next space, 3 hdc in next space, 3 dc in next space.
- Next Corner: 3 tr, ch 2, 3 tr in the next space.
- Repeat around. Join with a sl st.
Phase 3: How to Use this “Model” for Different Items
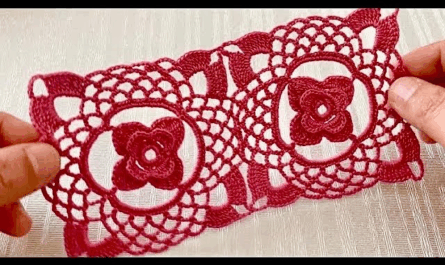
| For a Table Runner | For a Blouse / Tunic |
| Layout: Arrange motifs in a single or double row (e.g., 2 wide by 10 long). | Layout: Create two large rectangles (Front and Back). A standard blouse is usually 4–5 motifs wide. |
| Joining: Use a Flat Slip Stitch Join to keep the runner perfectly flat on the table. | Joining: Use the Join-As-You-Go (JAYG) method to make the garment flexible and seamless. |
| Edging: Add a “Pineapple” lace border on the two short ends for a stunning finish. | Edging: Use a simple Ribbed Stitch (alternating front/back post dc) for the neckline and waist. |

Phase 4: Pro-Design Tips
- Weight Control: If making a blouse, use a Bamboo-Cotton blend. Standard cotton can get heavy once you join 20+ motifs together.
- The “V” Neck Trick: To make a blouse neckline, simply leave the top-middle motif out of the front panel assembly.
- Blocking is Essential: To make your motif look like a “Model” design, pin your squares to a blocking board. This ensures every square is exactly the same size before you join them.
Would you like me to provide a diagram or a specific layout for a Medium-sized blouse using these squares?
Video tutorial: