 by
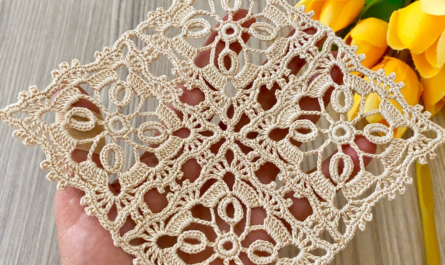
by To achieve a gorgeous texture in a crochet square, we need to move beyond flat stitches and incorporate 3D elements. The most effective way to do this is by combining Popcorn Stitches (for depth) and Front Post Double Crochets (for raised ridges).
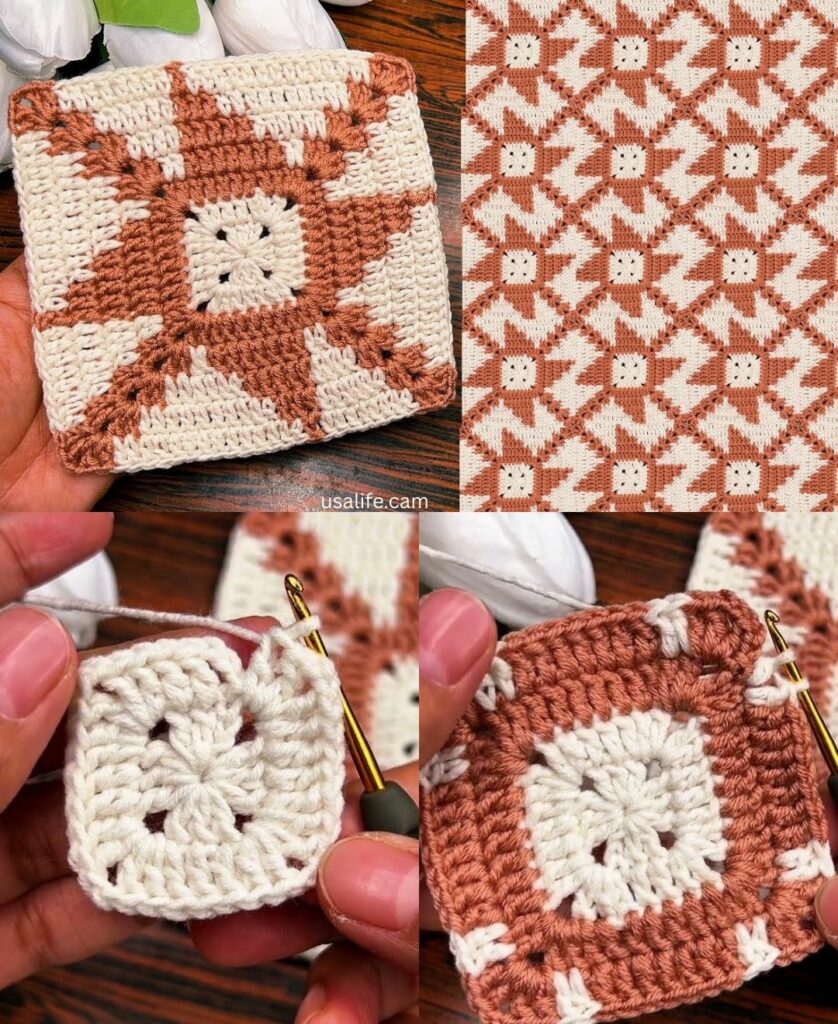
I call this the “Embossed Petal Square.” It looks complex and high-end, making it perfect for a “magnificent” blouse or a statement table runner.

🧶 The Embossed Petal Square Tutorial
This square is worked in 5 rounds. It starts with a thick, textured center and expands into a structural square with “ribs” that catch the light.
Materials You’ll Need
- Yarn: A smooth, solid-colored yarn shows texture best. Mercerized Cotton or a Cotton-Acrylic blend (DK or Worsted weight) works beautifully.
- Hook: 4.0 mm (G/6) for DK yarn or 5.0 mm (H/8) for Worsted.
- Extras: Tapestry needle for weaving in those ends!
Special Stitch Key
| Stitch | Abbreviation | How to Do It |
| Popcorn | PC | Work 5 dc in one stitch. Drop loop, insert hook in 1st dc, pull loop through. |
| Front Post DC | fpdc | YO, insert hook from front to back to front around the post of the st below, finish dc. |
| Corner | CNR | (2 dc, ch 2, 2 dc) in the same space. |

Step-by-Step Instructions
Round 1: The Foundation
- Start: Make a Magic Ring.
- Stitches: ch 3 (counts as dc), work 15 dc into the ring.
- Join: sl st to the top of the starting ch 3. (16 dc total).
Round 2: The Popcorn Bloom
This round creates the 3D “heart” of the motif.
- ch 3 (counts as 1st dc of your popcorn). Complete a PC in the same stitch.
- ch 2, skip 1 stitch.
- Repeat: [PC in next stitch, ch 2, skip 1 stitch] 7 more times.
- Join: sl st to the top of the first popcorn.

Result: You should have 8 popcorns separated by ch-2 spaces.
Round 3: Squaring the Texture
- Move Hook: sl st into the first ch-2 space.
- First Corner: ch 3, (dc, ch 2, 2 dc) in the same space.
- Side: ch 1. In the next ch-2 space, work 3 dc. ch 1.
- Repeat: [Corner in next space, ch 1, 3 dc in next space, ch 1] around.
- Join: sl st to top of ch 3.
Result: A clear square frame with popcorns peeking through the middle.
Round 4: Embossing the Ridges
This is the “secret sauce” for the gorgeous texture.
- Corner: sl st to corner, work CNR (2 dc, ch 2, 2 dc).
- Side: * fpdc around the next 2 dc of the previous row.
- dc in the ch-1 space.
- fpdc around each of the 3 dc on the side.
- dc in the ch-1 space.
- fpdc around the next 2 dc.
- Repeat: Work the corners and the fpdc “ribs” on all four sides.
- Join: sl st to top of ch 3.
Round 5: The Final Definition
- sc in every stitch around.
- Corners: Work (sc, ch 2, sc) in the corner spaces.
- Finish: Fasten off and weave in ends.

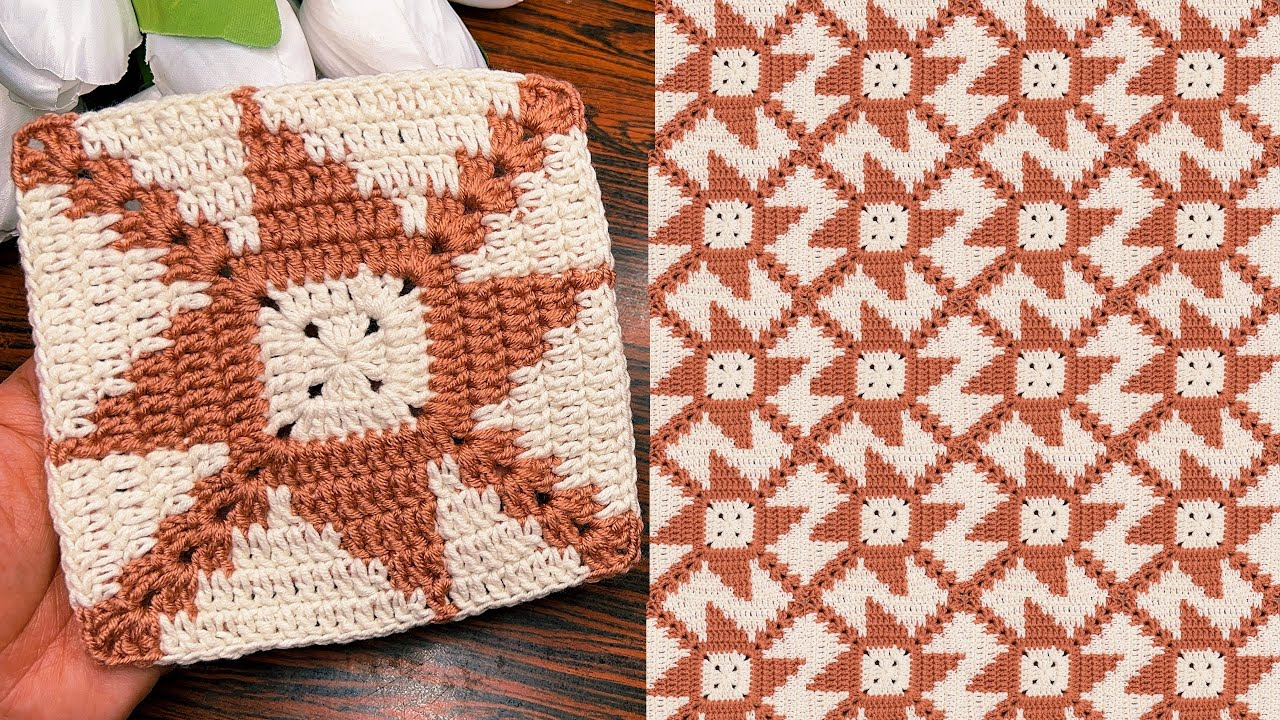
🌟 Why This Texture is “Magnificent”
- Light & Shadow: The fpdc ridges in Round 4 create vertical shadows. When you wear a blouse made of these, the texture moves and changes as you walk.
- Tactile Appeal: The Popcorns in the center provide a “bumpy” feel that makes home decor (like a runner) feel artisanal and expensive.
- Structural Integrity: Because post stitches are denser, this square holds its shape very well—it won’t sag as much as a standard granny square when used for a heavy tunic or sweater.
🛠️ Project Adaptation
The Gorgeous Runner
Join 20 of these squares in a 2×10 grid. Because the center is thick, use a 3.5 mm hook with cotton thread. It will sit heavy on the table and won’t blow away if the window is open!
The Textured Blouse
Join these using the Whip Stitch on the back loops only. This keeps the front ridges (the fpdc) as the star of the show and creates a “seamless” textured look across your chest and shoulders.
Helpful Peer Note: Textured squares use about 20-30% more yarn than flat squares. If you are planning a large blouse, make sure you buy an extra skein of yarn to account for those “yarn-hungry” popcorn stitches!
Would you like me to suggest a color palette that emphasizes the 3D shadows of these ridges?
Video tutorial: