 by
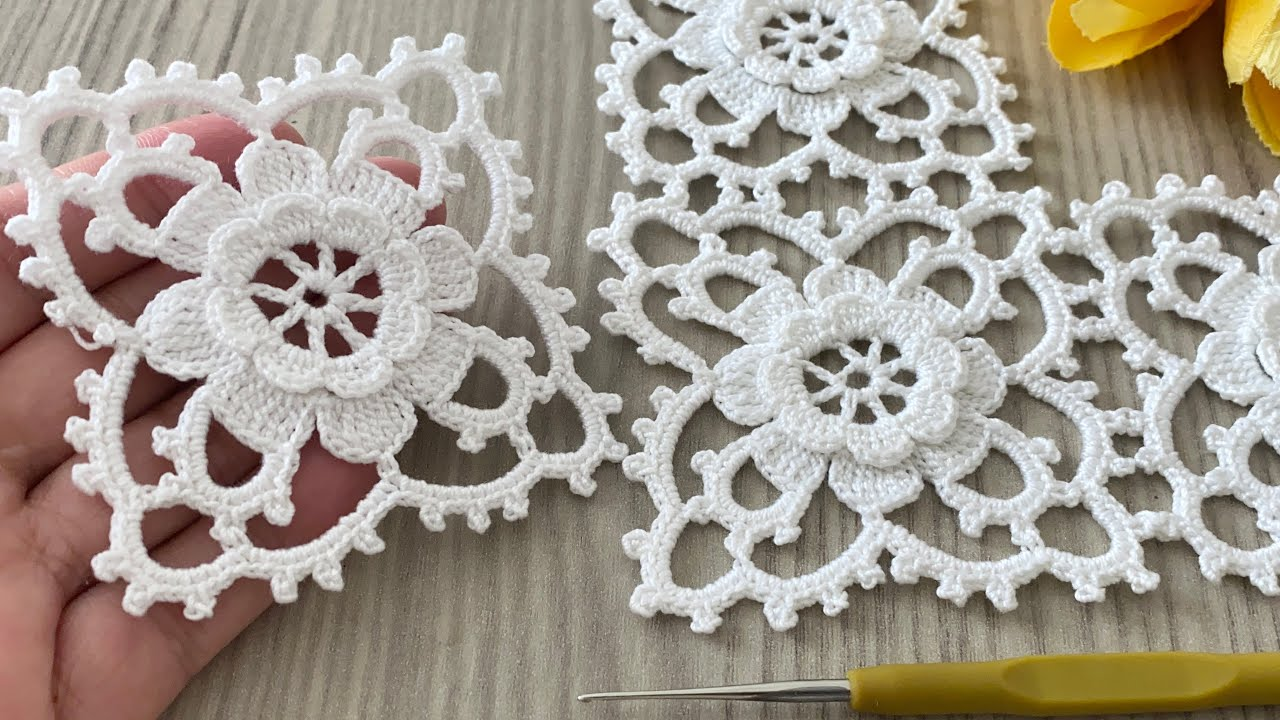
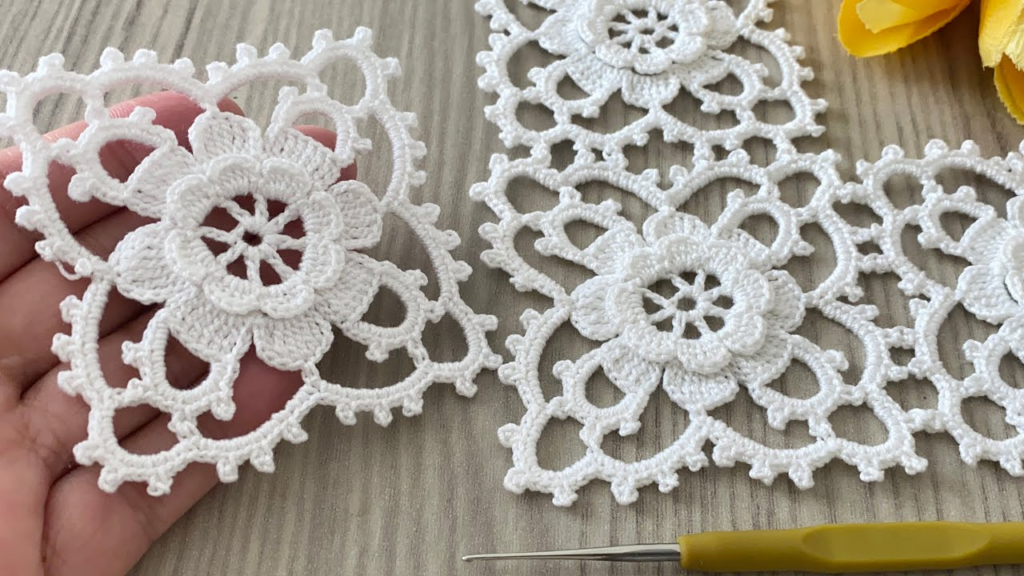
by A Layered Flower Motif (also known as a 3D flower) is one of the most versatile designs in crochet. Unlike flat motifs, this pattern uses “front loops” and “back loops” to stack petals on top of each other, creating depth and texture.
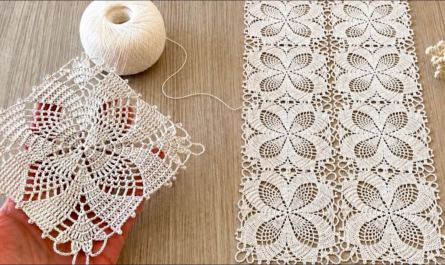
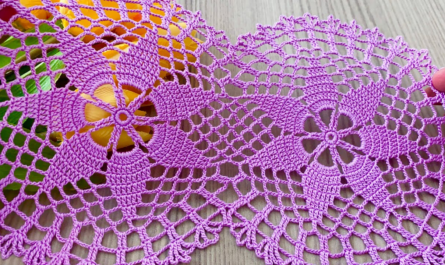
This motif is “stunning” when used as an appliqué on a blouse or joined together to create a 3D table runner. In the Phnom Penh heat, I suggest using 100% Cotton or a Silk/Cotton blend so the flower holds its “pop” without feeling heavy or itchy.
1. Materials & Abbreviations
- Yarn: DK or Sport weight cotton (Two colors look best).
- Hook: 3.5mm (E).
- Stitches (US Terms):
- MR: Magic Ring
- SC: Single Crochet
- HDC: Half Double Crochet
- DC: Double Crochet
- TR: Treble Crochet
- FLO / BLO: Front Loop Only / Back Loop Only
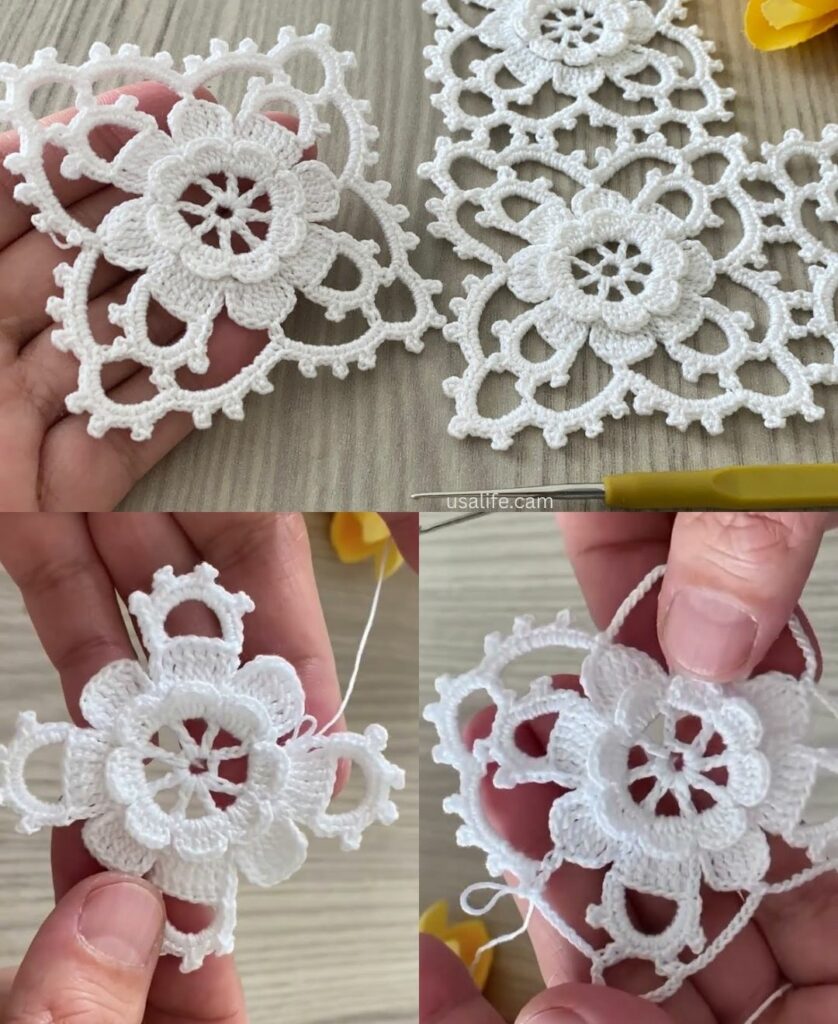
2. Step-by-Step Layered Flower Tutorial
Round 1: The Center (Color A)
- Start with a Magic Ring.
- Ch 1, work 12 SC into the ring.
- Join with a sl st to the first SC. (12 stitches).
Round 2: The First Petal Base
- Working in both loops for now: Ch 4 (counts as 1 SC + Ch 3).
- Skip 1 stitch, SC in the next stitch.
- Repeat: Ch 3, skip 1, SC in next around.
- Join with a sl st to the first chain. (You now have 6 small loops).
Round 3: Layer 1 – Small Petals
We want these petals to sit forward.
- In each Ch-3 loop around, work: (SC, HDC, 3 DC, HDC, SC).
- Join with a sl st. You now have a 6-petal flat flower.

Round 4: The Second Petal Base (The “Hidden” Row)
To create the layer, we must work behind the first set of petals.
- Ch 1. Reach your hook behind the first layer and work a SC around the post of the SC from Round 2.
- Ch 5.
- Repeat: Work a SC around the next SC post from Round 2, followed by a Ch 5.
- Join with a sl st. (You now have 6 larger loops hidden behind the first petals).
Round 5: Layer 2 – Large Petals (Color B or A)
- In each Ch-5 loop, work: (SC, HDC, DC, 3 TR, DC, HDC, SC).
- Join with a sl st and fasten off.

3. How to Use the Layered Motif
For a Stunning Table Runner
Instead of joining the flowers side-by-side (which creates gaps), crochet a simple mesh runner using double crochets and chain spaces. Then, “sew” these layered flowers onto the mesh in a pattern. This makes the flowers look like they are growing off the table.
For a Designer Blouse
These flowers are beautiful when placed along the neckline or the cuffs of a simple tunic.
- Pro Tip: If you join many layered flowers together to make a full blouse, use a very thin yarn (Lace weight). Otherwise, the layers will make the garment too thick and hot for the Cambodian climate.

4. Design Secrets for 3D Flowers
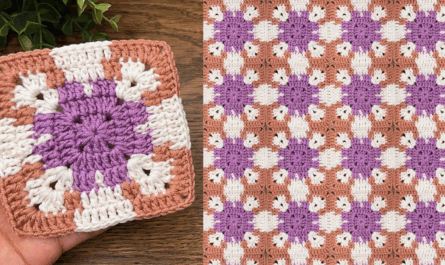
- Color Gradation: Use a dark color for the center, a medium shade for the first layer, and a light shade for the bottom layer. This mimics a real blooming flower.
- Stitch Math: To keep the flower flat, each layer must have more chains in the “base loops” than the layer above it.
- Layer 1 Base: $3$ chains.
- Layer 2 Base: $5$ chains.
- Layer 3 Base: $7$ chains.
- Blocking: 3D flowers can look “smushed” after crocheting. Use your fingers to pull the petals upward, then lightly steam them to “freeze” the 3D shape in place.
Would you like me to show you how to add a third layer to this flower, or perhaps how to add green leaves to the back to turn it into a square motif?
Video tutorial: