 by
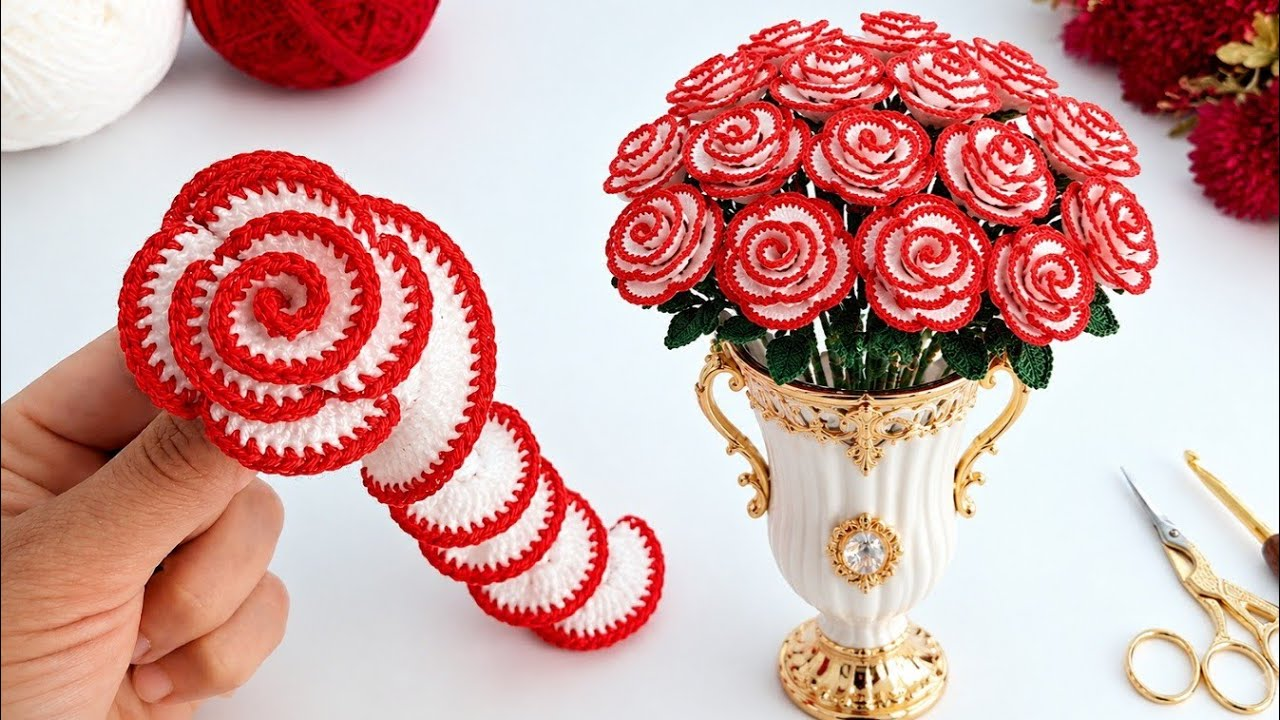
by Creating a crochet rose bouquet is a beautiful project because it is permanent, customizable, and makes for an exquisite handmade gift. Unlike fresh flowers, these will last forever.
To build a professional-looking bouquet, we will create three components: the Petal Layers, the Calyx (the green base), and the Stem.

🧶 The Toolkit
- Yarn: Fine-weight (Sport or DK) cotton yarn. Cotton holds its shape much better than acrylic, which is vital for flowers.
- Colors: A vibrant rose color (Red, Pink, or Peach), a soft leaf green, and a dark brown or green for the stems.
- Hook: 2.5 mm or 3.0 mm. Using a hook smaller than the yarn label suggests makes the stitches tight, which keeps the petals from “flopping” over.
- Extra Supplies: Floral wire (18-gauge for the stem, thinner for leaves), floral tape (green), and a hot glue gun.
🛠 Part 1: The Rose Petals
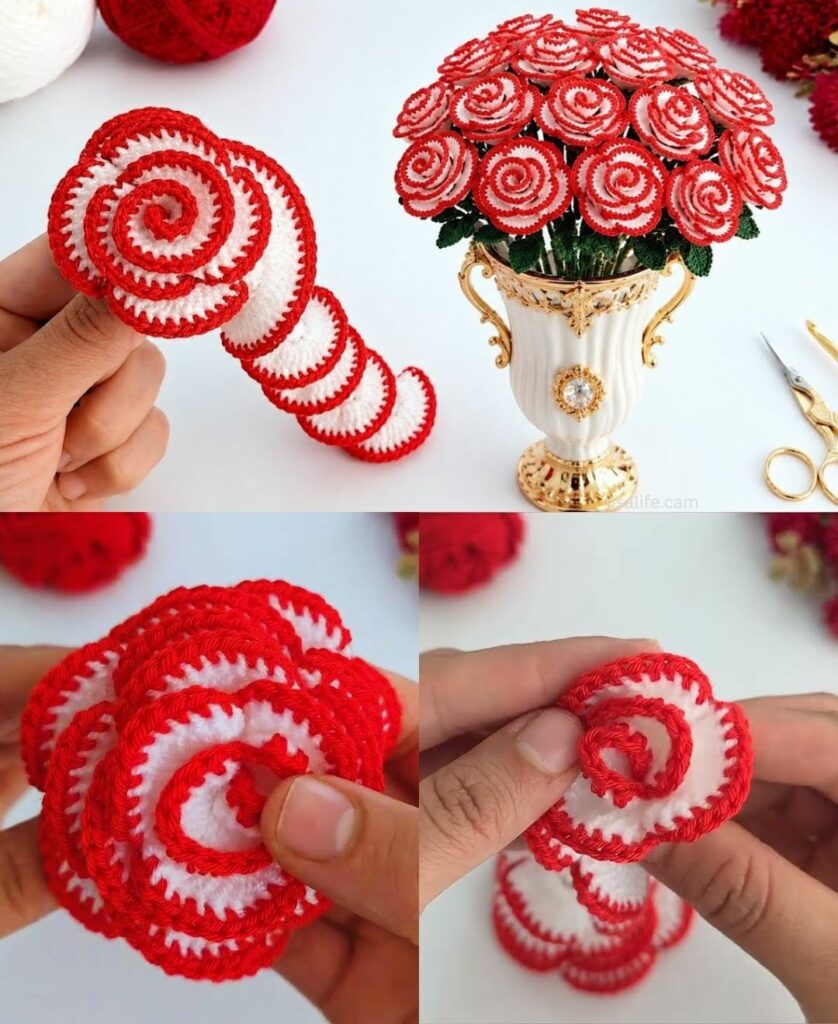
We will use a “continuous strip” method, which is the easiest way to get a natural, layered look.
- The Base Chain:
ch 60. - Row 1: Work
2 dcin the 4th chain from the hook. Then, work3 dcin every chain across until the end. As you work, you will notice the chain naturally begins to twist and curl into a spiral—this is exactly what you want! - Row 2 (Optional for fuller roses): Work
3 dcin every stitch across. This will make the petals very ruffled and voluminous. - Finish: Fasten off, leaving a long 10-inch tail of yarn.

🛠 Part 2: The Assembly
- Rolling the Rose: Take your floral wire (the stem). Starting at one end of your petal strip, begin rolling the strip tightly around the top of the wire.
- Securing: As you roll, use your tapestry needle and that long yarn tail to sew through the base of the “spiral” to hold it together. Ensure you sew through the bottom of the rose multiple times to anchor it firmly to the wire stem.
🛠 Part 3: The Calyx & Leaves
The calyx is the small green star-shaped piece at the base of the flower that makes it look realistic.
- The Calyx:
ch 6, join to form a ring.*ch 4, work 1 sc in 2nd ch from hook, 1 dc in next, 1 dc in last. Sl st into the ring.*Repeat from * to * 5 times to create 5 green points. - The Leaves:
ch 10. Work1 scin 2nd ch,1 hdc,4 dc,1 hdc,1 sc. This creates a beautiful leaf shape. Wrap the tail of the leaf around your stem wire and secure with a bit of glue.

✨ The “Bouquet” Secret Sauce
1. Floral Tape Magic
Don’t leave the wire exposed! Start your green floral tape at the base of the rose calyx. Wrap it tightly and firmly downward at a $45^\circ$ angle, all the way down the stem. As you reach the spot where you want a leaf, place the leaf wire against the stem and wrap the tape over both to bind them together.
2. The “Soft” Touch
Once your roses are assembled, they might look a bit stiff.
- Use your fingers to gently pull the top edges of the petals outward to “fluff” the rose.
- Pro Tip: If you have a fabric stiffener spray, give the petals a very light misting. It will help them hold their shape even if the bouquet is handled frequently.

3. Styling the Bouquet
A bouquet looks “amateur” if all the roses are at the same height.
- Vary the Stems: Cut your floral wires at different lengths before wrapping them.
- Add “Filler”: Crocheted roses look best when paired with “baby’s breath” or simple green sprigs. You can make simple small white flowers (using the same pattern as the rose but with only 10 chains) to fill the gaps between your large roses.
💡 Creative Idea: The Scented Bouquet
Since these are crochet, they won’t have a natural scent. To make your bouquet even more special, add a tiny drop of essential oil (like rose or lavender) to the center of each rose on the back side. The cotton yarn will absorb the oil and hold the scent for weeks, making your “forever” roses smell as beautiful as they look.
Would you like me to provide a pattern for the “baby’s breath” filler flowers, or are you ready to plan the color palette for your bouquet?