by
by To crochet flowers that look “real,” you must move away from flat, two-dimensional shapes and embrace three-dimensional construction. The secret to botanical realism in crochet lies in three things: fine-gauge thread, varying stitch heights, and tension management.
Here is your detailed masterclass on how to move from “crafty” flowers to “botanical” replicas.
🧶 The Professional Botanical Toolkit
- Yarn/Thread: To achieve a realistic scale, use Size 10 or Size 20 Mercerized Cotton Thread. Standard acrylic yarn is too fuzzy and thick to mimic the delicate nature of real petals.
- Hook: A 1.5 mm to 2.0 mm steel crochet hook.
- Realism Tools:
- 26-gauge or 30-gauge floral wire: Essential for shaping petals and leaves.
- Fabric stiffener (or watered-down white glue): To give the petals that crisp, organic feel.
- Floral tape: For creating realistic stems.

🛠 The “Realism” Construction Techniques
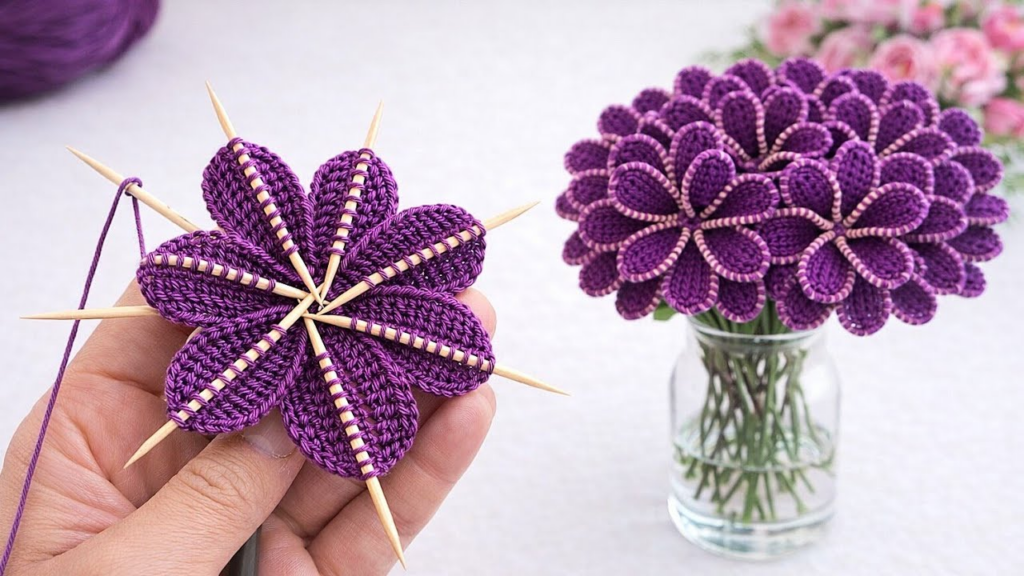
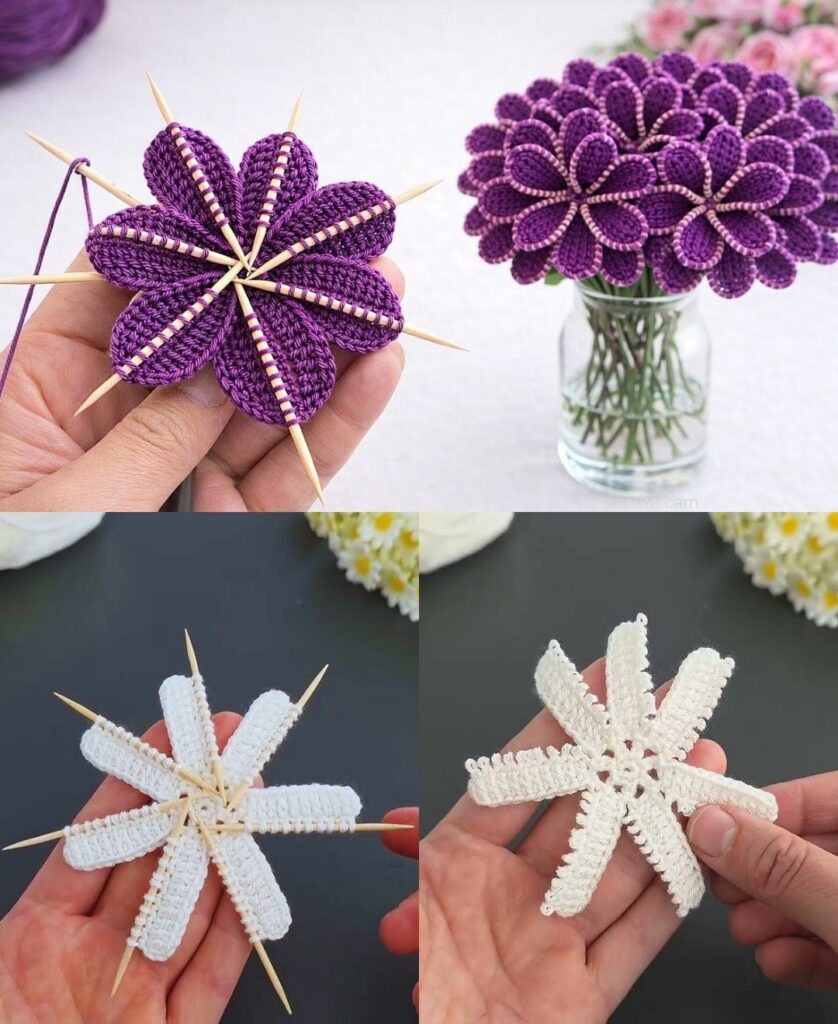
1. The Wire-Edge Technique (The “Secret Sauce”)
This is the single most important technique for realism. Instead of just crocheting with yarn, you crochet around a piece of thin floral wire.
- How to do it: Lay your thin floral wire along the top of your foundation chain. Work your stitches (single or half-double crochet) directly over the wire, enclosing it inside the stitch.
- Why it works: Once the petal is finished, you can gently bend the edges. This allows you to create the “ruffled,” “wavy,” or “curled” edges found in real roses, tulips, and poppies.
2. Varying Stitch Heights for Organic Shape
Real petals are rarely uniform. To mimic this, change the stitch height within a single petal row.
- The Technique: Start with a
sl st, thensc, thenhdc, thendc, thentr(treble), and then work back down the heights. - The Effect: This creates a natural “arch” in the petal, mimicking the way real flowers curve toward the center.

3. Shaping the “Anthers” and “Stamens”
A flower looks fake if the center is just a flat circle. You need to create depth.
- The Technique: Use French Knots (if you know embroidery) or “Picot” clusters. For a realistic center, use a contrasting yellow or dark brown thread to create tiny, raised, nubby textures in the very middle of the flower.
🛠 A Mini-Tutorial: The “Botanical” Petal
- Foundation:
ch 10. - Row 1: Work
scin each chain, but incorporate a piece of 30-gauge wire inside the stitches. - Row 2: Work
(sc, hdc, dc, 2 dc, dc, hdc, sc)along the chain. - The Shape: Because the wire is inside, you can now pinch the tip of the petal to make it pointed, or push the sides to make it rounded.
- Assembly: Make 5 of these petals. Overlap the bases slightly and sew them around a central “stamen” (a small bead or a cluster of knotted yarn).

✨ Finishing for “High-End” Realism
- The “Vapor” Steam: Once your flower is assembled, hold it over the steam of a boiling kettle for 3–5 seconds. This softens the fibers, allowing you to manipulate the petals into a more “bloomed” or “closed” position.
- Petal Painting: If you want hyper-realism, use a tiny amount of watered-down acrylic paint or fabric dye to add “veins” or “blushes” to the edges of your petals. A faint pink blush at the base of a white petal makes a world of difference.
- Natural Imperfection: Real flowers are never perfectly symmetrical. When assembling, purposely tilt one petal slightly lower than the others. Do not make all your petals uniform.
💡 The “Professional” Workflow
If you want to create an entire bouquet, follow this order of operations:
- Crochet all petals and leaves (incorporating wire into the edges).
- Apply fabric stiffener to the petals and let them dry in a “curled” shape.
- Assemble the center (the stamen) onto the main stem wire.
- Attach petals one by one, using floral tape to bind them securely to the stem.
- Wrap the stem with floral tape, adding leaves as you move down.
Would you like me to provide a speci