 by
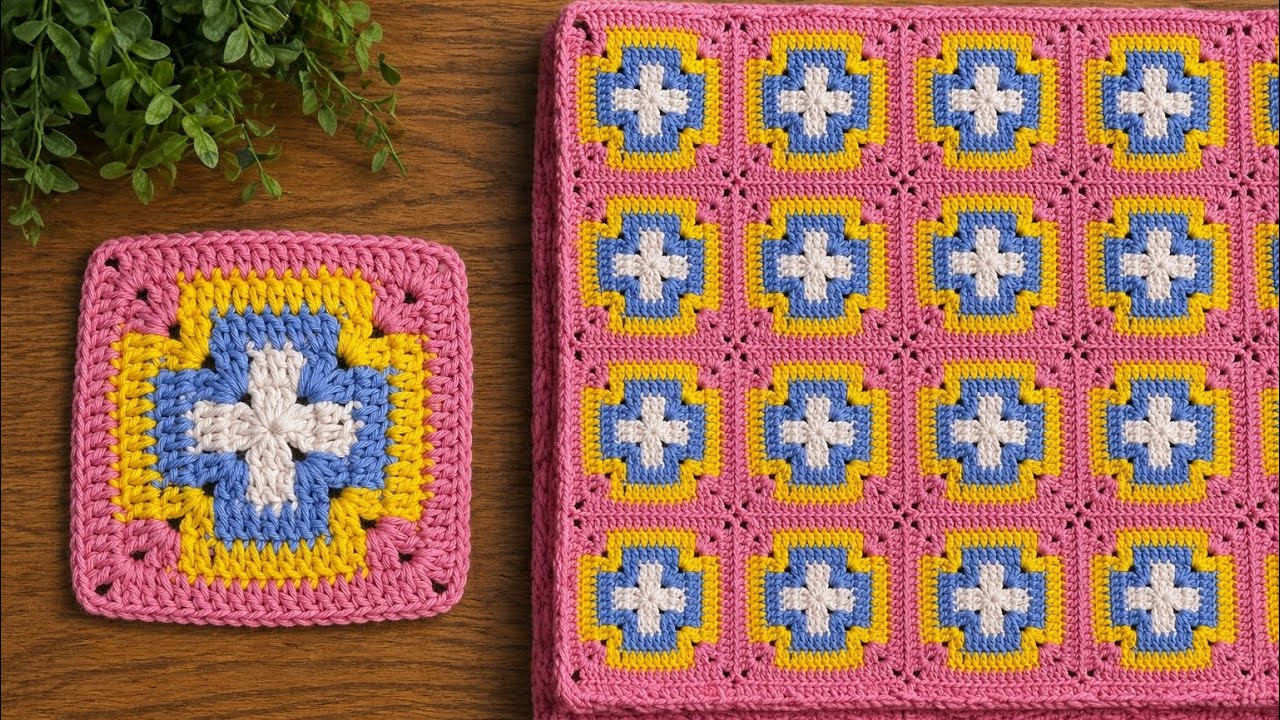
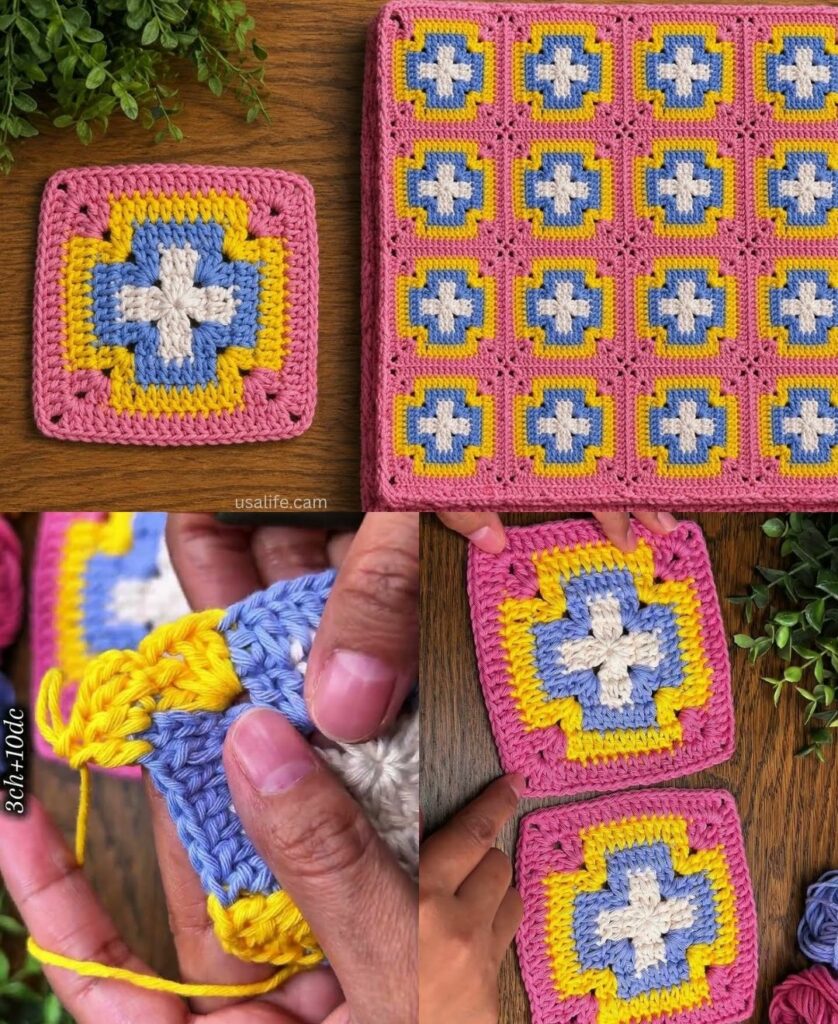
by The Classic Granny Square is the perfect entry point into the world of crochet. It is modular, portable, and teaches you the fundamental “DNA” of most crochet projects: working in the round.
Once you master this square, you can join them to create anything from a simple coaster to a complex heirloom blanket or a functional table runner.

🧶 The Beginner’s Toolkit
Before you start, pick a yarn that is easy to “read.” Avoid dark colors (black or navy) or fuzzy textures for your first few squares, as it makes seeing your stitches difficult.
| Item | Recommendation | Why? |
| Yarn | Worsted Weight (Size 4) Acrylic or Cotton | Durable and shows clear stitch definition. |
| Hook | 5.0 mm (H/8) | The most comfortable “middle-of-the-road” size. |
| Extras | Scissors & Tapestry Needle | To finish your work and hide the “tails.” |
🛠 Key Terms to Know (US Terms)
- ch (Chain): The start of most projects.
- sl st (Slip Stitch): Used to join rounds or move your yarn without adding height.
- dc (Double Crochet): The tall stitch that creates the “body” of the square.
- Cluster: A group of 3 double crochets worked into the same hole.
- Corner Space: The hole created by 2 chains at each corner.

🚀 Step-by-Step Guide
Step 1: The Foundation Ring
- Make a slip knot and place it on your hook.
- ch 4.
- Insert your hook into the first chain you made.
- Yarn over and pull through everything on the hook (sl st).
Result: You now have a tiny circle. This is where all your Round 1 stitches will go.
Step 2: Round 1 (The Center)
- Start: ch 3 (this counts as your first dc).
- First Cluster: Work 2 dc into the center of the ring.
- The Corner: ch 2.
- Repeat: [3 dc into the ring, ch 2] three more times.
- Join: sl st into the top of your starting ch 3.
Check: You should see 4 clusters and 4 corner holes. It looks like a tiny cross.
Step 3: Round 2 (Expanding)
- Travel: sl st into the next 2 stitches and then sl st into the corner hole. (This puts you in the right spot to start).
- First Corner: ch 3 (counts as dc). In that same corner hole, work: 2 dc, ch 2, 3 dc.
- Transition: ch 1.
- Remaining Corners: In each of the other 3 corner holes, work: (3 dc, ch 2, 3 dc) followed by a ch 1.
- Join: sl st into the top of the starting ch 3.
Step 4: Round 3 (Corners and Sides)
- Travel: sl st over to the first corner hole.
- Corner: ch 3, then work (2 dc, ch 2, 3 dc) in the corner. ch 1.
- The Side: Look at the hole on the side between corners. Work 3 dc into that side hole. ch 1.
- Repeat: Work a Corner (3 dc, ch 2, 3 dc) in every corner and 3 dc in every side hole. Always put a ch 1 between clusters.
- Join: sl st to the top of the ch 3. Fasten off.

💡 Troubleshooting & Tips
- The “Jellyfish” Effect: If your square is curling up like a bowl, your tension is too tight. Relax your hands or try a 5.5 mm hook.
- The Hidden Stitch: After making a corner, the very next stitch can sometimes be “hidden” under the cluster you just made. Slide your stitches over to find the top of the dc.
- 3D Texture Variation: If you want a more textured, “3D” look, try working your stitches into the Back Loops Only (BLO) of the previous row. This creates a raised ridge that looks beautiful on home decor items.
✨ Finishing Touches
- Weave in Ends: Use your tapestry needle to “thread” your yarn tails through the base of your clusters. If you just cut them short, the square will eventually unravel.
- Blocking: This is the “magic” step. Pin your square to a foam board in a perfect square shape and hit it with a bit of steam from an iron (don’t touch the yarn with the hot metal!). This sets the shape permanently.
Would you like me to explain how to join these squares together to make a standard-sized throw pillow?