 by
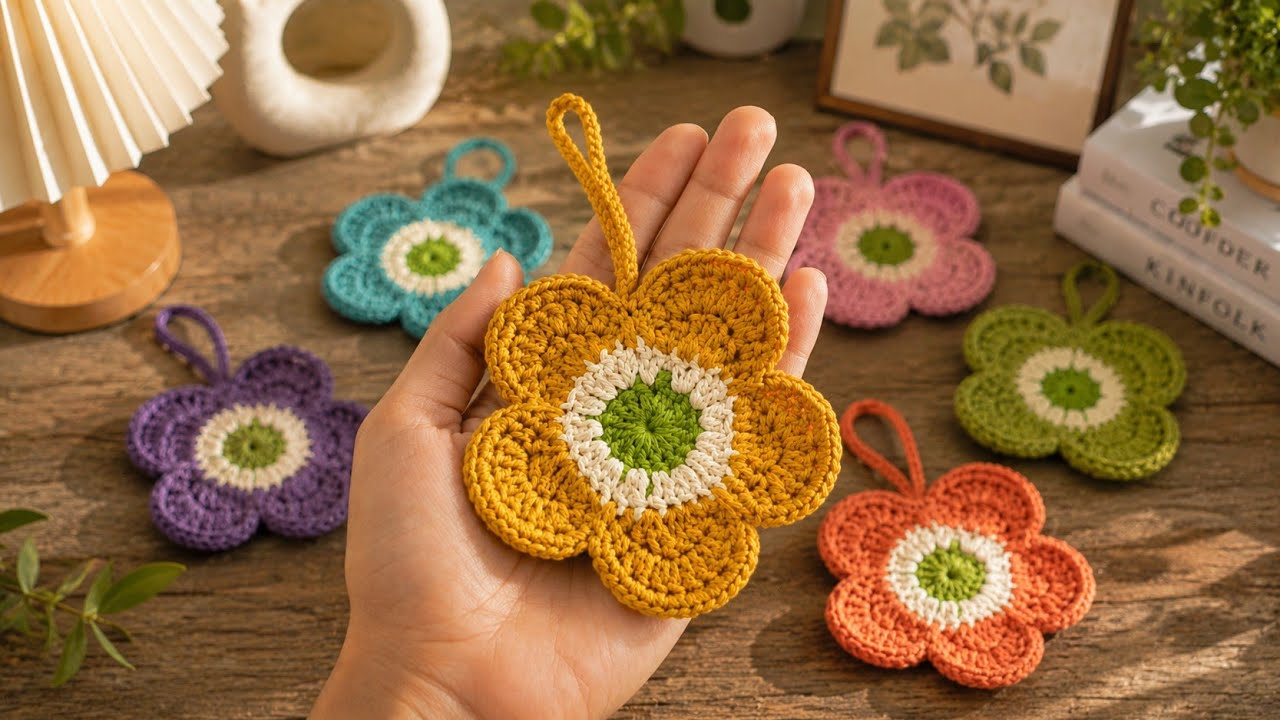
by To create an Extraordinary Flower AirPods Pouch, we will move away from a simple “bag” and create a 3D Blossom Shell. This design features a reinforced base to protect the charging port and a “Petal Lid” that flips back.
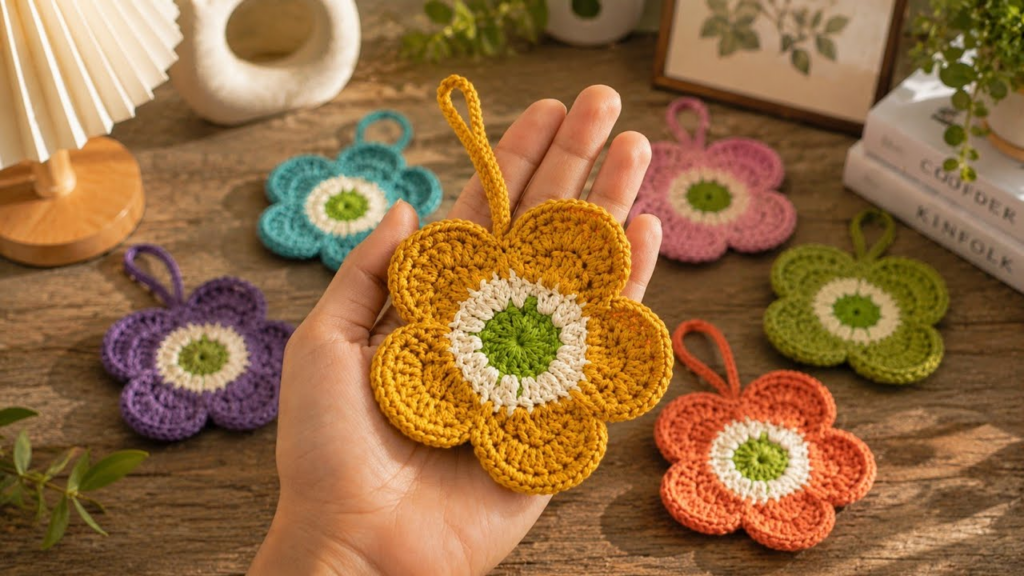
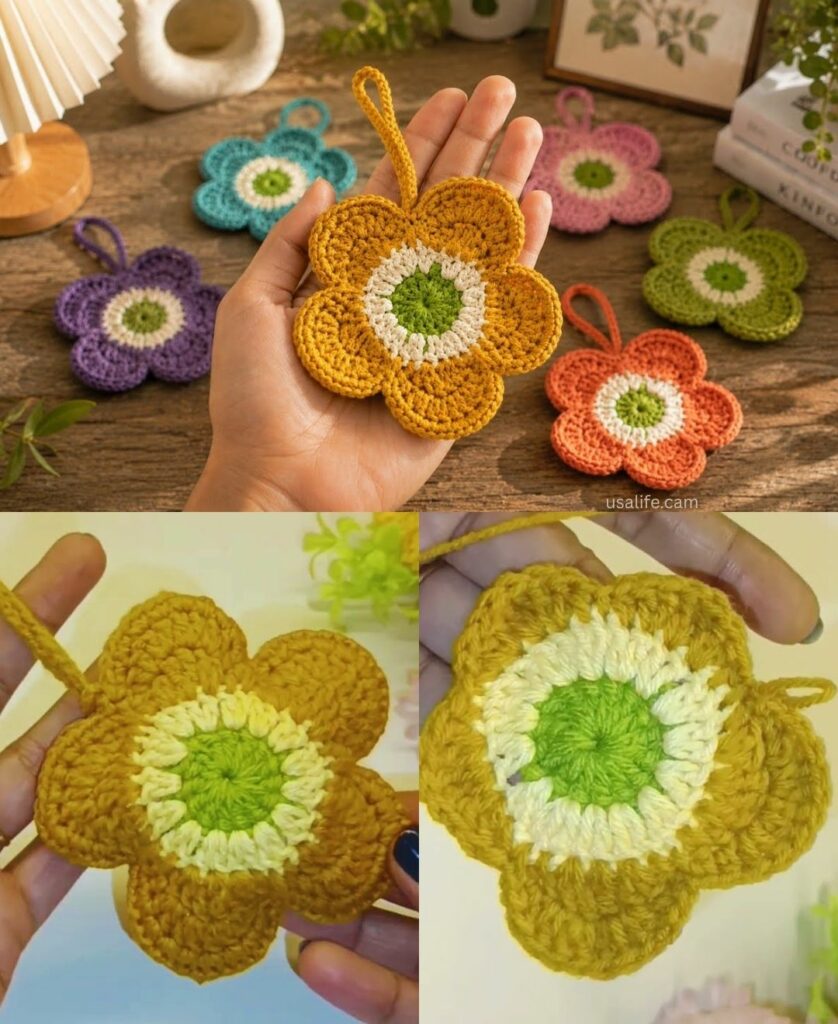
Using a Sunburst or African Flower motif is the trendiest way to achieve this look. Below is the detailed pattern for a 3D Floral Pouch.
I. Technical Blueprint
- The Fit: This pattern is designed for standard AirPods and AirPods Pro.
- Yarn: 100% Mercerized Cotton (DK Weight). Cotton is essential because it provides a “hard” shell that won’t stretch out over time, ensuring your AirPods stay secure.
- Hook: 3.0mm (D). A smaller hook creates a tight, “no-hole” fabric to keep dust out.
- Color Palette:
- Color A (Center): Yellow or Gold.
- Color B (Petals): Pink, White, or Lavender.
- Color C (Body/Leaves): Green or Cream.
II. The Pattern (Step-by-Step)
Part 1: The Floral Face (The Front)
- Round 1 (The Core): With Color A, Magic Ring, ch 2, work 11 hdc in ring. Sl st to join. (12 sts).
- Round 2 (The Petal Base): Join Color B in any st. Ch 2, dc in same st, ch 1. Repeat in every stitch around. Sl st to join. (12 clusters).
- Round 3 (The 3D Bloom): Sl st into the first ch-1 space. Work 3 dc in the space, ch 1. Repeat in every space around. Sl st to join. (12 clusters).
- Round 4 (Squaring the Flower): Join Color C.
- In first space: (3 tr, ch 2, 3 tr) — First Corner.
- Next space: 3 dc.
- Next space: 3 hdc.
- Next space: 3 dc.
- Repeat until you have a square. (This forms the front panel).

Part 2: The Protective Back Panel
- With Color C, ch 13 (or enough to match the width of your square).
- Work in rows of sc (Single Crochet) until the back panel is exactly the same size as the front floral panel.
- Detail: Working in sc for the back provides a flat, stable surface that sits comfortably against your bag or pocket.
Part 3: The Flip-Top Lid
- Do not fasten off the Back Panel.
- Continue working for 4 more rows of sc.
- Decrease Row: Sc2tog (decrease) at the start and end of the next 2 rows to create a “tab” shape.
- Button Hole: Ch 4, skip 2 sts, sc in last st. Fasten off.
III. Assembly & “Extraordinary” Finishing
1. The Charging Port Opening (Pro Tip)
When joining the front and back:
- Start at the top side corner. sc down the side.
- When you reach the bottom center, ch 2 and skip 2 stitches.
- Continue sc around the other side.
- Why: This creates a perfect “window” for your lightning cable so you never have to take the AirPods out of the pouch to charge them.

2. The “Non-Slip” Interior
Since the AirPods case is slippery:
- Take a small piece of silicone or rubberized shelf liner.
- Tack it to the inside of the back panel with a few threads.
- This “grips” the plastic case so it stays snug inside the crochet.
3. The “Leaf” Charm & Keyring
- The Leaf: Ch 8, sc in 2nd ch, hdc, dc, dc, hdc, sc. Sl st around the other side.
- Attach the leaf and a metal lobster clasp to the top corner.

IV. Summary for Success
| Feature | The Designer Choice |
| Durability | Use a “Cross-Stitch Single Crochet” (yarn under) for a denser fabric. |
| Closure | Use a Wooden Pearl Button to match the floral aesthetic. |
| Protection | Steam block the front panel so the 3D flower stays flat and professional. |
V. Final Styling Detail
To make the flower look “Magnificent,” use a tapestry needle and a slightly darker shade of Color B to sew “veins” onto the petals. This small embroidery detail moves the pouch from “basic craft” to “boutique accessory.”
Would you like me to provide a specific measurement guide for the AirPods Pro model vs. the standard AirPods?