by
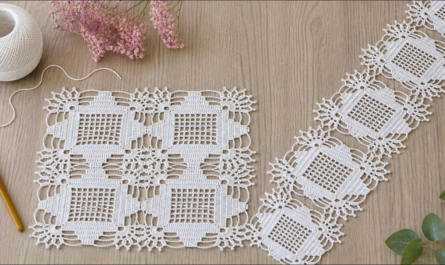
by A Square Motif is the most versatile project a beginner can learn. Think of it as a small “tile” that you can create in bulk and then join together to build anything from a simple coaster to a complex, professional-looking blanket or blouse.
Here is an easy, step-by-step guide to the “Classic Solid Square,” which is perfect for beginners because it is gap-free and uses very basic stitches.
🧶 Your Beginner Toolkit
- Yarn: A medium-weight (DK or Worsted) cotton yarn in a light color (like cream or yellow). Cotton has excellent “stitch definition,” making it easy to see where to insert your hook.
- Hook: A 4.0 mm or 5.0 mm crochet hook.
- Stitch Key (US Terms):
- ch (chain): Yarn over, pull through loop.
- dc (double crochet): Yarn over, insert hook, pull up loop, yarn over, pull through two loops, yarn over, pull through final two loops.
- sl st (slip stitch): Insert hook, yarn over, pull through both the stitch and the loop on your hook (used to join rounds).
🛠 The Step-by-Step Construction
Round 1: The Core
- The Ring:
ch 4. Insert your hook into the first chain andsl stto form a small ring. - The Start:
ch 3(this counts as your firstdc). - The Cluster: Work 2 dc into the center of the ring. (You now have a cluster of 3 stitches).
- The Corner:
ch 2. - The Pattern: Work a cluster of 3 dc into the ring, then
ch 2. Repeat this process 3 more times until you have 4 clusters in total. - The Join:
sl stinto the top of your initialch 3to close the round.

Round 2: Growing the Square
- Move to the Corner:
sl stacross the next 2 stitches and into the nearest cornerch-2space. - The Corner:
ch 3(counts asdc), 2 dc, ch 2, 3 dc all into that same corner hole. - The Transition:
ch 1. - The Sides: Move to the next corner hole and work 3 dc, ch 2, 3 dc.
- Repeat: Do this for all 4 corners, remembering to
ch 1between each corner cluster. - The Join:
sl stinto the top of your startingch 3.
Round 3: Building the Square
- Move to the Corner:
sl stinto the first corner hole. - The Corner:
ch 3, 2 dc, ch 2, 3 dcin the corner. - The Side:
ch 1. Work a cluster of 3 dc into the gap created by thech 1from the round below.ch 1. - The Pattern: Work your corners as
(3 dc, ch 2, 3 dc)and your side gaps as(3 dc). - The Join:
sl stinto the top of your startingch 3.

🌟 3 Keys to a Professional Look
- Tension Consistency: If your square is curling into a bowl, your stitches are likely too tight. Try to relax your hands. If the square is “ruffling” (wavy edges), you may be crocheting too loosely. Practice will help you find the right rhythm.
- The “Turning” Secret: If your square starts to look like a spiral, turn your work over after every round. By working the next round in the opposite direction, your stitches will stay perfectly vertical and aligned.
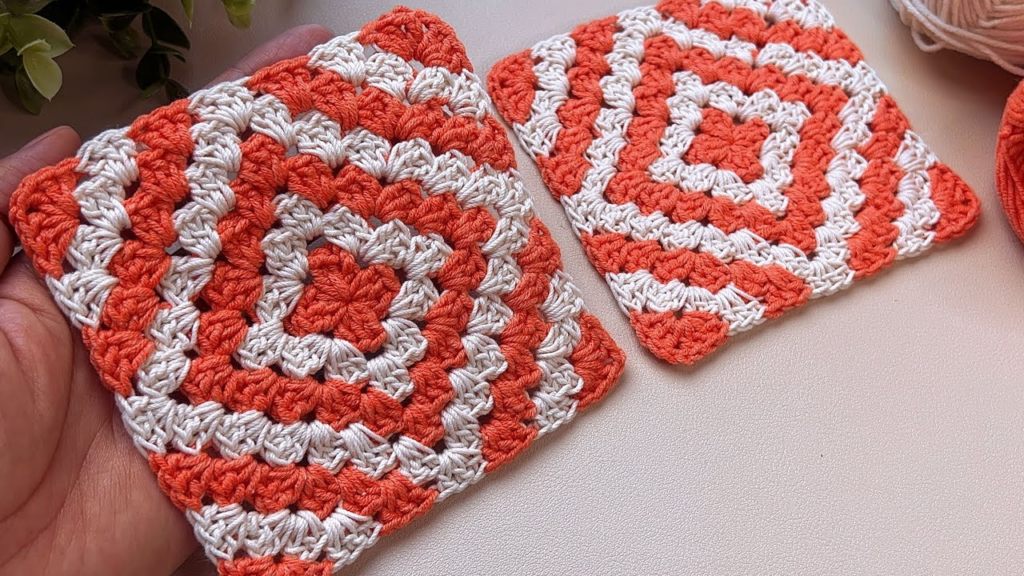
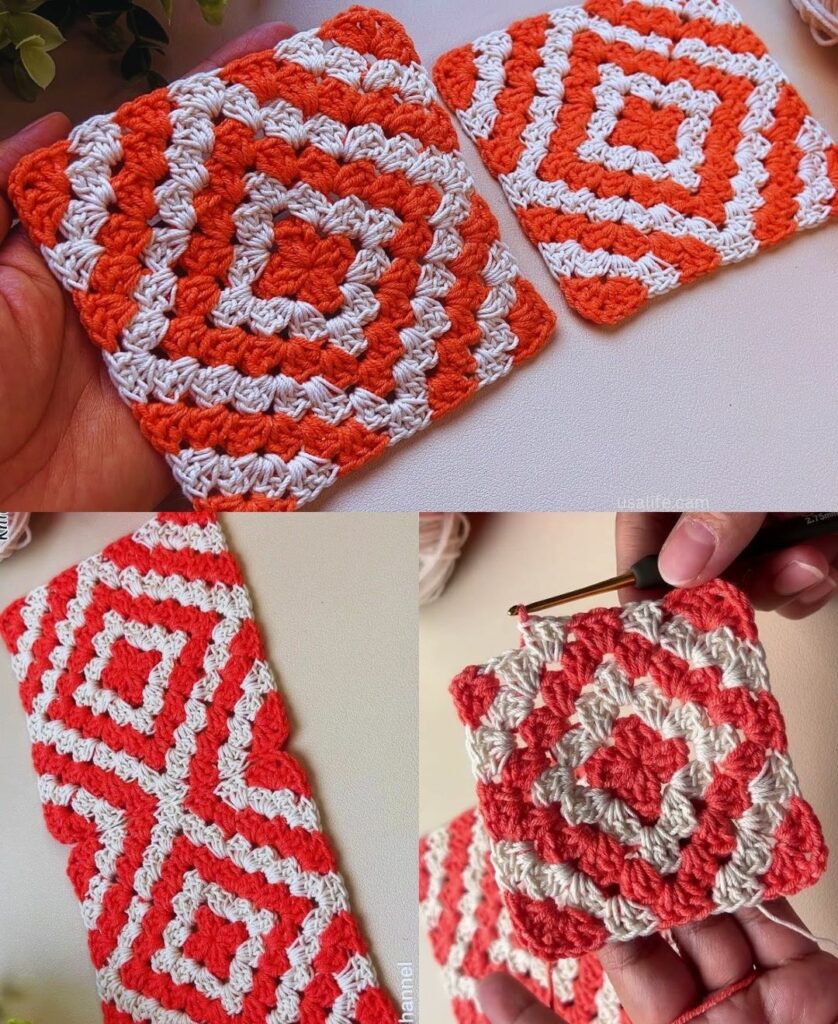
- Blocking (The Secret Sauce): Your motif will look much more professional if you “block” it. Lay the finished square on a soft towel or foam mat, pin the four corners down so they form sharp $90^\circ$ angles, and lightly steam it with a handheld steamer. Once it dries, it will hold that perfectly crisp, flat shape forever.
💡 What to do with your squares?
- Join them: Use a “Mattress Stitch” with a tapestry needle to sew them together, working through the back loops only for an invisible seam.
- Create a Frame: Once you have a larger project, work one round of
sc(single crochet) all the way around the outer edge to give it a neat, finished frame. - Color Play: Try changing your yarn color at the start of each round to create stunning, graphic patterns.
Would you like me to explain how to join your motifs together, or are you interested in a slightly more decorative “lacy” square pattern next?