by
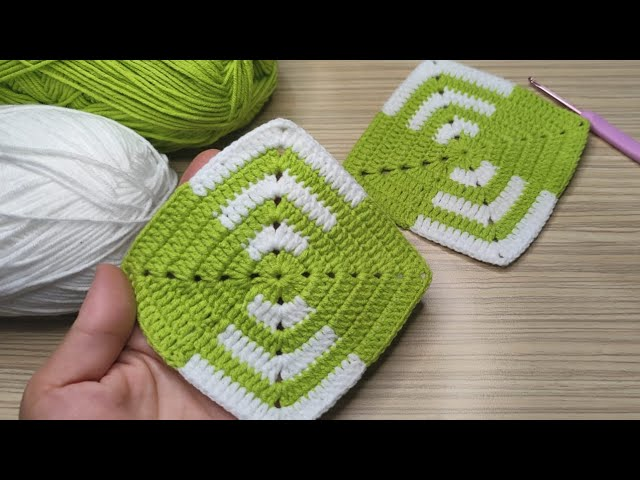
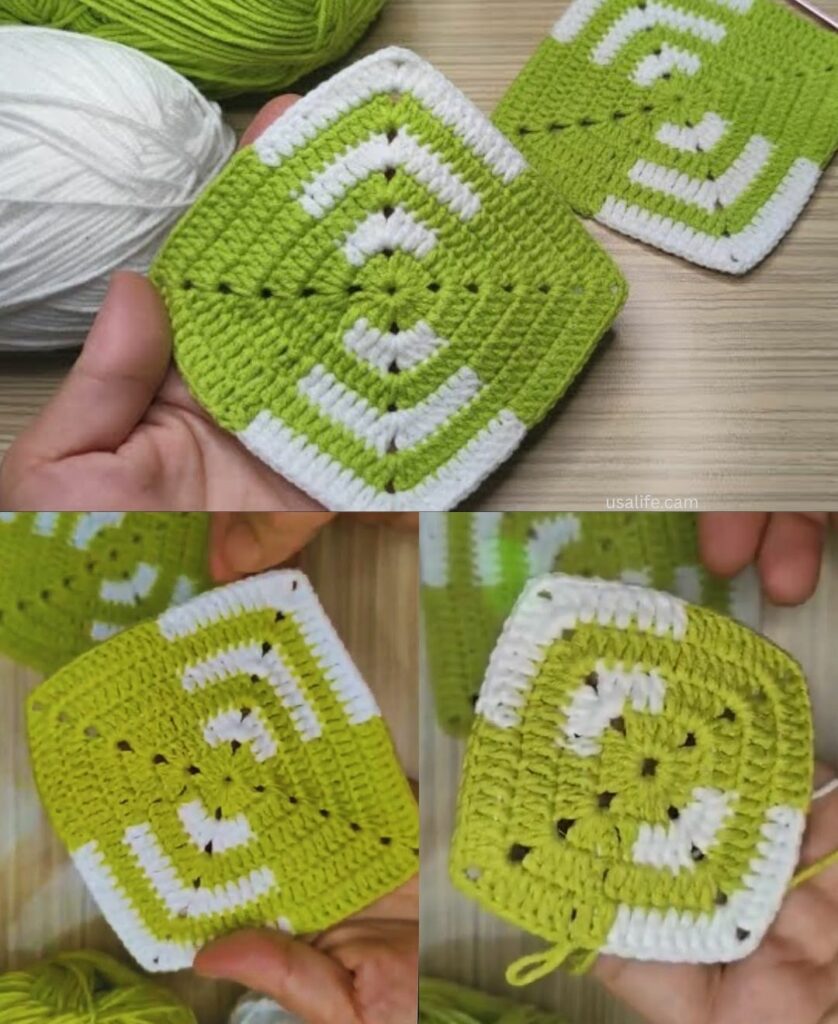
by The Pistachio & White Granny Square is a classic combination. The softness of the pistachio green paired with the crispness of white creates a fresh, modern, and high-end look. This design is perfect for spring-themed blankets, pillows, or even a lightweight summer cardigan.
Here is your detailed, step-by-step guide to crafting this elegant motif.
🧶 The Toolkit
- Yarn: DK or Worsted weight cotton.
- Color A: Pistachio Green
- Color B: Crisp White
- Hook: 4.0 mm (a slightly smaller hook keeps the stitches tight and the pattern crisp).
- Stitch Key (US Terms):
- ch: Chain
- sl st: Slip Stitch
- dc: Double Crochet
🛠 The Step-by-Step Instructions
Round 1: The White Center
- Start: With White,
ch 4, join withsl stto form a ring. - The Cluster:
ch 3(counts as first dc), work 2 dc into the ring,ch 2. - The Pattern: Work
3 dcinto the ring,ch 2. Repeat 3 more times. - Join:
sl stto the top of the initialch 3. Fasten off.

Round 2: The Pistachio Expansion
- Attach: Join Pistachio Green in any corner space with a
sl st. - The Corner:
ch 3(counts as dc),2 dc,ch 2,3 dc(all in corner space). - The Side:
ch 1. Move to the next corner and work(3 dc, ch 2, 3 dc). - Join:
sl stto the top of yourch 3. Do not fasten off; we will keep the green attached to create a nice transition.
Round 3: The Graphic Contrast (White)
- Transition:
sl stto the first corner. Join White. - The Corner:
ch 3, 2 dc, ch 2, 3 dcin the corner. - The Fill:
ch 1. Work a cluster of 3 dc into the side gap created by the green round.ch 1. - The Pattern: Continue working
(3 dc, ch 2, 3 dc)into corners and(3 dc)into side gaps. - Join:
sl stto top ofch 3. Fasten off.

Round 4: The Pistachio Finish
- Attach: Join Pistachio Green in any corner.
- The Border: Work one final round of
(3 dc, ch 2, 3 dc)in corners and(3 dc)in side gaps using the green. This “frames” the white, making the whole square look like a piece of fine tilework.
🌟 Pro-Tips for a Boutique Look
- Color Blocking Strategy: If you are making a full blanket, you can alternate your squares:
- Square Type 1: Pistachio center, White frame.
- Square Type 2: White center, Pistachio frame.
- When joined together in a checkerboard pattern, this creates a sophisticated, professional design.
- The “Invisible” Start: To make your squares look flawless, start your rounds in the middle of a side rather than in a corner. It hides the “seam” where you join the yarn, making the transition look seamless.
- Steam Blocking: This is non-negotiable for white/colored combinations. Because these are two different colors, the tension might vary slightly. Pin your squares down, steam them until they are perfectly flat, and let them dry. This ensures that the crisp white lines stay perfectly straight.

💡 Project Idea: The “Pistachio Garden” Blanket
This motif works beautifully for a lightweight blanket. To take it to the next level, join all your squares using the Flat Slip Stitch Join in a light grey or charcoal yarn. The grey acts as a third color that “grounds” the pistachio and white, making the whole piece look like a designer textile rather than a homemade craft.
Would you like me to help you map out how many squares you would need for a full-sized throw blanket using this specific color combination?