 by
by It sounds like you want to combine two lovely elements: a star shape and a 3D flower effect in crochet! This can be achieved by creating a star-shaped base and then adding layered petals on top, similar to how we made the 3D flower coaster.
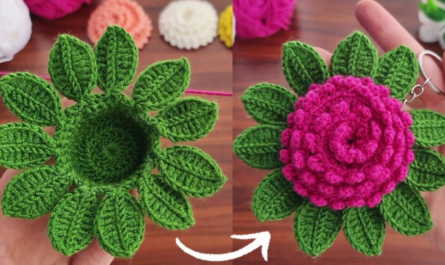
This project will result in a beautiful, decorative piece that’s a bit more advanced than a flat coaster but still very manageable. You can use it as an appliqué on blankets, hats, or bags, or even stiffen it to be a standalone ornament.
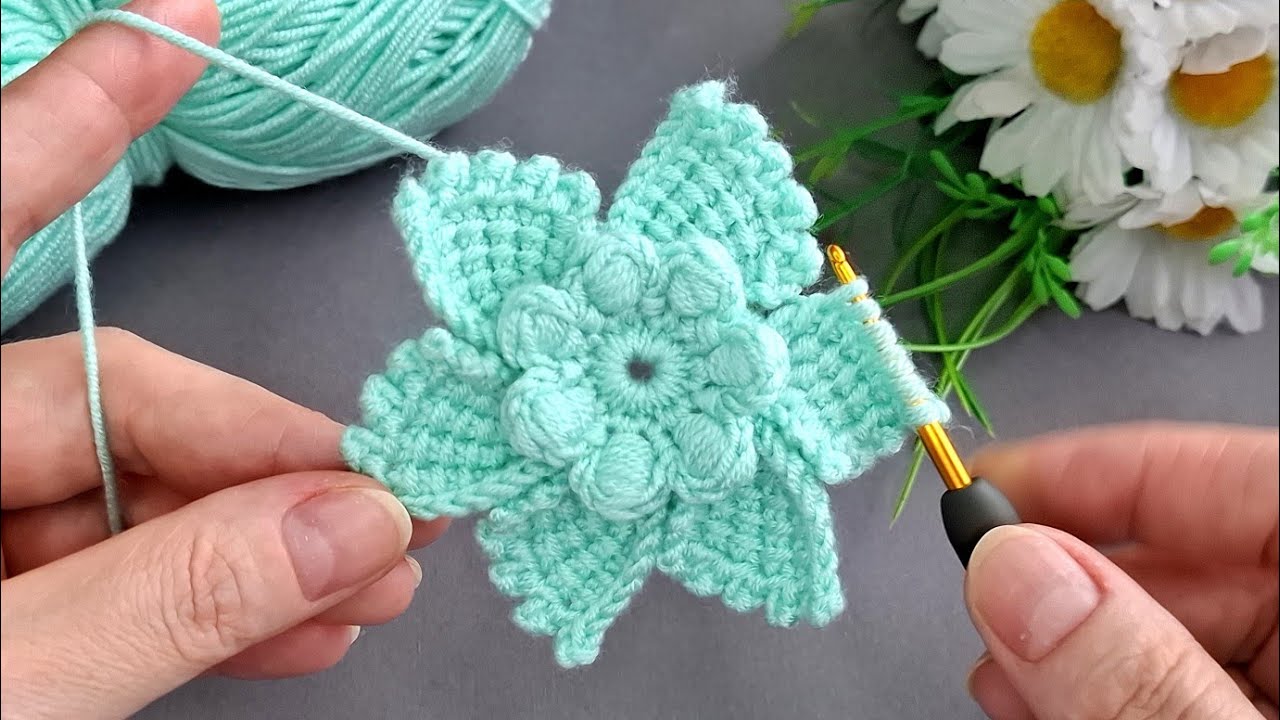
How to Make a Crochet Star 3D Flower
We’ll break this down into three main parts: first, crocheting the star-shaped base, second, crafting the 3D flower petals, and finally, assembling your unique star flower.
1. Essential Materials You’ll Need
- Yarn:
- For the Star Base: Worsted Weight (Aran) cotton or acrylic yarn in your desired star color (e.g., white, cream, blue). Cotton is great for holding shape.
- For the 3D Flower: Worsted Weight (Aran) cotton or acrylic yarn in your desired flower color (e.g., yellow, pink, red).
- Quantity: You won’t need much, so this is a great project for using up yarn scraps!
- Crochet Hook: 4.0mm (US G/6) or 4.5mm (US 7) hook. The exact size depends on your yarn and desired fabric density; aim for stitches that are not too loose.
- Scissors: For cutting yarn.
- Yarn Needle (Tapestry Needle): Essential for weaving in ends and assembling the flower.
2. Basic Crochet Stitches You’ll Use
This project utilizes a few common stitches:
- Chain (ch): To begin rows and create spaces.
- Slip Stitch (sl st): For joining and securing.
- Single Crochet (sc): A dense, foundational stitch.
- Half Double Crochet (hdc): A medium-height stitch.
- Double Crochet (dc): A taller stitch, great for petals.
- Triple Crochet (tr) / Treble Crochet: An even taller stitch, used here for the star points.
- Magic Ring (MR): (Also called Magic Circle) The best way to start a tight center for the star.
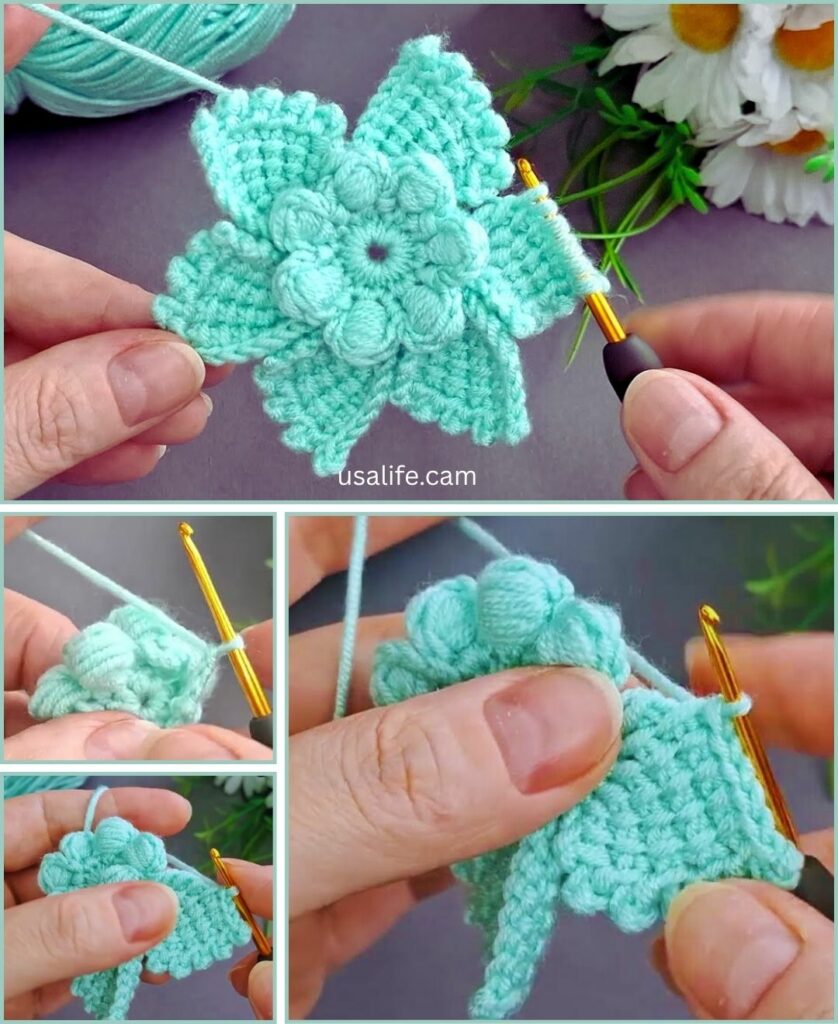
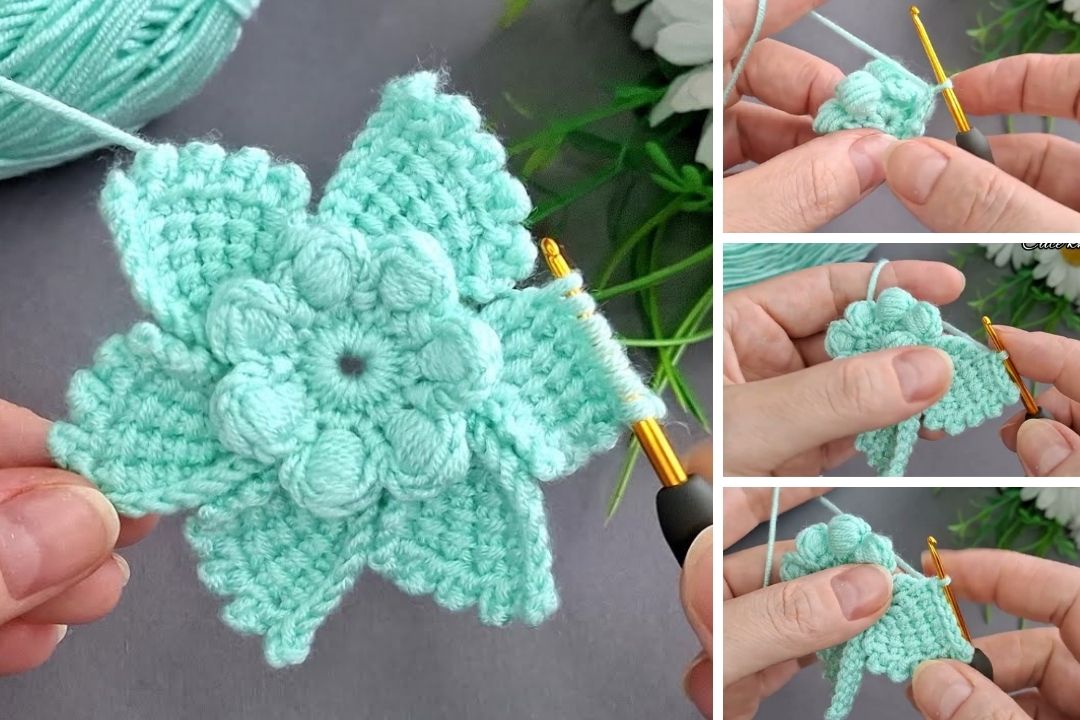
Part 1: Crafting the Crochet Star Base
We’ll make a classic 5-point star.
Abbreviations (US Crochet Terms):
- ch: chain
- sc: single crochet
- sl st: slip stitch
- hdc: half double crochet
- dc: double crochet
- tr: triple crochet (or treble crochet)
- MR: magic ring

Instructions for Star Base:
- Start: Create a Magic Ring (MR).
- Round 1: Ch 2 (does NOT count as a stitch here). Work 10 hdc into the Magic Ring. Pull the ring tight. Join with a sl st to the top of the first hdc. (10 hdc)
- Note: Using hdc instead of sc in the first round creates a slightly larger, more defined center for the star points to build on.
- Round 2 (Creating Points):
- Ch 1 (does NOT count as a stitch).
- *Sl st into the first hdc.
- Work (ch 3, 1 dc, 1 tr, 1 dc, ch 3) into the same hdc where you made the sl st. (This forms one point of your star).
- Sl st into the next hdc.
- Sl st into the next hdc.*
- Repeat from * to * 4 more times around. (You will have 5 star points).
- Join with a final sl st into the very first sl st you made at the beginning of this round.
- Finishing the Star: Fasten off, leaving a long tail (about 12 inches / 30 cm) for sewing if you plan to attach it to something, or a shorter tail if it’s purely decorative. Weave in the starting tail of the magic ring.
Part 2: Crocheting the 3D Flower Petals (Yellow Color)
We’ll make two layers of yellow petals for a nice, full 3D effect.
Instructions for Yellow 3D Flower:
Flower Center / Base (Common for both layers):
- Create a Magic Ring (MR).
- Ch 1 (does NOT count as a stitch).
- Work 8 sc into the Magic Ring.
- Pull ring tight. Join with a sl st to the first sc. (8 sc) (This forms the small base for your petals.)

Flower Layer 1 (Back Layer – Larger Petals – use yellow yarn):
This layer will sit behind the second layer, adding initial fullness to the flower.
- From the center base (8 sc), Ch 2 (does NOT count as a stitch).
- *In the same stitch where you just joined, work (3 dc).
- Sl st into the next stitch.* Repeat from * to * 7 more times. (You will have created 8 “petals,” each made of a 3-dc cluster, with a slip stitch in between them. This makes a dense, slightly ruffled layer.)
- Fasten off, leaving a long tail (about 12 inches / 30 cm) for sewing. Weave in the starting tail of this flower base.
Flower Layer 2 (Front Layer – Smaller Petals – use yellow yarn, or a lighter/darker yellow for contrast):
This layer will sit on top of the first, adding a more defined, raised dimension.
- Create a Magic Ring (MR).
- Ch 1 (does NOT count as a stitch).
- Work 6 sc into the Magic Ring.
- Pull ring tight. Join with a sl st to the first sc. (6 sc) (This is a smaller base for a smaller top layer of petals.)
- Ch 2 (does NOT count as a stitch).
- *In the same stitch where you just joined, work (3 dc).
- Sl st into the next stitch.* Repeat from * to * 5 more times. (You will have created 6 “petals” made of 3 dc clusters.)
- Fasten off, leaving a long tail (about 12 inches / 30 cm) for sewing. Weave in the starting tail of this layer’s base.

Part 3: Assembly & Finishing Your Crochet Star 3D Flower
This is where your star and beautiful yellow flower come together!
- Stack the Flower Layers: Place the smaller 6-petal yellow flower (Layer 2) directly on top of the center of the larger 8-petal yellow flower (Layer 1). Gently arrange the petals so they are staggered (not directly on top of each other) for a fuller, more “blooming” look.
- Secure Flower Layers Together: Use the long yarn tail from Layer 2 and your yarn needle. Stitch through the very center of both flower layers a few times (like an “X” or a small circle) to secure them to each other.
- Attach Flower to Star Base:
- Position the assembled yellow 3D flower in the exact center of your crocheted star base.
- Using the same long tail from Layer 2, stitch through the center of the flower and then down through the very center of the star base (where the magic ring is).
- Make several small stitches in a circular motion around the very center of the flower, ensuring your needle goes through all layers (both flower layers and the star base). This will firmly attach the flower and subtly pull the center down, enhancing the 3D effect of the flower.
- Optional Center Detail: For an extra touch, you can use a small piece of brown or darker yellow yarn to create a few French knots or just a small stitched circle in the very center of the flower before tying off the sewing yarn.
- Weave in All Remaining Ends: Double-check that all yarn tails (from both the star and the flower) are securely woven into the fabric on the back/wrong side of your finished piece. Trim any excess yarn close to the fabric.
- Blocking (Recommended):
- Gently wet your entire star 3D flower. You can briefly dunk it in lukewarm water.
- Carefully squeeze out excess water (do not wring!).
- Lay it flat on a clean towel or a foam blocking mat. Gently shape the star points and softly arrange the 3D petals as desired. You can use rust-proof pins to hold the star’s shape and lift the petals for more dimension.
- Allow it to air dry completely. Blocking will help set the shape of your star and make the flower truly “pop.”
You’ve now created a unique and beautiful crochet star 3D flower! This can be a charming embellishment or a standalone decorative piece. What else would you like to create?