by
by That is a wonderful project! A Crochet Square Blanket made using the Granny Square method is one of the most classic and satisfying projects for beginners. It’s built from smaller, manageable squares joined together, making it less overwhelming than a single large piece.
I will provide a detailed, step-by-step guide on how to create the individual Classic Granny Square and how to assemble them into a blanket.
🧶 Classic Granny Square Blanket Tutorial
This blanket is constructed using multiple individual Classic Granny Squares (the primary motif), which are then sewn or crocheted together, and finished with a border.
Materials You’ll Need
- Yarn: Medium-weight yarn (Worsted/Size 4) is ideal for blankets. Choose 1 main color and 1-3 accent colors.
- Crochet Hook: The size appropriate for your yarn (e.g., 5.0 mm or H/8).
- Scissors
- Tapestry Needle (for weaving in ends and joining squares).
Key Crochet Terms
| Abbreviation | Stitch Name |
| ch | Chain |
| sl st | Slip Stitch |
| dc | Double Crochet |
| Cluster (Cl) | 3 dc worked into the same space |
| Corner | (Cl, ch 2, Cl) |
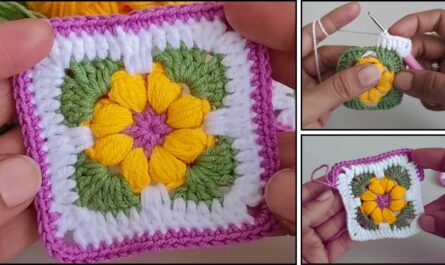
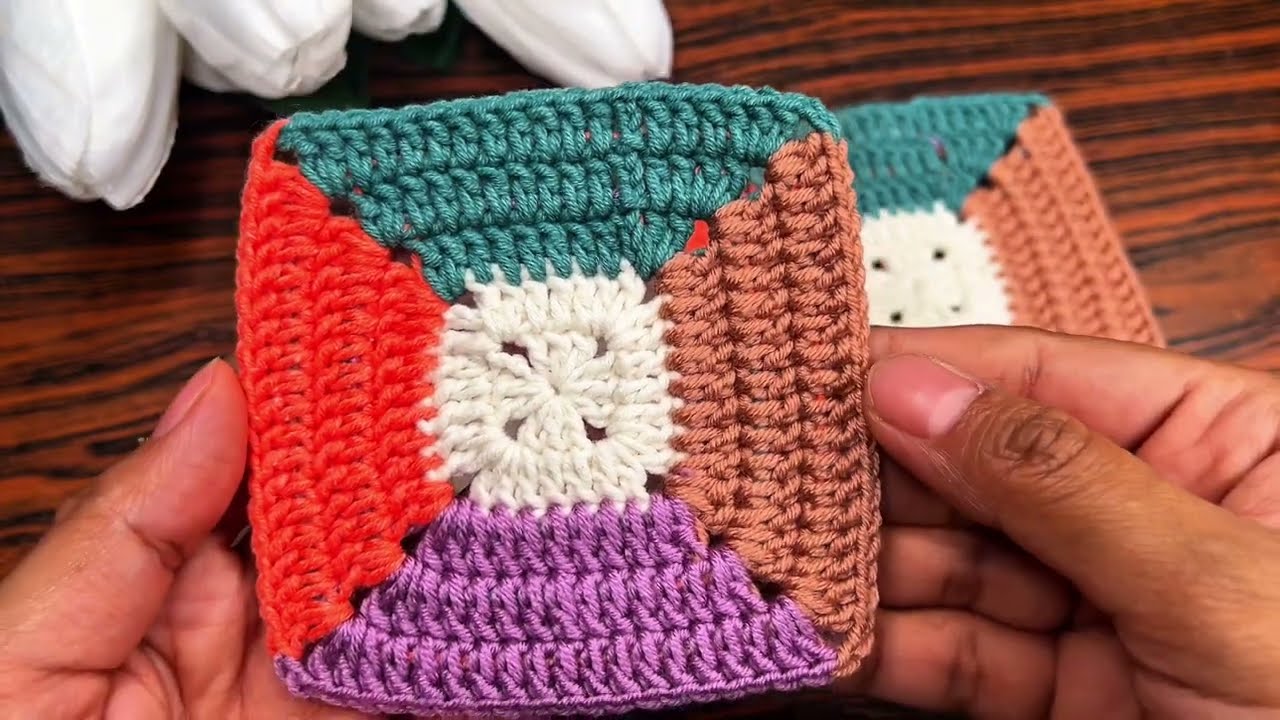
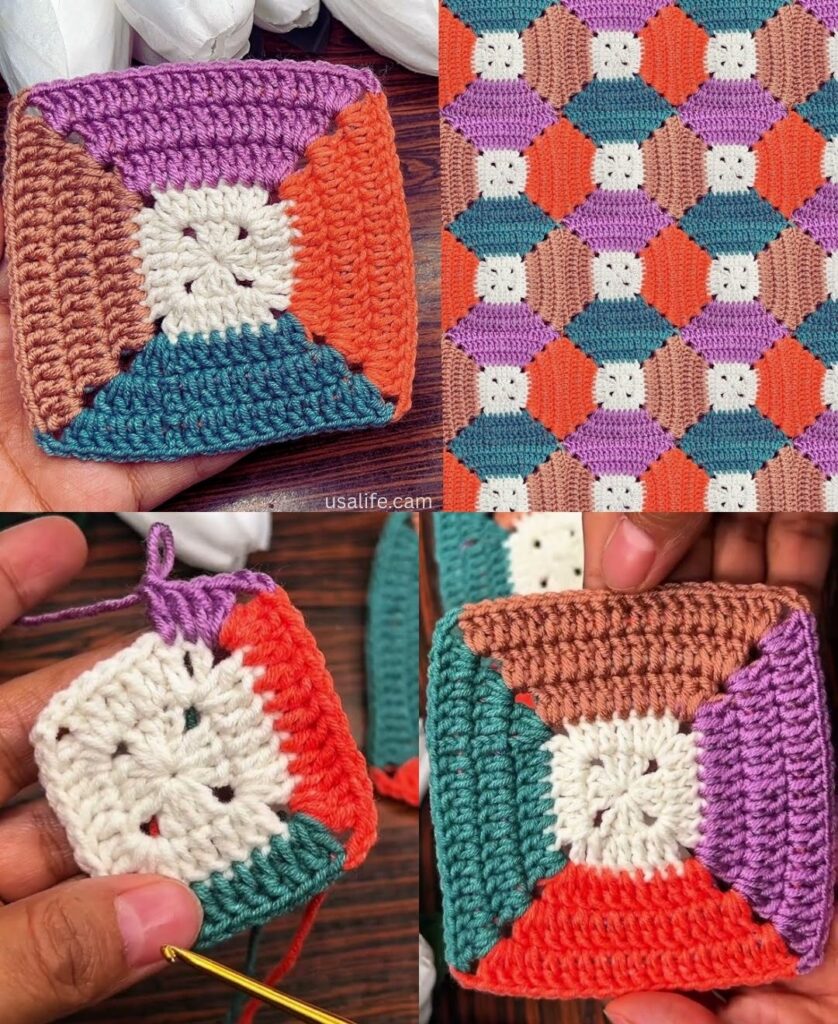
Part 1: Crocheting the Individual Granny Square
Round 1: Creating the Center
- Start the Ring: Make a Magic Ring. (Alternatively, ch 4 and sl st into the first ch to form a ring.)
- First Cluster: ch 3 (counts as dc). Work 2 dc into the ring.
- Corner Space: ch 2.
- Repeat: Work [3 dc into the ring, ch 2] 3 more times. (You have 4 clusters and 4 corner spaces).
- Finish: Pull the tail tight. Join with a sl st to the top of the beginning ch 3.
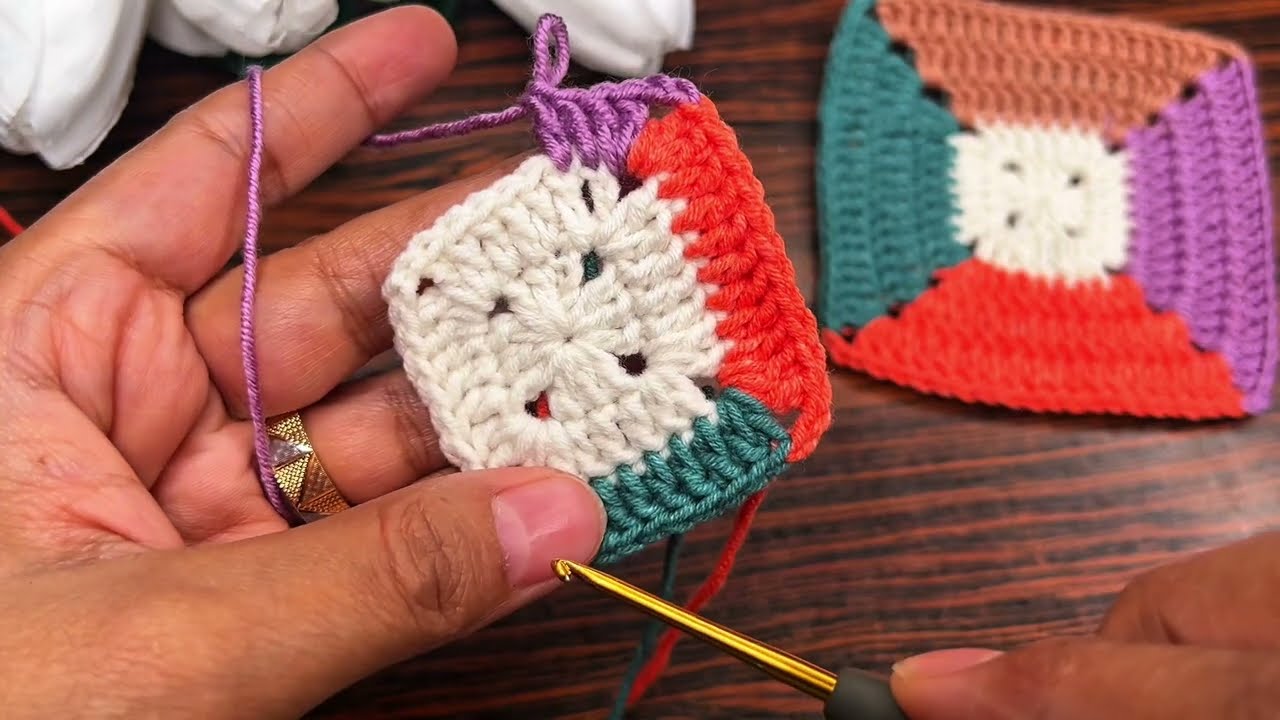
Round 2: Defining the Square
Work only into the chain spaces from the previous round.
- Move to Corner: sl st into the next 2 dc stitches and then sl st into the ch-2 corner space.
- First Corner: ch 3. Work (2 dc, ch 2, 3 dc) into the corner space (a complete Corner).
- Side Separator: ch 1.
- Repeat: Work [Corner (3 dc, ch 2, 3 dc) in the next ch-2 space, ch 1] 3 more times.
- Finish: Join with a sl st to the top of the beginning ch 3.
Round 3 (and subsequent rounds): Expanding the Sides
- Move to Corner: sl st over the next 2 dc stitches and sl st into the ch-2 corner space.
- First Corner: ch 3. Work (2 dc, ch 2, 3 dc) into the corner space.
- Side Clusters: ch 1. Work 3 dc into every ch-1 side space from the previous round. ch 1.
- Repeat: Continue the sequence [Corner, (ch 1, 3 dc in next ch-1 sp) across the side] around the square.
- Finish: Join with a sl st to the top of the beginning ch 3.
💡 Tip: Repeat Round 3 until your squares are the desired size. For a standard throw blanket, squares are often 6 to 12 inches wide.
Part 2: Planning and Preparation
1. Determine Blanket Size
A standard throw blanket is approximately 50 x 60 inches.
- If your square is 10 inches wide, you will need a 5×6 grid of squares (30 squares total).
- If your square is 5 inches wide, you will need a 10×12 grid of squares (120 squares total).
2. Make All Squares
Crochet the total number of squares required. Weave in the ends for each square before joining them—it is easier to do now!
Part 3: Joining the Squares
The easiest method for beginners is the Whipstitch Join using a tapestry needle.
- Layout: Lay all your squares out on a large surface in the final desired configuration (e.g., 5 rows of 6 squares).
- Whipstitch: Thread a long length of your joining yarn (or a contrasting color) onto your tapestry needle.
- Join Rows: Line up two adjacent squares, edge to edge. Insert the needle under both loops of the edge stitches on both squares. Pull the yarn through.
- Work the needle over the top and down through the next corresponding stitch on both squares. Repeat this across the entire side, creating a seam that pulls the two squares together.
- Join all squares into long rows first (e.g., 5 rows of 6 squares).
- Then, join the long rows together to complete the grid.
Part 4: Finishing Border
A border gives the blanket a finished, polished look and hides any slight irregularities where the squares meet.
- Joining Round: Join the yarn anywhere on the blanket edge. Work 1 round of Single Crochet (sc) evenly around the entire perimeter.
- Corners: Work (sc, ch 1, sc) into each corner space to keep the blanket flat.
- Seams: Work a sc into the joining seam to hide it.
- Border Pattern (Optional): Work 2-3 more rounds of a simple stitch like Double Crochet (dc) or the Granny Stitch (cluster, ch 1) to build a decorative frame.
- Final Fasten Off: Fasten off the final yarn tail and weave it securely into the back of the border stitches.
Your beautiful granny square blanket is complete! Would you like to know how to crochet a different style of joining instead of the whipstitch (like the Join-as-You-Go method)?
Video tutorial: