by
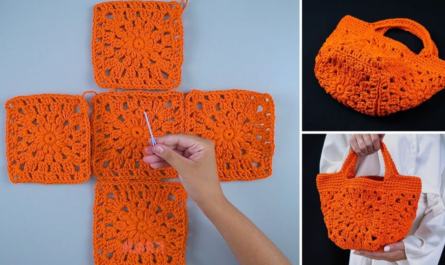
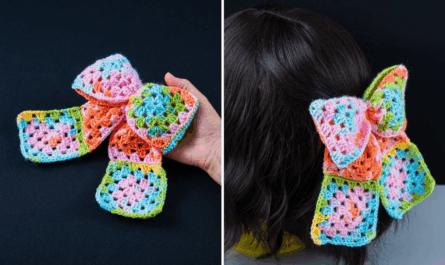
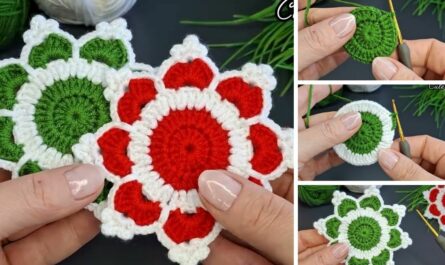
by The Granny Square is arguably the most famous and fundamental crochet motif! It is incredibly versatile, relatively easy to master, and forms the basis for blankets, garments, bags, and more.
Here is a detailed, step-by-step pattern for the classic Open Traditional Granny Square, which is perfect for beginners.
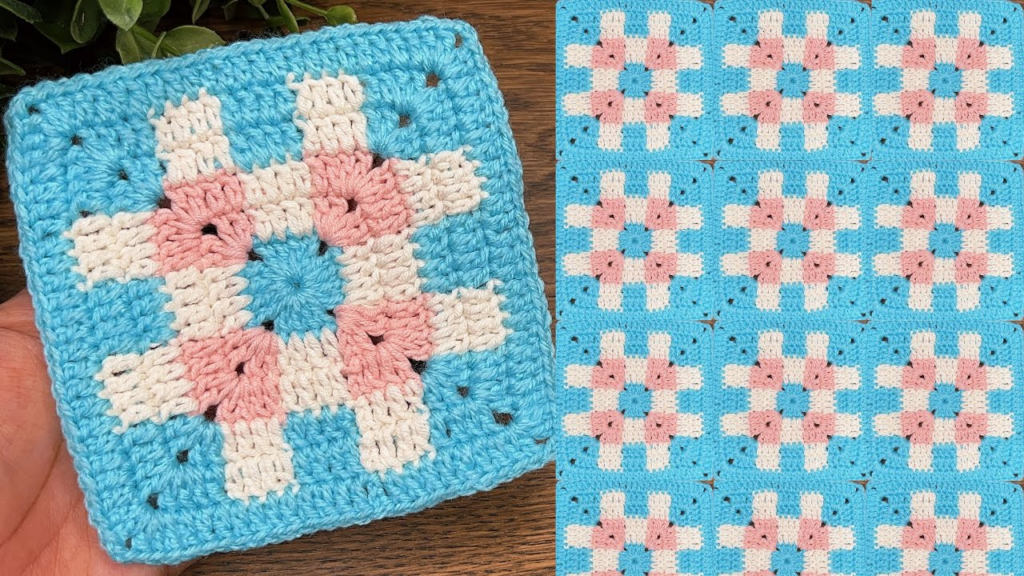
The Classic Open Traditional Granny Square Pattern
This pattern is worked in rounds, increasing at the corners to maintain a square shape.
Skill Level: Beginner Yarn Recommendation: Any weight acrylic or cotton yarn is suitable. Worsted weight (or Aran) is the most common choice for practice. Hook Recommendation: Use the hook size recommended for your chosen yarn (e.g., a 5.0 mm [H/8] or 5.5 mm [I/9] for worsted weight). Abbreviations:
- ch: chain
- st(s): stitch(es)
- sl st: slip stitch
- dc: double crochet
- sp: space
- ch-sp: chain space
- MR: Magic Ring (or you can ch 4 and sl st to 1st ch to form a ring)

Pattern Instructions
Foundation: Starting the Center
- Start with a Magic Ring (MR) OR Chain 4 and sl st into the first chain to form a ring.
Round 1: Forming the First Corners
The first round establishes the four corners and the four sides.
- Ch 3 (counts as your first dc).
- Work 2 more dc stitches into the ring. (This forms your first 3-dc cluster).
- Corner 1: Ch 3.
- Work 3 dc into the ring.
- Corner 2: Ch 3.
- Work 3 dc into the ring.
- Corner 3: Ch 3.
- Work 3 dc into the ring.
- Corner 4: Ch 3.
- Sl st to the top of the starting ch 3 to join the round.
- (You should have four 3-dc clusters and four ch-3 corner spaces).

Round 2: Expanding the Square
In this round, you will place clusters in the corner spaces from the previous round and create chain spaces along the sides.
- Move to the corner: Sl st into the next 2 dc stitches, then sl st into the first ch-3 corner space. (This positions you correctly for the next round).
- Start Corner 1: Ch 3 (counts as 1st dc). Work 2 more dc into the same corner space.
- Corner Turn: Ch 3.
- Work 3 dc into the same corner space. (You have completed your first corner: (3 dc, ch 3, 3 dc)).
- Side: Ch 1.
- Corner 2: Work (3 dc, ch 3, 3 dc) into the next ch-3 corner space.
- Side: Ch 1.
- Repeat steps 6 and 7 two more times (for Corner 3 and Corner 4).
- Sl st to the top of the starting ch 3 to join the round.
- (You should have eight 3-dc clusters, four ch-3 corners, and four ch-1 side spaces).
Round 3: Establishing the Pattern Repeat
The pattern is now fully established: clusters in side spaces, and corners in corner spaces.
- Move to the side space: Sl st into the next 2 dc stitches, then sl st into the first ch-1 side space.
- Start Side 1: Ch 3 (counts as 1st dc). Work 2 more dc into the same ch-1 side space. (This is your first side cluster).
- Corner: Ch 1. In the next ch-3 corner space, work (3 dc, ch 3, 3 dc).
- Side: Ch 1.
- Work 3 dc into the next ch-1 side space. (This fills the first side space).
- Corner: Ch 1. In the next ch-3 corner space, work (3 dc, ch 3, 3 dc).
- Repeat steps 4 through 6 around the square.
- Closing: After the last corner, Ch 1. Sl st to the top of the starting ch 3 to join the round.
- (You should have twelve 3-dc clusters, four ch-3 corners, and eight ch-1 side spaces).

Subsequent Rounds (The Repeat):
Continue working the pattern established in Round 3:
- Sl st into the ch-1 space to begin the round.
- Start with a 3-dc cluster in the ch-1 space where you started (Ch 3, 2 dc).
- Work 3 dc clusters into every ch-1 space along the sides, separating them with ch 1.
- Work the (3 dc, ch 3, 3 dc) corner sequence into every ch-3 corner space.
- Always use ch 1 to separate clusters along the sides.
- Join with a sl st to the top of the starting ch 3.
Continue until the square reaches your desired size.
Tips for a Beautiful Granny Square
- Color Changes: To change color, complete the last sl st of the round with the new color. Then proceed with the sl st moves or ch 3 with the new color.
- Perfect Seams (No Traveling): If you dislike slip stitching over to the corner, you can turn your work at the end of each round. This creates a slightly different texture and eliminates the visible “seam” line, though it is less traditional.
- Solid Granny Square: If you want a denser, less lacy fabric, follow the steps above but replace all “ch 1” side spaces with “dc” stitches. This eliminates all the holes on the sides.
- Blocking: If your square is curling or not lying flat, use blocking! Wet your finished square(s), pin them to a board in a perfect square shape, and let them dry completely. This is especially helpful for cotton or wool.
- Joining: Granny squares can be joined using various methods:
- Whipstitch/Sewing: Simple and sturdy.
- Slip Stitch Join: Creates a neat, raised ridge.
- Single Crochet Join: Creates a pronounced seam.
- Join-As-You-Go (JAYG): Joining the squares in the final round of the second square (as detailed in previous answers) is often the fastest and neatest method.

Video tutorial: