by
by Crocheting a Butterfly Patterned Blouse or Tunic is a fantastic project that combines intricate detail with wearable fashion. The “butterfly” pattern usually refers to a specific type of lace stitch that creates a repeating fan or shell motif, often secured in the center with a few chains, resembling butterfly wings when laid flat. Alternatively, it can mean a technique where individual butterfly motifs are crocheted and then joined or appliquéd.
Given that you are in a warm climate (Phnom Penh), the lace nature of the butterfly pattern is perfect, as it offers excellent breathability.
Yarn Selection for Blouse/Tunic
For a comfortable and draping garment, select a fiber that feels cool against the skin:
- 100% Cotton or Cotton/Bamboo Blend: Highly recommended for excellent drape, softness, and breathability.
- Yarn Weight: Use Sport Weight (Category 2) or DK (Double Knitting/Category 3) for a light and airy tunic. Worsted weight may be too heavy for the heat.
- Hook Size: Usually 3.5mm to 4.5mm, depending on your gauge, ensuring the fabric is loose enough to drape well.
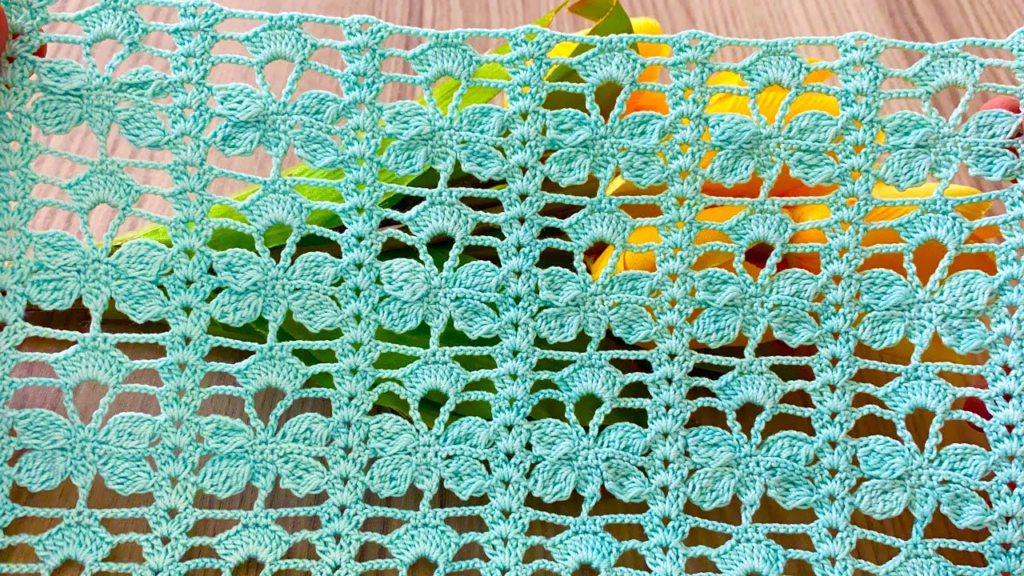
Method 1: The Butterfly Lace Stitch (Fabric Construction)
This method creates the butterfly pattern directly in the fabric rows, giving the garment a lovely, integrated lace structure.
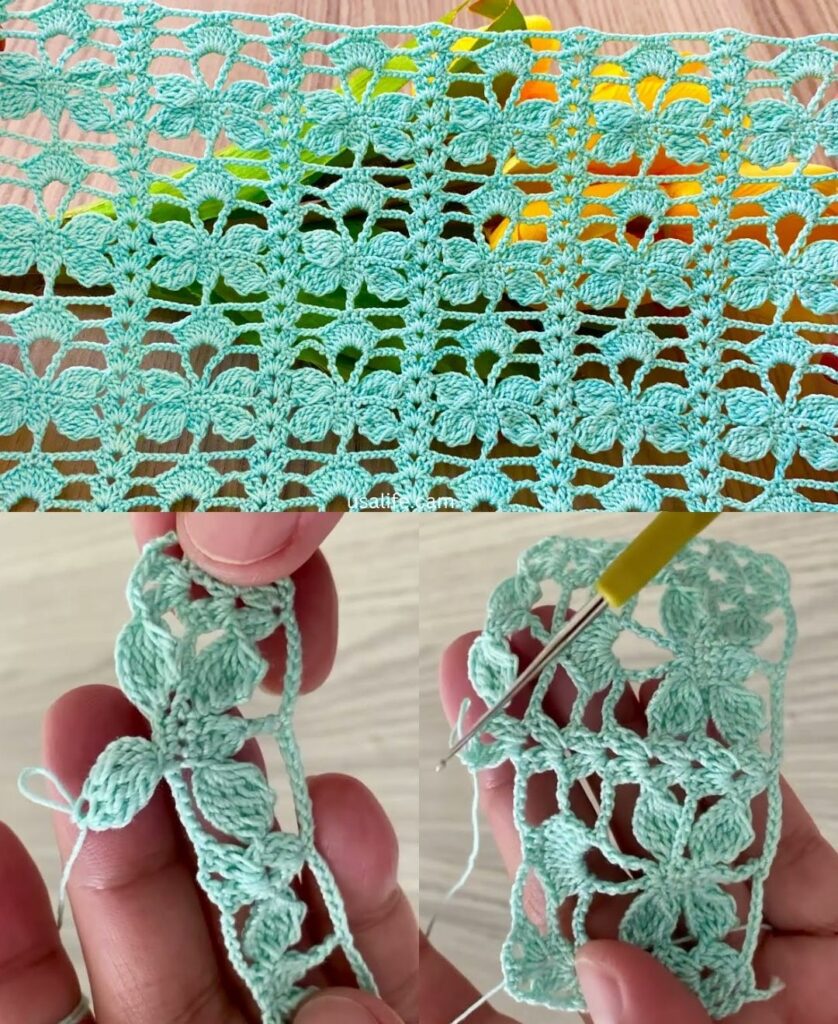
A. Understanding the Stitch
The butterfly stitch is typically composed of a large fan or shell cluster that is “closed” by the surrounding stitches, often with a series of chain loops or single crochets to form the body.

Example of a Simple Butterfly Lace Repeat:
- Foundation: Requires a multiple of stitches (e.g., multiple of 10 + 2).
- Row 1 (Setup): Work a simple row of single crochet (sc) or double crochet (dc).
- Row 2 (Butterfly): Work
scin the first st.*ch 3, skip 3 sts, dc 5 times into the next st (Fan/Wing), ch 3, skip 3 sts, sc in the next st*. Repeat from*. - Row 3 (Closing): Work a row of
scordc, anchoring the row above the fans. The new fans will be built on this row, often centered over thescordcthat separated the previous fans.
B. Garment Construction Outline (Top-Down Yoke)
The Top-Down Yoke method is best for a blouse/tunic as it minimizes seams and allows the lace pattern to flow continuously.
1. Yoke and Increases
- Start: Create a foundation chain for the neckline.
- Yoke Shape: Work the initial rows in a simpler stitch (like
dcorhdc), incorporating increases evenly at 4 or more points (depending on the yoke shape—round or square) until the piece lays flat and reaches the armpit depth. - Integrate Pattern: Once the yoke is established, integrate the Butterfly Lace stitch pattern into the rows/rounds, ensuring the increases are maintained in the background stitches so the yoke continues to grow.
2. Body and Division
- Divide: Once the yoke reaches the armpit, use a Dividing Row to separate the stitches for the two sleeves from the stitches for the front and back (as detailed in previous general garment instructions).
- Tunic Length: Continue working the Butterfly Lace pattern in continuous rounds for the body. The lace pattern will naturally have beautiful drape. Continue until the garment reaches the desired Tunic length (mid-thigh or knee).
- Tapering: If you want the tunic to taper slightly inward at the waist, work a decrease round every 5-6 inches.
3. Sleeves and Finishing
- Sleeves: Rejoin yarn at the underarm and work the Butterfly Lace pattern in rounds. The open lace is perfect for airy summer sleeves.
- Blocking: Wet block the finished garment, pinning out the lace to open up the pattern and enhance the overall drape.

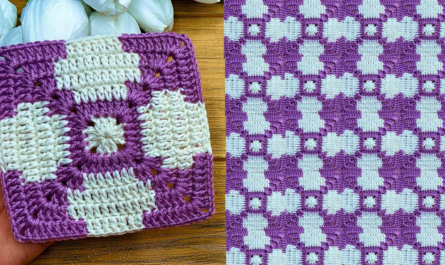
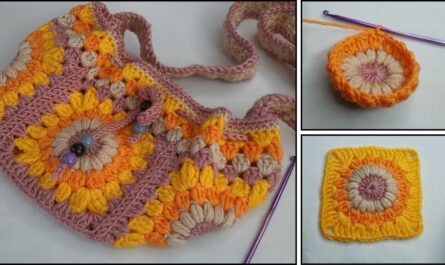
Method 2: Individual Butterfly Motifs (Joined Construction)
This method involves crocheting individual butterfly squares or motifs and joining them together to form the tunic/blouse. This allows for fun color variations!
A. Essential Materials & Key Concepts
- Motif: Use a simple Granny Square or Hexagon pattern, but replace the standard double crochet clusters with your Butterfly Lace stitch, or use a pattern specifically designed to look like a butterfly in a square.
- Sizing: This method requires careful calculation. You must determine how many motifs wide and long you need for the garment size.
B. Garment Construction Outline (Joined Motifs)
1. Motif Creation
- Count: Calculate the total number of motifs needed for the back, front, and sleeves based on your desired final measurements and the size of your motif.
- Crochet: Crochet all the individual butterfly motifs. Crucially, ensure they are all the exact same size.
2. Assembly and Shaping
- Joining: Use a neat joining technique (like the Slip Stitch Join or Join-As-You-Go/JAYG) to connect the motifs. JAYG is often preferred as it’s faster and avoids seams.
- Body: Join the motifs into large front and back panels. Join the shoulders and side seams.
- Sleeves: Join motifs to form the sleeves, or leave the edges unattached for an open, airy effect.
3. Shaping (Armholes and Neckline)
- Irregular Edges: Because the tunic is made of squares, the armholes and neckline will have jagged, uneven edges.
- Evening Out: Use a series of “make-up” rows along the neckline, armholes, and hem. Work stitches like
sl st,sc,hdc, anddcinto the open chain spaces and corners to create a smooth, even edge suitable for wearing.
4. Finishing
- Edging: Work 2-3 final rounds of
scorhdcon the neckline and armholes for stability. - Blocking: Pin the finished tunic, stretching the seams and lace motifs gently, and wet block to ensure the joined garment hangs straight.
Tips for a Successful Butterfly Tunic/Blouse
- Swatching the Pattern: For Method 1, always swatch the Butterfly Lace pattern to ensure it lies flat. If it puckers, your chain spaces are too small; if it ruffles, your chain spaces are too large.
- Yarn Weight Consistency: If using the motif method (Method 2), stick strictly to the same yarn and hook size for every single motif. A difference of even a few millimeters will make joining difficult.
- Drape over Density: Since it’s a warm climate garment, prioritize a stitch count and yarn choice that results in a loose, drapey fabric over a dense, thick fabric.
Which method—integrated lace (Method 1) or joined motifs (Method 2)—appeals more to your design style?
Video tutorial: