 by
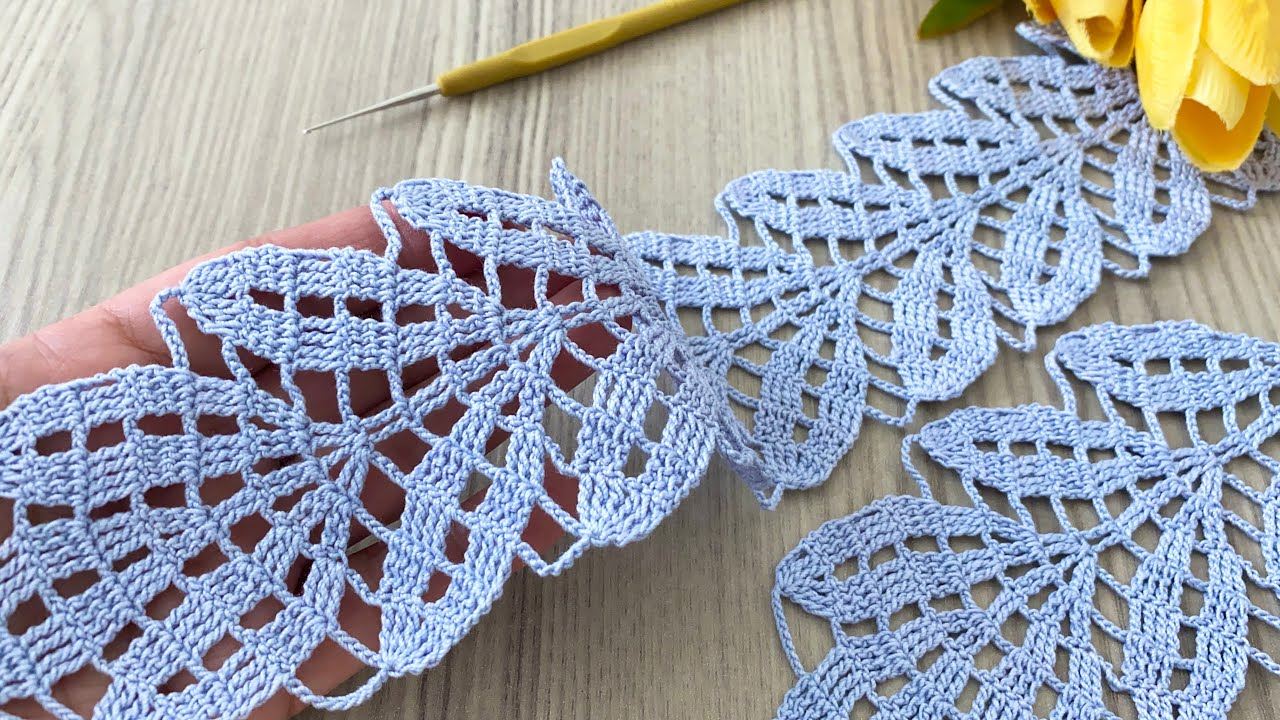
by This “New and Stylish” leaf pattern is inspired by organic, botanical textures. Unlike traditional flat leaves, this design features a raised central vein and a serrated edge, giving it a 3D, high-fashion look.
This motif is truly multi-purpose: join them tip-to-base for a Table Runner, appliqué them onto a Blouse, or connect them into a sprawling Lace Shawl.

🧶 Choosing Your “Botanical” Materials
The style of the leaf changes with the “weight” of your fiber:
| Project | Suggested Yarn | Hook Size |
| Lace Edging / Blouse | Size 10 Mercerized Cotton | 1.50 mm – 2.0 mm |
| Runner / Wall Hanging | Linen or Bamboo Blend (DK) | 3.5 mm – 4.0 mm |
| Statement Shawl | Wool or Alpaca (Worsted) | 5.0 mm – 5.5 mm |
🛠 Step-by-Step Tutorial: The Raised Vein Laurel Leaf
This leaf is worked in continuous rounds around a starting chain. The “Style” comes from working in the Back Loops Only (BLO) to create the ribbed texture.
Stitch Key (US Terms)
- ch: Chain
- sl st: Slip Stitch
- sc: Single Crochet
- hdc: Half Double Crochet
- dc: Double Crochet
- BLO: Back Loop Only (Insert hook only into the loop furthest from you).

The Pattern
1. The Stem & Base
- Start: ch 15.
- Foundation: sl st in 2nd ch from hook. sc in next 2 chains. hdc in next 2 chains. dc in next 4 chains. hdc in next 2 chains. sc in next 2 stitches.
- Tip: In the very last chain, work (sc, ch 2, sc). This creates the pointed leaf tip.
2. The Return Side (Symmetry)
- Now you will work back down the other side of the starting chain.
- Mirror: sc in 2 stitches, hdc in 2, dc in 4, hdc in 2, sc in 2.
- Join: sl st to the first sc.
3. The Textured Ribbing (The “New” Style)
- Round 2 (Working in BLO): ch 1.
- The Rise: sc in BLO of next 4 stitches. hdc in BLO of next 4. dc in BLO of next 4.
- The Tip: In the ch-2 space at the tip, work (2 dc, ch 3, sl st in 1st ch of the ch-3, 2 dc). Note: This “sl st in 1st ch” creates a sharp Picot point.
- The Descent: dc in BLO of next 4. hdc in BLO of next 4. sc in BLO of next 4.
- Join: sl st to the base.
4. The Decorative Stem
- ch 6. sl st in 2nd ch from hook and next 4 chains.
- Fasten off and leave a long tail for sewing if using as an appliqué.

📐 Multi-Purpose Applications
1. The Magnificent Table Runner
Instead of making individual leaves, you can join-as-you-go.
- Make your first leaf.
- While making the second leaf, when you reach the Picot Tip, work a sl st into the Base Stem of the first leaf.
- This creates a “Vine” of leaves that looks stunning draped down the center of a table.
2. The Stylish Motif Blouse
Use these leaves to transform a simple garment:
- Neckline Appliqué: Crochet 6-8 leaves in a gradient of greens or autumnal oranges.
- Placement: Pin them around the collar of a plain linen blouse and sew them down with invisible thread. It creates a “Couture” look that is very popular in European boutiques.
3. The 3D Leaf Shawl
For a shawl, you want the leaves to overlap like real foliage.
- Math Tip: If each leaf is $L$ cm long and $W$ cm wide, you can calculate the total leaves ($N$) needed for a triangular shawl using:$$N \approx \frac{\text{Total Area}}{\text{Area of 1 Leaf}}$$
- Assembly: Connect the leaves at the widest part of the “belly” (the dc section) to create a solid fabric that still has the “scalloped” edge of individual leaves.
💡 Professional Tips for “Style”
- Variegated Yarn: Use a yarn that shifts from dark green to light lime. Because of the BLO ribbing, the color changes will look like natural light hitting a real leaf.
- Stiffening: For home decor (like a runner), dip the finished leaves in a mixture of water and sugar (or fabric stiffener) and block them flat. This keeps the points sharp and professional.
- Beading: Add a single crystal bead to the picot tip of each leaf for a “dewdrop” effect that looks incredible on a shawl or blouse.

Would you like me to explain how to create a “Triple Leaf Vine” where three leaves grow from a single central stem?
Video tutorial: