 by
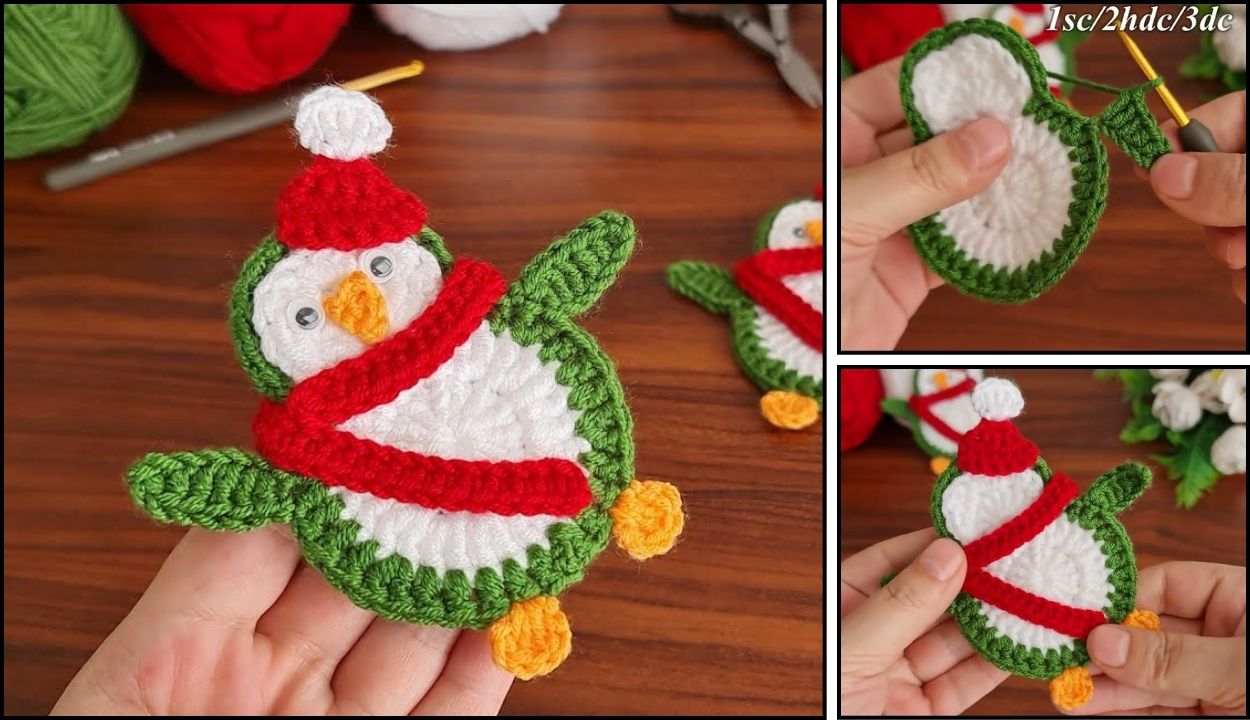
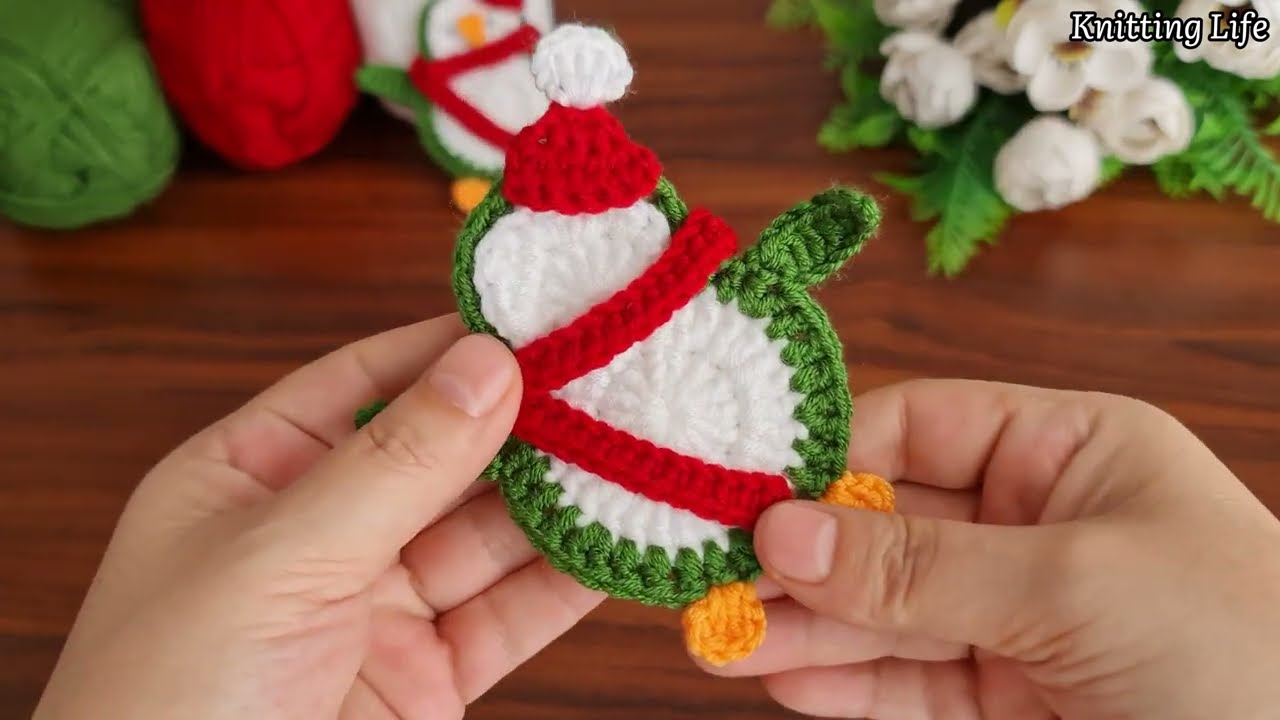
by Crocheting a penguin ornament is an absolutely adorable project, perfect for adding a touch of handmade charm to your home, especially as a Christmas decoration, or just as a cute little desk companion! It’s a fun way to use basic amigurumi (crocheted toy) techniques, making it a great step up for beginners who have mastered basic stitches.
Given that it’s currently warm in Phnom Penh, your yarn choice isn’t dictated by warmth, so you have plenty of flexibility. Acrylic yarn is a fantastic choice for amigurumi because it’s affordable, widely available in many colors, durable, and easy to work with. Cotton yarn also works wonderfully, giving a slightly crisper stitch definition.

How to Crochet a Penguin Ornament: A Detailed Guide
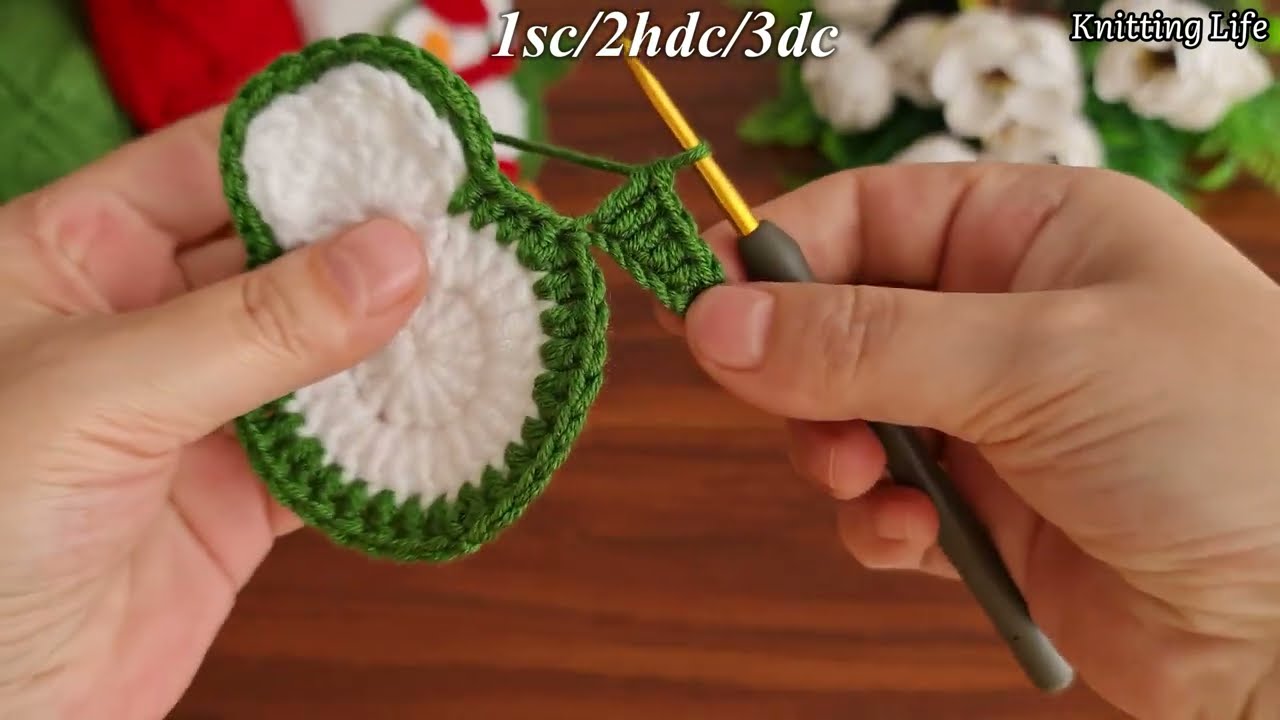
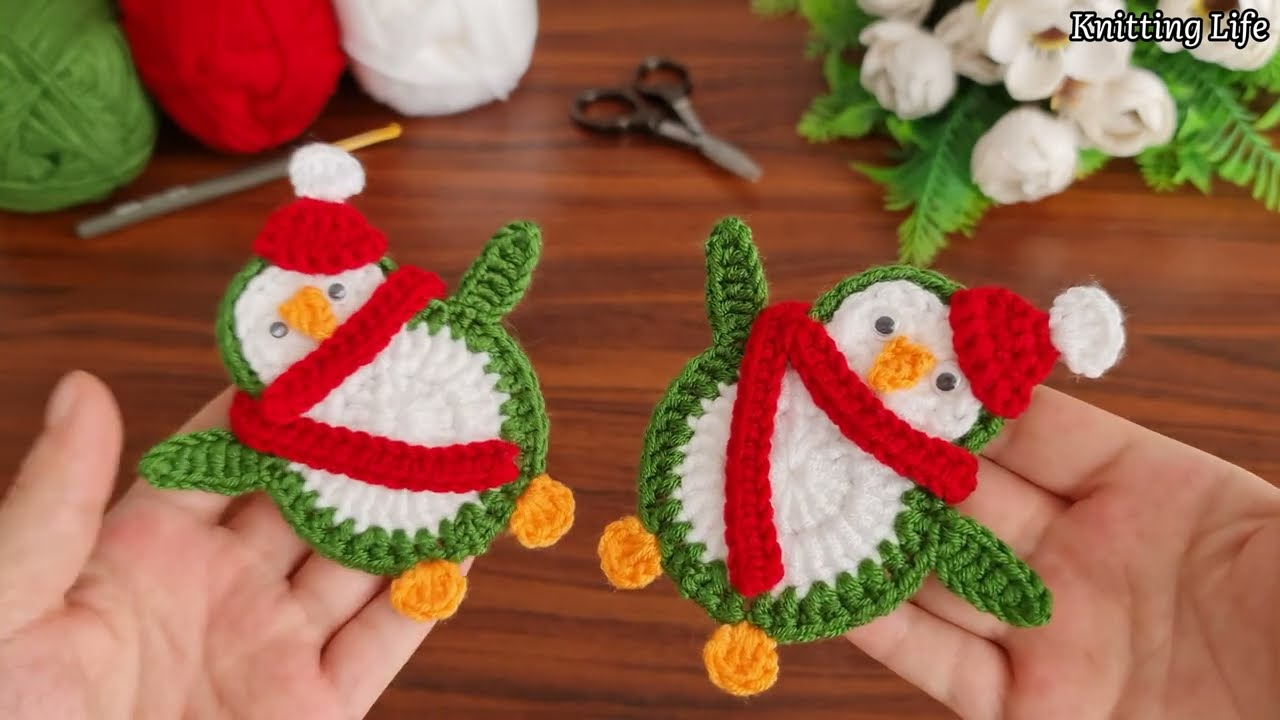
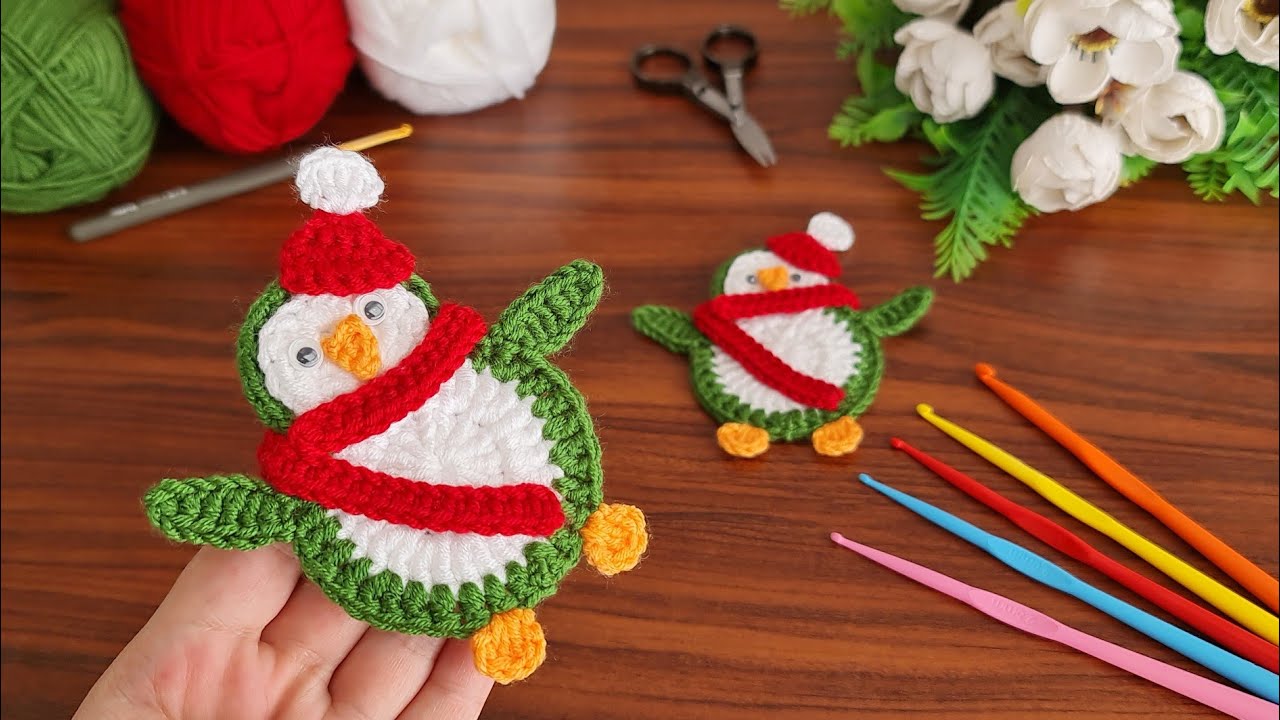
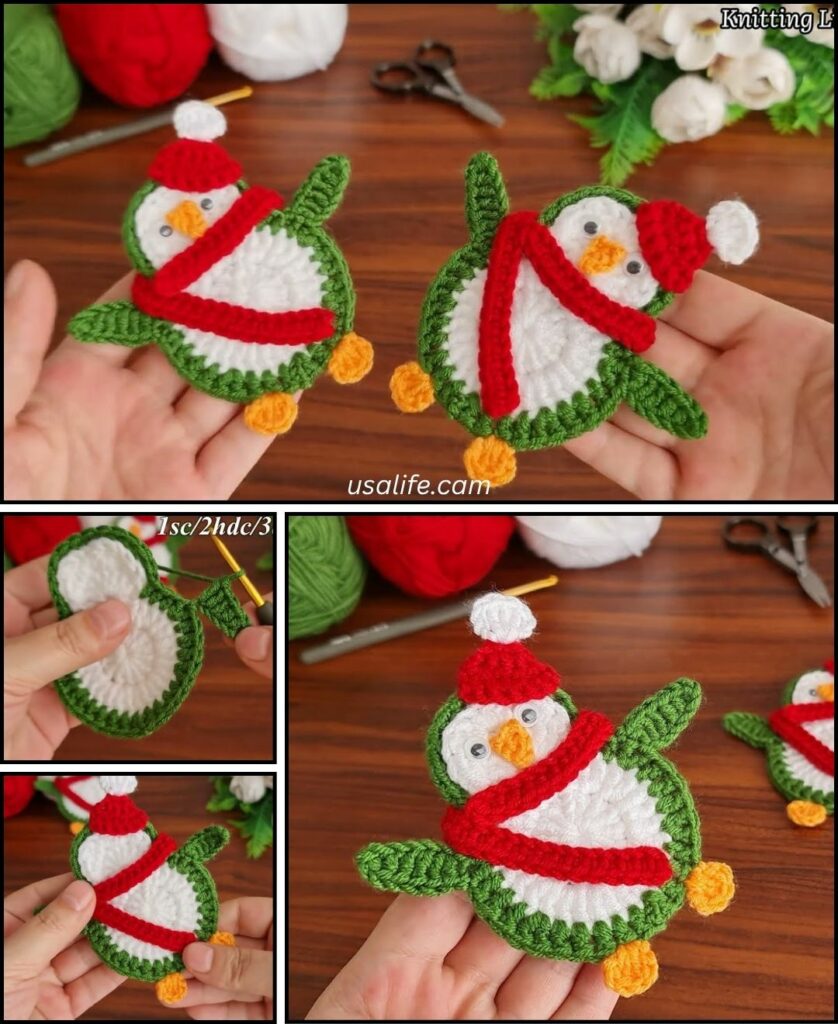
This pattern creates a cute little standing penguin, perfect for an ornament or small desk buddy. We’ll break it down into the body, wings, feet, and beak.
1. Essential Materials You’ll Need
- Yarn:
- Main Color (MC): Black or Dark Blue (for the penguin’s back). Worsted Weight (Aran / Medium / Category 4).
- Belly Color (BC): White or Cream. Worsted Weight.
- Beak/Feet Color (FC): Orange or Yellow. Worsted Weight.
- Small amounts of each color are sufficient, making this a great scrap yarn project.
- Crochet Hook:
- A 3.0mm (US C/2) or 3.5mm (US E/4) hook. For amigurumi, you want a hook size that creates a very tight fabric with no visible gaps when stretched, so the stuffing doesn’t show through. If your stitches are naturally loose, go down a hook size.
- Scissors: For cutting yarn.
- Yarn Needle (Tapestry Needle): Essential for weaving in ends and sewing parts together.
- Stuffing:
- Polyester Fiberfill (Poly-fil): Standard stuffing for amigurumi.
- Safety Eyes (Optional but Recommended): Small (6mm-8mm) black safety eyes. If using for small children, embroidering eyes is safer.
- Stitch Marker (Highly Recommended!): To mark the beginning of each round, as you’ll be working in continuous spirals.
- Small Ribbon or Cord (Optional): For hanging the ornament.
2. Basic Crochet Stitches You’ll Use
This pattern uses fundamental amigurumi stitches:
- Magic Ring (MR) / Adjustable Ring: (Highly Recommended!) Creates a tight, hole-free center for starting spherical shapes. Alternatively, you can
ch 2, then work all stitches of Round 1 into the 2nd ch from the hook. - Chain (ch): Used for starting.
- Slip Stitch (sl st): For joining and neatening.
- Single Crochet (sc): This will be your primary stitch, creating a dense fabric.
- Increase (inc): Work 2 sc into the same stitch to add stitches.
- Decrease (sc2tog): Work 2 sc stitches together into one to reduce stitches. For a neater decrease in amigurumi, use the invisible decrease (insert hook into FLO of next 2 stitches, yarn over, pull through both FLO, yarn over, pull through 2 loops). This is optional for beginners.
- Working in Rounds (Continuous/Spiral): You’ll build the main body in a continuous spiral for a seamless look.
- Fasten Off: To securely end your work.
- Weaving in Ends: Hiding yarn tails for a neat finish.
Crochet Penguin Ornament Pattern
This pattern creates a penguin approximately 3-4 inches (7.5-10 cm) tall, suitable for an ornament.
Abbreviations (US Crochet Terms):
- MC: Main Color (Black/Dark Blue)
- BC: Belly Color (White/Cream)
- FC: Feet Color (Orange/Yellow)
- MR: Magic Ring
- ch: chain
- sc: single crochet
- st(s): stitch(es)
- inc: increase (work 2 sc into the same stitch)
- sc2tog: single crochet 2 together (decrease)
(...): work stitches into the same stitch or space[...]: repeat instructions in brackets- FO: Fasten off
Part 1: The Body (Top Down)
Start with MC (Black/Dark Blue). Work in continuous rounds.
- Round 1: Create a MR. Work 6 sc into the MR. (6 sc)
- Place your stitch marker in the first sc. Move it up to the first stitch of each new round.
- Round 2: Inc in each st around. (12 sc)
- Round 3:
*Sc in the next st, inc in the next st.*Repeat from*to*around. (18 sc) - Round 4:
*Sc in the next 2 sts, inc in the next st.*Repeat from*to*around. (24 sc) - Round 5:
*Sc in the next 3 sts, inc in the next st.*Repeat from*to*around. (30 sc) - Round 6:
*Sc in the next 4 sts, inc in the next st.*Repeat from*to*around. (36 sc)- Change Color (MC to BC): Work the last sc of Round 6 up to the last yarn over. Drop MC. Pick up BC (White/Cream). Yarn over with BC and pull through both loops to complete the sc.
- From now on, the stitches of the body will be worked through the Back Loop Only (BLO) for shaping, creating a crisp line for the color change.
- Round 7 (BC, BLO): Sc in each st around, working in BLO only. (36 sc)
- The front loops that remain visible from Round 6 will create a nice ridge.
- Round 8 (BC): Sc in each st around. (36 sc)
- Round 9 (BC): Sc in each st around. (36 sc)
- Place Safety Eyes (Optional): If using safety eyes, insert them between Rounds 7 and 8 (the white section), approximately 5-6 stitches apart. Secure the washers on the inside.
- Round 10 (BC):
*Sc in the next 4 sts, sc2tog over the next 2 sts.*Repeat from*to*around. (30 sc) - Round 11 (BC):
*Sc in the next 3 sts, sc2tog over the next 2 sts.*Repeat from*to*around. (24 sc)- Stuff the body firmly with polyester fiberfill or yarn scraps. Ensure it’s evenly filled and holds a good shape.
- Round 12 (BC):
*Sc in the next 2 sts, sc2tog over the next 2 sts.*Repeat from*to*around. (18 sc)- Change Color (BC to MC): Work the last sc of Round 12 up to the last yarn over. Drop BC. Pick up MC (Black/Dark Blue). Yarn over with MC and pull through both loops to complete the sc.
- Round 13 (MC):
*Sc in the next st, sc2tog over the next 2 sts.*Repeat from*to*around. (12 sc) - Round 14 (MC):
*Sc2tog over the next 2 sts.*Repeat from*to*around. (6 sc)- Fasten off MC, leaving a long tail (about 8-10 inches / 20-25 cm).
- Close the hole: Thread the yarn tail onto your yarn needle. Insert the needle under the front loop only (FLO) of each of the remaining 6 stitches. Pull the yarn tail tight to close the hole. Secure the yarn and weave it into the body.
Part 2: Wings (Make 2)
With MC (Black/Dark Blue).
- Round 1: Create a MR. Work 6 sc into the MR. (6 sc)
- Work in continuous rounds.
- Round 2: Sc in each st around. (6 sc)
- Round 3:
*Sc in the next st, inc in the next st.*Repeat from*to*3 times. (9 sc) - Rounds 4-5: Sc in each st around. (9 sc)
- Round 6:
*Sc in the next st, sc2tog over the next 2 sts.*Repeat from*to*3 times. (6 sc)- Fasten off, leaving a long tail for sewing. Do not stuff the wings.
- Flatten the wing and use the yarn tail to sew the opening closed, then sew to the sides of the penguin’s body (roughly on the black section, just above the white belly line).
Part 3: Feet (Make 2)
With FC (Orange/Yellow).
- Round 1: Create a MR. Work 6 sc into the MR. (6 sc)
- Round 2: Sc in each st around. (6 sc)
- Round 3:
*Sc in the next st, inc in the next st.*Repeat from*to*3 times. (9 sc)- Fasten off, leaving a long tail for sewing. Do not stuff the feet.
- Flatten the foot and use the yarn tail to sew the opening closed, then sew to the bottom of the penguin’s body, slightly to the front, allowing it to stand.
Part 4: Beak (Make 1)
With FC (Orange/Yellow).
- Round 1: Create a MR. Work 4 sc into the MR. (4 sc)
- Round 2:
*Sc in the next st, inc in the next st.*Repeat from*to*2 times. (6 sc)- Fasten off, leaving a long tail for sewing. Do not stuff the beak.
- Pinch the beak flat and sew it to the face, just below the safety eyes.
Part 5: Finishing Touches
- Weave in ALL Ends NEATLY: This is crucial for a professional look. Use your yarn needle to carefully weave in every single yarn tail securely.
- Add a Hanger (Optional):
- Cut a piece of yarn (same color as the head or a contrasting festive color) about 6-8 inches long.
- Fold it in half to form a loop.
- Using your yarn needle, thread the two ends of the loop through the very top center of the penguin’s head.
- Tie the ends securely in a knot. Trim any excess yarn.
You’ve now crocheted an adorable penguin ornament! These make fantastic gifts, stocking stuffers, or additions to your own holiday decor.