 by
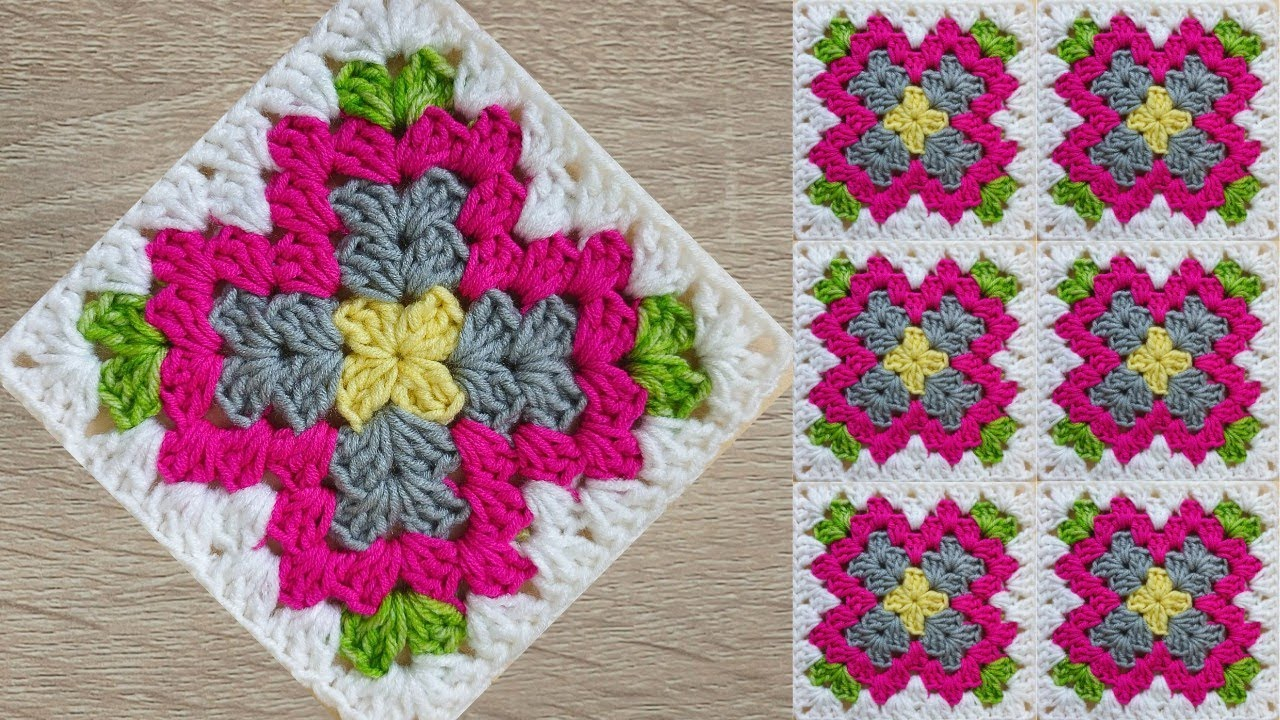
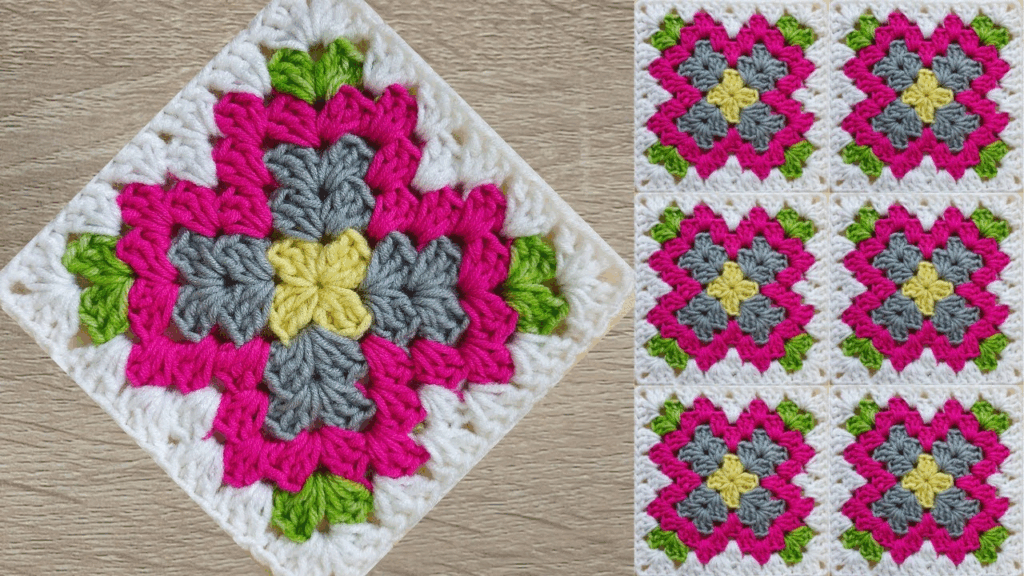
by Crocheting a colorful granny square is a fantastic way to practice color changes and create a vibrant, scrap-busting motif. The technique is simple: you complete one or more rounds with one color, tie it off, and then join a new color to start the next round.
Here is a detailed, step-by-step guide on how to crochet a classic granny square with color changes in every round.
Materials Needed
- Yarn: Medium-weight yarn (worsted/size 4) in at least three different colors (Color A, Color B, Color C). This is a great project for using up yarn scraps!
- Crochet Hook: The size recommended for your yarn.
- Scissors: For cutting yarn after each color change.
- Tapestry Needle: To weave in the ends.
Abbreviations
- ch: chain
- sl st: slip stitch
- dc: double crochet
- sp: space
- st(s): stitch(es)

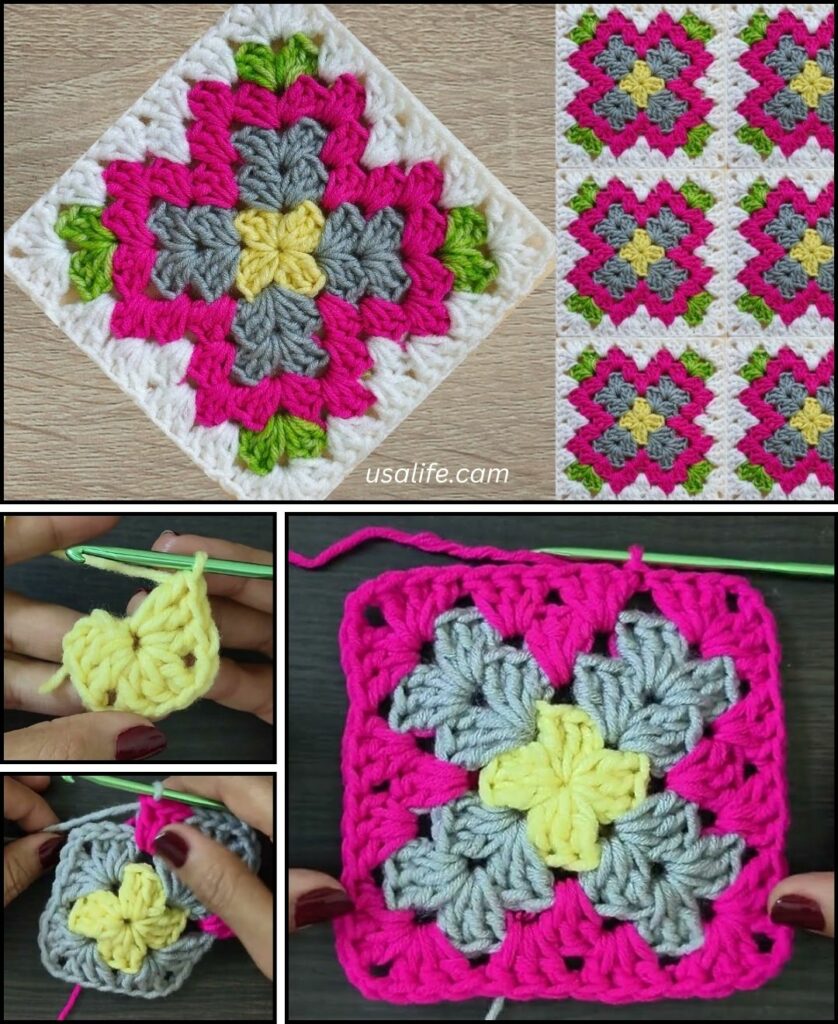
Step-by-Step Colorful Granny Square
In this pattern, you will cut the yarn and join a new color at the start of every round.
Round 1: The Center (Color A)
- Start the Ring: With Color A, make a slip knot, then ch 4. Join with a sl st into the first chain to form a ring.
- First Side and Corner:
- ch 3 (counts as your first dc).
- Work 2 dc into the center ring.
- ch 2 (this is your first corner space).
- Repeat Three Times:
- Work 3 dc into the ring.
- ch 2.
- Finish and Change Color: Join with a sl st to the top of the beginning ch 3. Cut Color A, leaving a 6-inch tail, and pull the tail through the loop to secure it.

Round 2: Defining the Square (Color B)
In this round, you will work the classic granny cluster (3 dc) and full corners (3 dc, ch 2, 3 dc).
- Join Yarn: Join Color B with a sl st into any ch-2 corner space from Round 1.
- First Full Corner:
- ch 3 (counts as first dc), work 2 dc into the same corner space.
- ch 2.
- Work 3 dc into the same corner space.
- First Side Space:
- ch 1 (this is the side chain between corners).
- Repeat Three Times: Move to the next ch-2 corner space.
- Work (3 dc, ch 2, 3 dc) into that space.
- ch 1.
- Finish and Change Color: Join with a sl st to the top of the beginning ch 3. Cut Color B, leaving a tail, and pull the tail through to secure.

Round 3: Expanding the Sides (Color C)
Now you will have both corner spaces and side spaces to work into.
- Join Yarn: Join Color C with a sl st into any ch-2 corner space from Round 2.
- First Corner:
- ch 3, work 2 dc, ch 2, 3 dc into the same corner space.
- Sides:
- ch 1.
- Work 3 dc into the next ch-1 side space.
- ch 1.
- Next Corner: Work (3 dc, ch 2, 3 dc) into the next ch-2 corner space.
- Repeat the side and corner sequence two more times.
- Finish and Change Color: Join with a sl st to the top of the beginning ch 3. Cut Color C, leaving a tail, and secure it.
Round 4 and Beyond: Repeating and Growing
You can continue this pattern indefinitely, switching colors every round to make your square as large and colorful as you like.
- Start: Join your next color into any ch-2 corner space.
- Corner: Work the corner cluster: (ch 3, 2 dc, ch 2, 3 dc).
- Sides: Work (3 dc, ch 1) into every single ch-1 side space until you reach the next corner.
- Next Corner: Work (3 dc, ch 2, 3 dc).
- Repeat the side and corner sequence around.
- Finish: Join, cut, and secure the yarn.
Finishing: Weaving in Ends
The biggest challenge with colorful granny squares is dealing with the tails. You will have two tails for every round (one from the start, one from the end).
- Weave Securely: Use your tapestry needle to thread each tail through the stitches on the back of the square. Weave the tail in one direction for about an inch, then reverse direction for a few stitches to lock it in place before trimming.
- Embrace the Fluff: Don’t worry if the back looks a little fluffy! It’s a natural part of color change projects.
This simple repeating structure allows you to showcase any color combination, making each granny square uniquely yours!
Video tutorial: