by
by That is a wonderful and specific request! The Wind Rose Motif (also known as a Compass Rose) is a geometric design characterized by its radial symmetry and pointed segments, often using taller stitches to create a dimensional, star-like effect.
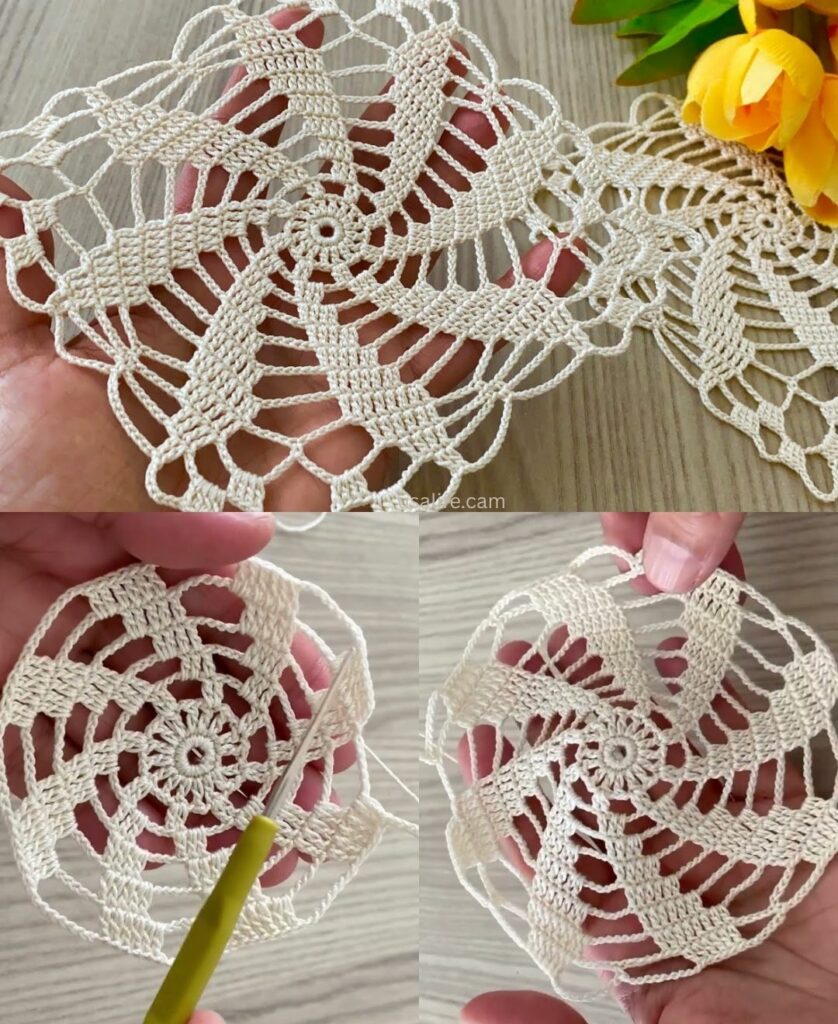
This tutorial details a classic method to create a dimensional 8-Pointed Wind Rose Motif, which is perfect for coasters, appliques, or for joining into a larger, patterned textile.
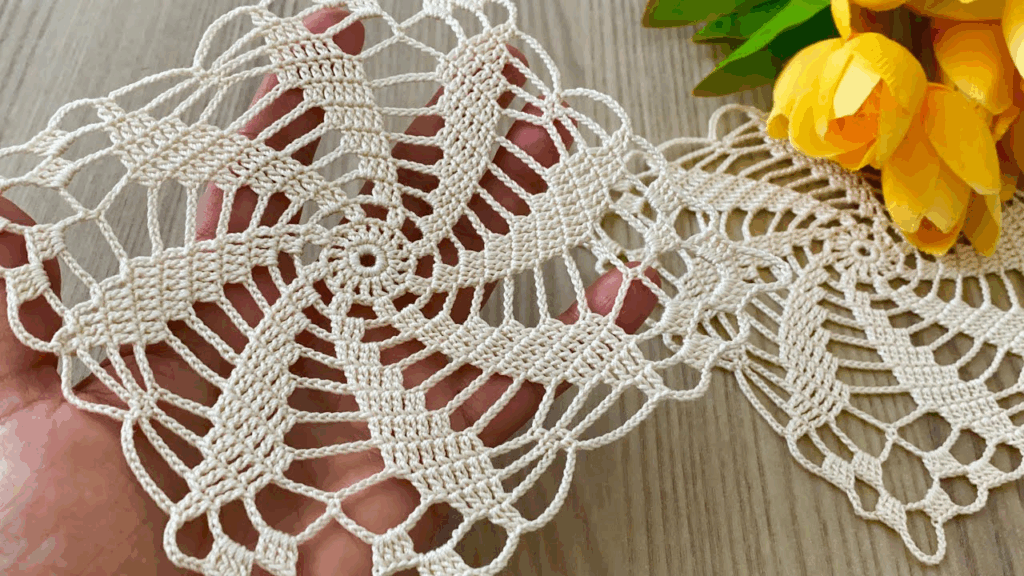
🧭 8-Pointed Wind Rose Motif Tutorial
This motif builds the pointed segments using increasing and decreasing stitches to form the sharp, radiating points.
Materials You’ll Need
- Yarn/Thread: DK or Worsted Weight yarn for a sturdy finish, or Size 10 Cotton Thread for a delicate, navigational chart look.
- Crochet Hook: The size appropriate for your yarn (e.g., 4.0 mm – 5.0 mm).
- Scissors, Tapestry Needle.
Key Crochet Terms
| Abbreviation | Stitch Name |
| ch | Chain |
| sl st | Slip Stitch |
| sc | Single Crochet |
| hdc | Half Double Crochet |
| dc | Double Crochet |
| tr | Treble Crochet (Triple Crochet) |
| Popcorn | Popcorn Stitch (Optional Center Texture) |
Part 1: Establishing the Center and Spokes
Round 1: Foundation (Center)
- Start: Make a Magic Ring. ch 3 (counts as dc). Work 15 dc into the ring.
- Finish: Pull the tail tight. Join with a sl st to the top of the ch 3. (16 sts).

Round 2: Creating the Radial Spokes
We establish the foundation for the eight distinct points.
- ch 1. Work sc in the same st.
- Spoke Loop: ch 4. Skip 1 stitch.
- Repeat: [sc in the next st, ch 4, skip 1 st] 7 more times. (8 ch-4 loops).
- Finish: Join with a sl st to the first sc.
Part 2: Building the Dimensional Points
Round 3: Defining the Points (First Layer)
We work clusters of tall stitches into the ch-4 loops to create sharp points.
- sl st into the first ch-4 loop.
- First Point: ch 3 (counts as dc). Work (dc, tr, ch 1, tr, 2 dc) into the same ch-4 loop.
- Anchor: Work sc into the next sc anchor.
- Repeat: Work [Point Shell (2 dc, tr, ch 1, tr, 2 dc) into the next ch-4 loop, sc into the next sc anchor] 7 more times.
- Finish: Join with a sl st to the top of the beginning ch 3. (8 defined points).
Round 4: Expanding and Defining the Edges
This round adds a layer of mesh and defines the outer edge of the points.
- sl st over the next 2 dc stitches to reach the tr stitches. ch 1. Work sc in the next tr.
- Outer Point: Work (sc, Picot, sc) into the ch-1 space (the peak of the point).
- Side Mesh: Work sc in the next tr. ch 5. Work sc in the next tr of the following point.
- Repeat: [sc Picot sc in the ch-1 peak, sc in the next tr, ch 5, sc in the next tr of the following point] 7 more times.
- Finish: Join with a sl st to the first sc.

Part 3: Final Shaping and Border
Round 5: Closing the Gaps
This round fills the large ch-5 loops and creates a rounded, stable edge.
- sl st into the next sc (to move to the base of the point).
- Point Segment: ch 1. Work sc in the Picot peak.
- Filling Gap: Work 6 hdc into the next ch-5 loop (this adds fullness and stability to the side).
- Repeat: Work [sc in the Picot peak, 6 hdc into the ch-5 loop] 7 more times.
- Finish: Join with a sl st to the first sc. Fasten off.
Final Steps: Blocking
Blocking is essential for this motif to achieve the crisp, defined points of a Wind Rose.
- Wet: Gently wet the finished motif.
- Pin: Lay it flat and carefully pin all eight Picot peaks outward into a perfect star shape. Ensure the center is flat and the sides are symmetrical.
- Dry: Allow the motif to dry completely to set the lace and the sharp points.
Your beautiful and dimensional Wind Rose Motif is now ready!
Video tutorial: