by
by 
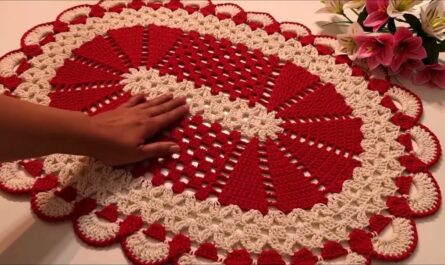
Elevate your home decor with a touch of handmade charm by crocheting your own oval rug! This versatile project is perfect for beginners and seasoned crocheters alike, offering a chance to experiment with color, texture, and stitch patterns. So grab your hook, yarn, and let’s dive into the delightful world of oval rug creation!
Materials:
- Yarn: Choose a medium-weight yarn suitable for rugs. Wool or acrylic blends are popular options for their durability and washability. Consider the desired rug size and adjust yarn quantity accordingly.
- Crochet Hook: Select a hook size appropriate for your chosen yarn weight. Typically, a size H-8 (5mm) or I-9 (5.5mm) hook works well for medium-weight yarn.
- Stitch Markers: These handy tools will help you mark the beginning and end of your oval, ensuring even shaping.
- Tapestry Needle: This will be used to weave in yarn ends and secure your finished rug.
- Optional: Rug backing (to prevent slipping) and sewing machine (for attaching the backing)
Choosing Your Pattern:
There are endless possibilities when it comes to oval rug patterns! You can find free patterns online or in crochet magazines, or even design your own. Consider the following factors when selecting a pattern:

- Skill Level: Choose a pattern that matches your crochet experience. Beginner-friendly patterns typically involve simple stitches like single or double crochet.
- Size: Decide on the desired size for your rug, ensuring it fits the intended space.
- Stitch Pattern: Explore various stitch patterns to create a unique texture for your rug. Popular choices include bobbles, moss stitch, and granny squares.
Getting Started:
- Chain Up: Most oval rug patterns begin with a foundation chain. Follow the pattern instructions to determine the chain length needed for your desired rug size.
- Work in Rows: Once you have your foundation chain, start crocheting rows using the specified stitches and stitch counts mentioned in the pattern. Remember to place stitch markers at the beginning and end of each row to maintain the oval shape.
- Increase and Decrease Stitches: To create the oval shape, you’ll need to increase stitches at the wider ends and decrease stitches at the narrower ends. The pattern will guide you on how and when to do this.
- Change Colors (Optional): If your pattern incorporates multiple colors, follow the instructions to switch yarn colors at the designated points. This adds visual interest and dimension to your rug.
- Finishing Touches: Once you reach the desired rug size, weave in all yarn ends using your tapestry needle. You can also add a rug backing for extra grip and stability. Simply sew the backing fabric onto the wrong side of your rug using the sewing machine.

Tips and Tricks:
- Gauge Swatch: Before starting the entire rug, make a small gauge swatch to ensure your stitches match the pattern gauge. This helps prevent the finished rug from being too large or too small.
- Tension Consistency: Maintain consistent tension throughout your crocheting to create an even and neat-looking rug.
- Take Breaks: Crocheting a large rug can take time. Don’t hesitate to take breaks to avoid fatigue and maintain focus.
- Personalize It! Feel free to add your own personal touches to your rug. Experiment with different stitch patterns, fringe the edges, or incorporate embellishments like pom-poms or tassels.
With a little dedication and creativity, you can crochet a stunning oval rug that adds warmth and personality to your home. So grab your hook, unleash your inner yarn artist, and get ready to create a cozy masterpiece!
I hope this detailed blog provides a helpful guide for crocheting your own oval rug. Remember, the key is to have fun and experiment! Feel free to share your creations and ask any questions you may have in the comments below. Happy crocheting!
P.S. Don’t forget to share pictures of your finished oval rug! We’d love to see your beautiful creations!
Here are some additional resources that you may find helpful:
- Free Oval Rug Crochet Patterns: https://www.youtube.com/watch?v=z_M1TU4eMb8
- Tips for Crocheting an Oval Rug: https://m.youtube.com/watch?v=FAi3tE11XWM
- Choosing Yarn for Crocheting Rugs: https://lovelifeyarn.com/best-yarn-for-crochet-rug/
I hope this information is helpful! Please let me know if you have any other questions.
Video tutorial