by
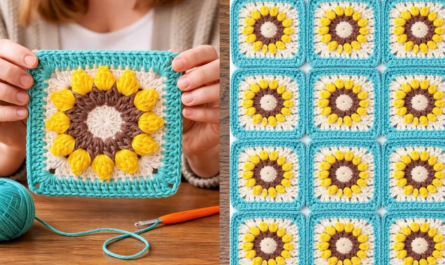
by Crocheting a colorful flower motif is a wonderfully joyful and versatile project! These little blooms are perfect for adding a pop of color to almost anything: as appliqués on blankets, hats, or bags; strung together for garlands; turned into jewelry; or even joined to make larger, vibrant pieces. They’re also an excellent way to use up small bits of yarn and practice basic crochet stitches, especially working in the round and changing colors neatly.
Since you’re in Phnom Penh, where it’s warm, you’ll want yarn that’s easy to work with and holds its shape well. 100% cotton yarn or a smooth acrylic yarn are both excellent choices. Cotton offers superb stitch definition, making your petal details really stand out, while acrylic comes in an endless array of colors and is generally very forgiving for beginners.
How to Crochet a Colorful Flower Motif: Step by Step
This tutorial will guide you through creating a classic, flat flower motif with distinct petals and a contrasting center. We’ll use two or three colors to make it truly vibrant.
1. Essential Materials You’ll Need
- Yarn:
- Color A (Flower Center): A small amount of yarn for the center (e.g., yellow, orange, or a contrasting bright color).
- Color B (Petals): A small amount of yarn for the petals (e.g., pink, red, blue, purple, or another vibrant color).
- Optional Color C (Outer Ring/Edge): A small amount of yarn for an optional final accent round (e.g., green for a leaf-like effect, or a coordinating color).
- Worsted Weight (Aran / Medium / Category 4) Cotton or Acrylic Yarn is recommended for good visibility and easy handling.
- Crochet Hook:
- A 3.5mm (US E/4) or 4.0mm (US G/6) hook. Choose a hook size that feels comfortable with your yarn and creates stitches that are neither too tight nor too loose.
- Scissors: For cutting yarn.
- Yarn Needle (Tapestry Needle): Essential for neatly weaving in all those yarn tails from your color changes.
2. Basic Crochet Stitches You’ll Use
This project relies on fundamental crochet stitches and working in the round:
- Magic Ring (MR) / Adjustable Ring: (Highly Recommended!) Creates a neat, hole-free center for your flower. If this is tricky, an alternative is to
ch 4and thensl stinto the first chain to form a ring, then work your first round of stitches into this chain ring. - Chain (ch): Used for starting, creating spaces, and sometimes for adding height for petals.
- Slip Stitch (sl st): Used for joining rounds seamlessly and for neatly moving your hook across stitches without adding height.
- Single Crochet (sc): A dense, short stitch.
- Half Double Crochet (hdc): A versatile, medium-height stitch.
- Double Crochet (dc): A taller stitch, frequently used for creating fuller petals.
- Fasten Off: To securely end your work.
- Weaving in Ends: Hiding yarn tails within your finished work for a professional look.
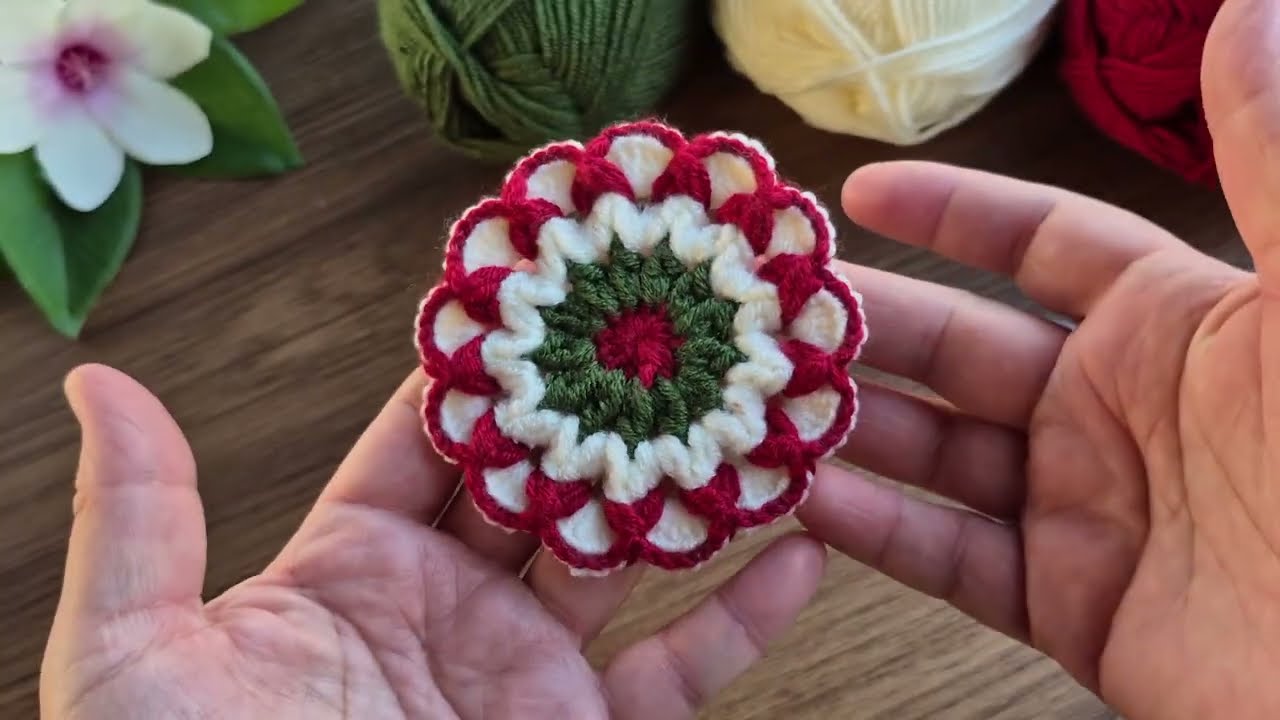
Crochet Flower Motif Pattern
This pattern creates a flower that’s approximately 2-3 inches (5-7.5 cm) in diameter, depending on your yarn and tension.
Abbreviations (US Crochet Terms):
- MR: Magic Ring
- ch: chain
- sl st: slip stitch
- sc: single crochet
- hdc: half double crochet
- dc: double crochet
- st(s): stitch(es)
(...): work stitches into the same stitch or space[...]: repeat instructions in brackets- FO: Fasten off
Understanding Color Changes in Joined Rounds
When you need to change colors at the end of a round for a clean transition:
- Work the last stitch of the current round (e.g., the last hdc or sl st to join) up to the last yarn over. You’ll have the final loops for that stitch on your hook (e.g., 3 loops for an hdc, 2 for a sl st).
- Drop the current color yarn. Pick up your new color yarn.
- Yarn over with the new color and pull through all the loops on your hook to complete the stitch.
- Now, with the new color, make your starting chain (e.g., ch 1 or ch 2) for the next round.
- Cut the old color yarn, leaving a 4-6 inch tail to weave in later.
Part 1: Flower Center (Color A)
Use Color A (e.g., Yellow) yarn.
- Round 1: Create a MR. Ch 2 (this chain does not count as a stitch). Work 12 hdc into the Magic Ring. Join with a sl st to the top of the very first hdc you made (not the ch-2). (You should have 12 hdc stitches in this round).
- Gently pull the tail of the MR to close the center hole tightly. It’s a good idea to weave in this short starting tail now to secure it.
- Change color to Color B (e.g., Pink) as you make the last sl st to join this round. FO Color A, leaving a tail for weaving in.
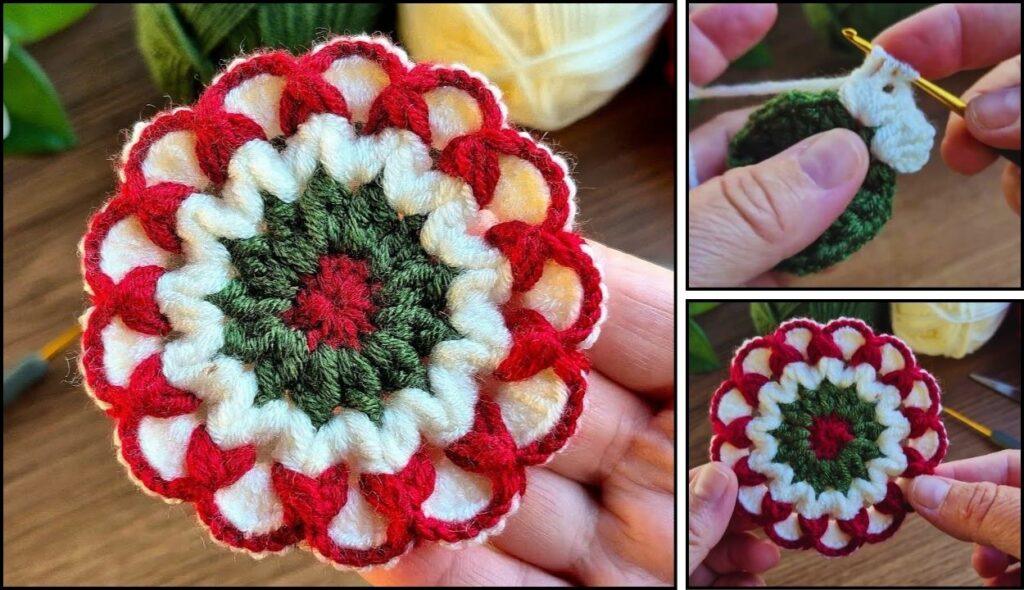
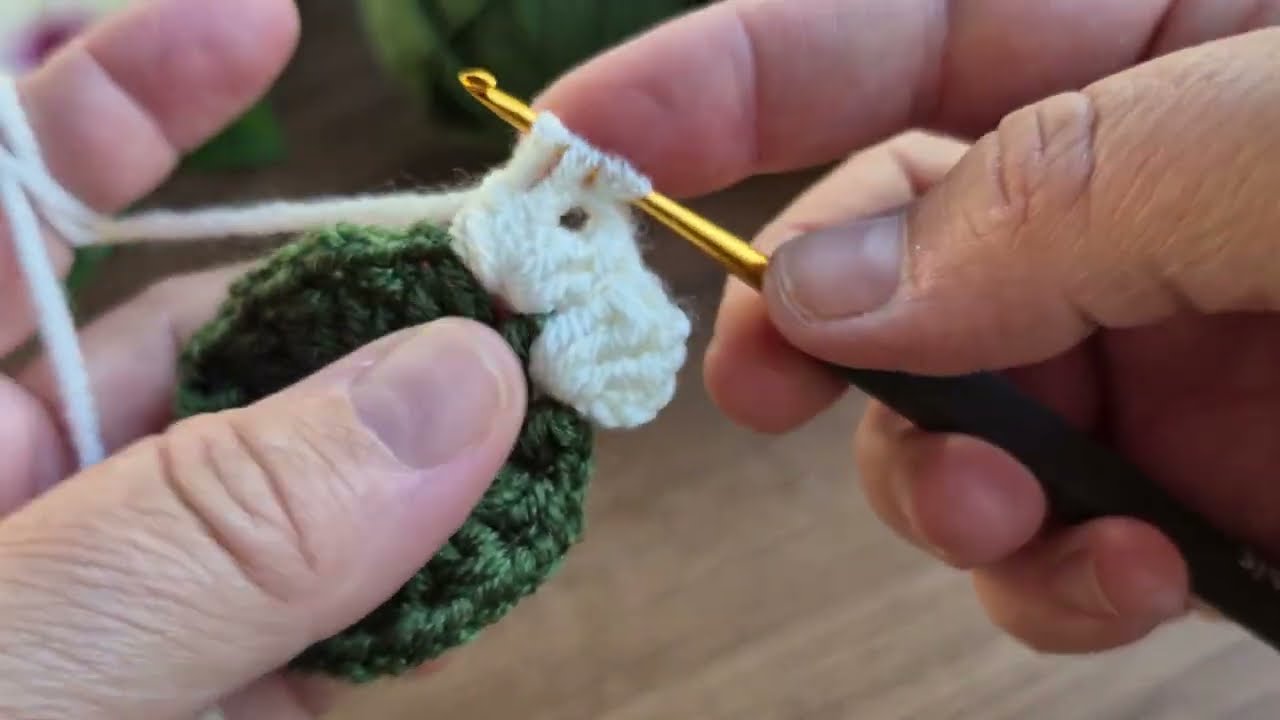
Part 2: Petals (Color B)
Continue with Color B (e.g., Pink) yarn.
- Round 2 (Petals): Ch 1 (does not count as a stitch).
*Work (sc, dc, dc, sc) all into the same stitch (this forms your first petal). Sl st into the very next stitch.*- Repeat from
*to*around the entire circle. You should create 6 distinct petals. - Join with a sl st to the first sc you made at the very beginning of this round (at the base of your first petal). (6 petals and 6 sl sts, covering 12 stitches from the previous round).
- Optional: If you’re adding an outer ring, change color to Color C (e.g., Green) as you make the last sl st to join this round. FO Color B, leaving a tail for weaving in. If not, just FO Color B and leave a tail for weaving in.

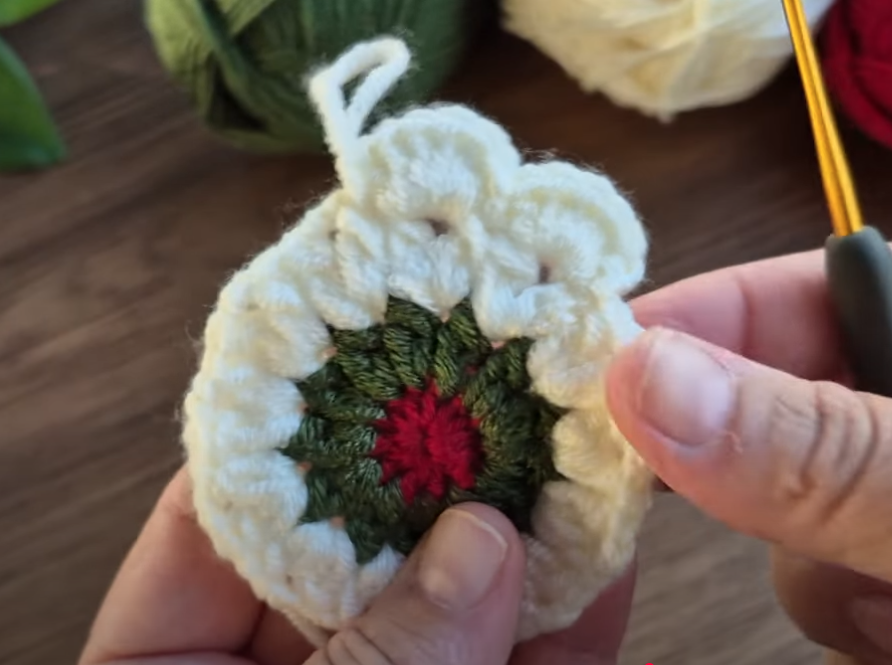
Part 3: Optional Outer Ring (Color C)
This round adds a delicate frame to your flower. Use Color C (e.g., Green) yarn.
- Round 3: Ch 1 (does not count as a stitch).
*Work (sc, ch 2) into the top of the middle dc of any petal from the previous round (the second dc of the two dc stitches you made for the petal).- Sc into the sl st between the two petals from the previous round (this secures the corner).
* - Repeat from
*to*around the entire flower. - Join with a sl st to the first sc you made at the beginning of this round.
- Fasten Off, leaving a tail about 6 inches (15 cm) long.
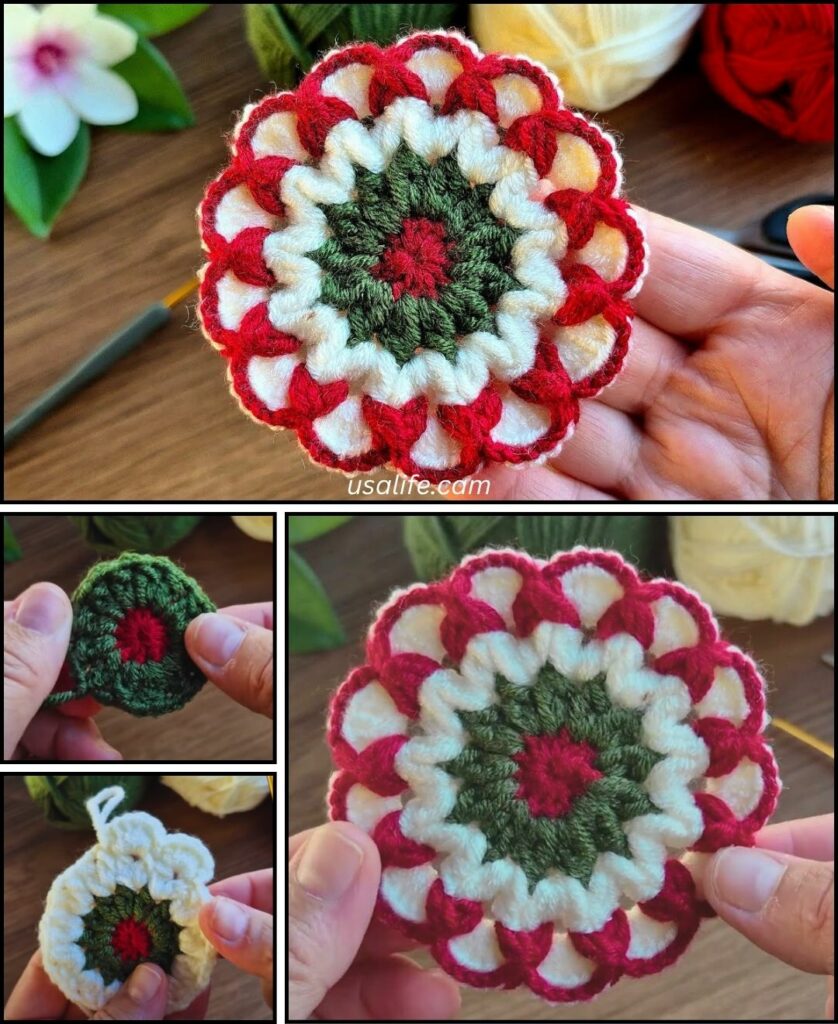
Part 4: Finishing Your Flower
- Weave in All Ends NEATLY: This is absolutely crucial for a clean and professional-looking flower, especially with multiple color changes.
- Use your yarn needle to carefully weave in every single yarn tail on the wrong side of your flower. Go back and forth through several stitches (at least 1-2 inches) to ensure they are hidden and won’t unravel.
- Blocking (Optional but Recommended!): Blocking will help your flower lay perfectly flat and define its petal shape, giving it a more polished look.
- Method: Gently wet your finished flower (you can mist it with a spray bottle). Lay it flat on a blocking mat or a clean towel. Gently stretch and shape the flower into a perfect circle, making sure each petal is distinct. You can use rust-proof pins to hold it in place if you have them. Allow it to air dry completely.
Tips for a Beautiful Colorful Flower Motif
- Consistent Tension: Try to maintain even tension throughout your work. This helps the flower lay flat and look uniform.
- Yarn Choice: Cotton yarn is excellent for flowers due to its crisp stitch definition. Smooth acrylics also work very well.
- Counting Stitches: In Round 1, ensure you have the correct number of stitches (12 hdc) for symmetrical petals.
- Experiment with Petal Stitches: Once you’re comfortable with the
(sc, 2 dc, sc)petal, you can try other combinations for different effects:- For fuller petals:
(sc, hdc, dc, hdc, sc)all in one stitch, thensl stin the next. - For pointier petals:
(sc, ch 1, dc, ch 1, sc)all in one stitch, thensl stin the next. - Always ensure you’re using the correct number of stitches from the previous round to accommodate your chosen petal size.
- For fuller petals:
- Color Play: This is where the “colorful” aspect really shines! Experiment with bold contrasts, analogous colors, or a gradient of shades for different effects.
- Uses: These flowers are incredibly versatile! Attach them to hats, headbands, bags, or blankets. Make a bunch and string them into a cheerful garland, or use them as unique gift toppers.
You’re now ready to crochet your very own beautiful and colorful flower motif! Enjoy creating these charming little blooms and finding creative ways to use them.