 by
by That’s a fantastic request! Crocheting squares is the foundation of many projects, and learning a “Stunningly Beautiful” Square Pattern as a beginner is a great way to build confidence while creating something truly rewarding.
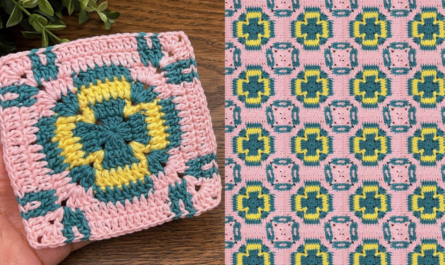
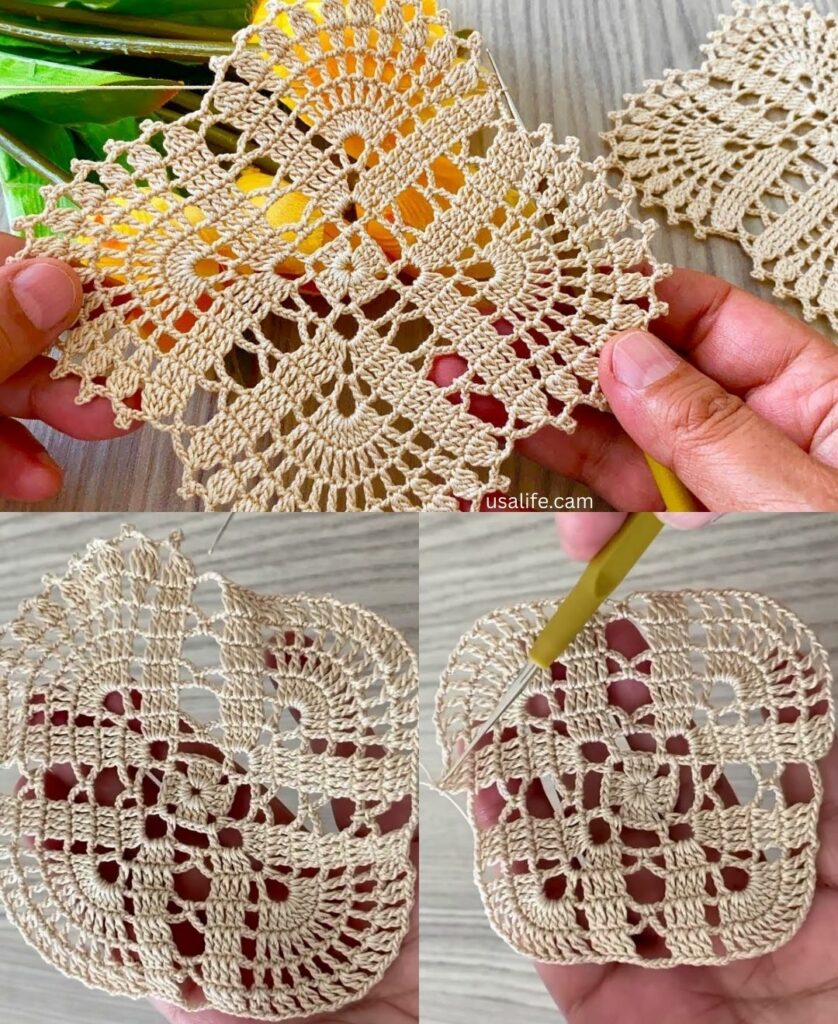
For a beginner-friendly project, we will focus on a variation of the Granny Square that uses simple stitches to create a beautiful, geometric, and textured look. This design is sometimes called the Solid Granny Square or the C2C (Corner-to-Corner) Look Square because of its dense fabric.
Given the warm climate in Phnom Penh, choosing 100% cotton yarn (DK or Worsted weight) is highly recommended. It offers great stitch definition and is breathable.

The Stunning Textured Square Pattern (Solid Granny Variation)
This pattern uses simple double crochet (dc) stitches to create a square that is solid in the center but uses chain spaces at the corners to maintain its shape.
1. Essential Materials You’ll Need
- Yarn: Worsted Weight or DK weight cotton or acrylic.
- Crochet Hook: A 5.0mm (US H/8) hook is a great size to start with for worsted weight yarn.
- Scissors.
- Yarn Needle (Tapestry Needle): For weaving in ends.
- Stitch Marker (Optional but helpful): To mark the beginning of rounds or corners.
2. Basic Crochet Stitches You’ll Use
- Magic Ring (MR): Creates a neat center. (Alternative: Ch 4, sl st to first ch to form a ring.)
- Chain (ch): For starting and corner spaces.
- Slip Stitch (sl st): For joining rounds.
- Double Crochet (dc): The main stitch used.

3. Step-by-Step Pattern Instructions
We will work in continuous rounds, joining with a slip stitch at the end of each round.
Part 1: Start the Center
- Start: Create a Magic Ring (MR).
- Round 1:
ch 3(counts as your firstdc).- Work
2 dcinto the ring. ch 2(this creates your first corner).- Work
3 dcinto the ring. ch 2(second corner).- Work
3 dcinto the ring. ch 2(third corner).- Work
3 dcinto the ring. ch 2(fourth corner).sl stto the top of the beginningch 3to join the round. (Total: 4 clusters of 3 dc, 4 ch-2 corners).- Pull the tail of the Magic Ring tight to close the center hole.
Part 2: Solid Growth
In this pattern, we will fill in every stitch along the sides, only using chain spaces in the corners. This is what creates the “stunningly beautiful” dense, solid look.
- Round 2:
ch 3(counts as your firstdc).- Work 1 dc into the next
2 dcstitches from the previous round (these are the side stitches). - In the first corner space (ch-2 space), work
(2 dc, ch 2, 2 dc). This creates your new corner structure. - Work 1 dc into the next
3 dcstitches along the side. - In the next corner space, work
(2 dc, ch 2, 2 dc). - Repeat this pattern around:
dcin every side stitch, and(2 dc, ch 2, 2 dc)in every corner space. sl stto the top of the beginningch 3to join the round.
- Round 3 and Beyond:
ch 3(counts as your firstdc).- Work 1 dc into every single
dcstitch along the straight side until you reach the next corner space. - In each corner space (ch-2 space), always work:
(2 dc, ch 2, 2 dc). - Repeat this sequence around the square.
sl stto the top of the beginningch 3to join the round.- The side stitches will increase by 4 in every round (2 from the corner on the left, 2 from the corner on the right).

4. Tips for Success (Especially for Beginners)
- Counting is Key: Always count your stitches in the corners (
2 dc, ch 2, 2 dc) and ensure you work a double crochet into every stitch along the sides. Missing a side stitch will cause your square to curl inward. - The Turning Chain: Be consistent! If you start with
ch 3counting as adc, make sure you end the round by slipping into the top of thatch 3. - Color Changes (Optional): This pattern looks gorgeous when you change colors with every round. To change colors neatly:
- Stop the final
sl stjoin of the current round when you have two loops left on the hook. - Drop the old color, yarn over with the new color, and pull through the final two loops to complete the join.
- Fasten off the old color and weave in the ends.
- Stop the final
- Blocking: For a truly beautiful and flat finish, wet block your finished square. Gently wet it, pin it to a flat surface, pulling it into a perfect square shape, and let it air dry. This sets the stitches and opens up the texture.
This solid square is sturdy, visually appealing, and provides a stable foundation for blankets, bags, or even a basic cushion cover!
Video tutorial: