by
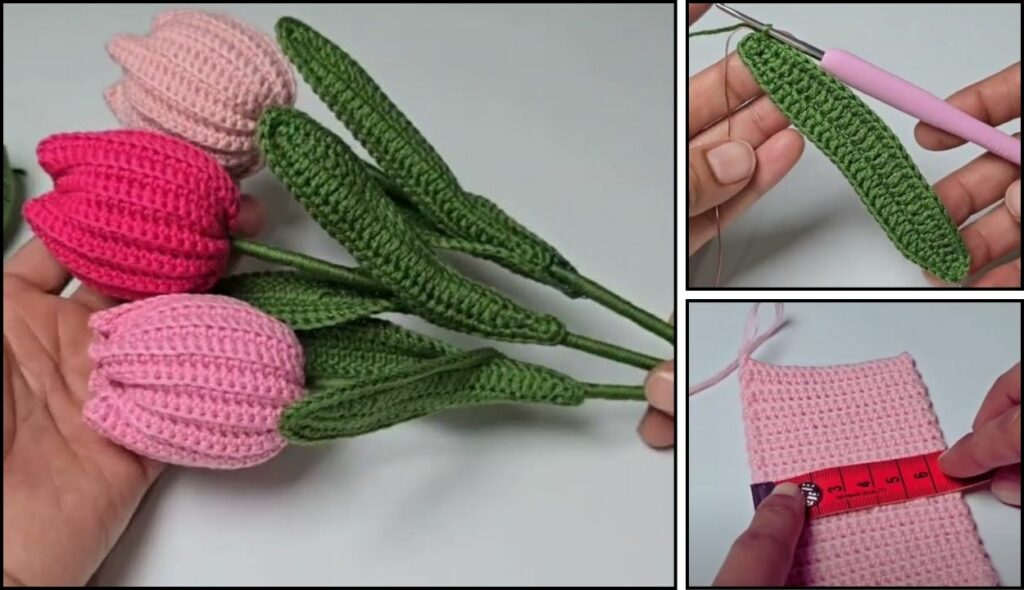
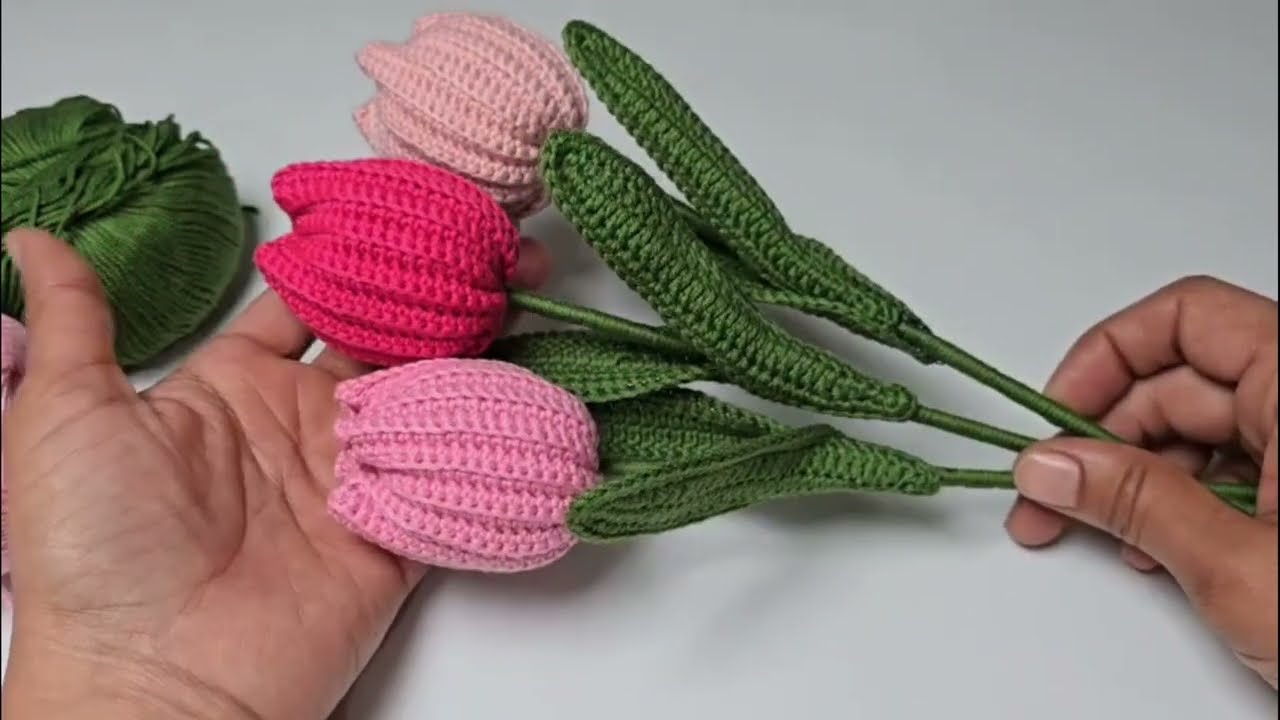
by Crocheting a tulip flower is a lovely way to bring a touch of spring into your home, or to create beautiful appliqués for garments, blankets, and accessories. Tulips, with their distinctive cup shape, lend themselves beautifully to crochet, and the resulting flower is recognizable and charming.
Given that you’re in Phnom Penh, where it’s warm, choosing the right yarn for a crochet flower is important for maintaining its shape and appearance in the humidity. 100% cotton yarn is an excellent choice for flowers. It provides crisp stitch definition, holds its shape well, and comes in a wide array of vibrant colors perfect for tulips. A smooth acrylic yarn can also work, offering durability and a vast color palette.
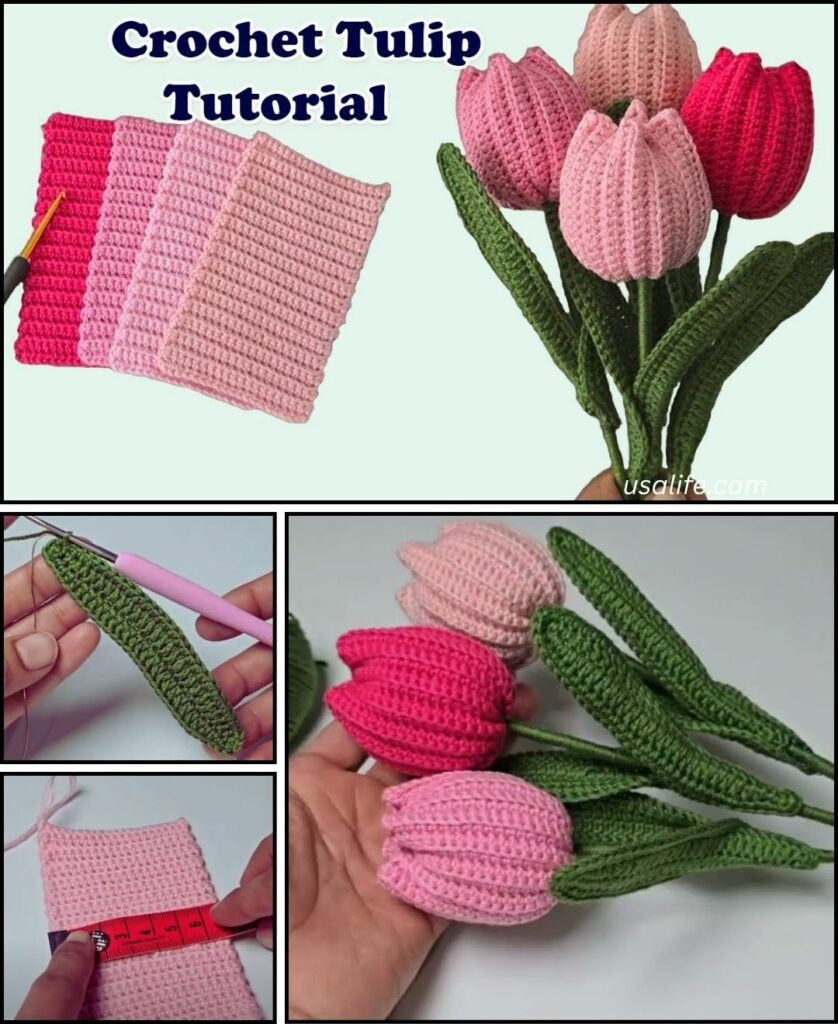
How to Crochet a Tulip Flower: Step-by-Step
This tutorial will guide you through creating a simple, standing tulip flower, where the petals form a distinct cup.
1. Essential Materials You’ll Need
- Yarn:
- Color A (Petals – e.g., Pink, Red, Yellow, Purple): Small amount of Worsted Weight (Aran / Medium / Category 4) 100% Cotton or Acrylic Yarn.
- Color B (Stem – e.g., Green): Small amount of Worsted Weight 100% Cotton or Acrylic Yarn.
- Color C (Leaves – e.g., Green, same as stem or slightly different): Small amount of Worsted Weight 100% Cotton or Acrylic Yarn.
- Optional (for stiffening): Floral wire (18-24 gauge) if you want a poseable stem, or stiffener spray/fabric stiffener if you want the petals to hold a very rigid shape without wire.
- Crochet Hook:
- A 3.5mm (US E/4) or 4.0mm (US G/6) hook. Choose a hook size that creates a fairly tight fabric for the petals, helping them stand upright and form the cup shape.
- Scissors: For cutting yarn.
- Yarn Needle (Tapestry Needle): Essential for neatly weaving in yarn ends and attaching pieces.
- Stitch Marker (Optional but helpful): To mark the beginning of rounds, especially if working the base of the flower or stem in a continuous spiral.
2. Basic Crochet Stitches You’ll Use
This project relies on fundamental crochet stitches, working in the round, and basic shaping:
- Magic Ring (MR) / Adjustable Ring: (Highly Recommended!) Creates a tight, hole-free center for the flower base. Alternatively, you can
ch 4and thensl stto the first chain to form a ring. - Chain (ch): For starting, creating height, and forming parts of the leaves.
- Slip Stitch (sl st): For joining rounds and neatly moving your hook.
- Single Crochet (sc): A dense, short stitch, used for the stem and base.
- Half Double Crochet (hdc): A versatile, medium-height stitch.
- Double Crochet (dc): A taller stitch, primarily used for forming the petals.
- Treble Crochet (tr – optional): For very tall or pointy petals, depending on the desired look.
- Increase (inc): Work 2 stitches into the same stitch to expand the shape.
- Fasten Off: To securely end your work.
- Weaving in Ends: Hiding yarn tails neatly.
Crochet Tulip Flower Pattern
This pattern creates a classic tulip shape, with separate instructions for the flower head, stem, and leaves.
Abbreviations (US Crochet Terms):
- MC: Main Color (Petals)
- SC1: Stem Color 1 (Green for Stem)
- SC2: Stem Color 2 (Green for Leaves) – can be same as SC1
- MR: Magic Ring
- ch: chain
- sl st: slip stitch
- sc: single crochet
- hdc: half double crochet
- dc: double crochet
- inc: increase (work 2 stitches into the same stitch)
- st(s): stitch(es)
- FO: Fasten off
Part 1: The Tulip Flower Head (Main Color – MC)
We’ll start at the bottom of the tulip head and work upwards, then create the petals.
- Round 1 (Base of Flower Head): With MC, create a MR. Ch 1 (does not count as a stitch). Work 6 sc into the MR. Join with a sl st to the first sc. (6 sc)
- Gently pull the MR tail to close the hole tightly. Weave in this tail now.
- Round 2: Ch 1. Work inc sc in each st around. Join with a sl st to the first sc. (12 sc)
- Round 3: Ch 1.
*Sc in the next st, inc sc in the next st.*Repeat 6 times around. Join with a sl st to the first sc. (18 sc)- This forms the base of your tulip head. Now we’ll shape the cup.
- Round 4 (Sides of Flower Head): Ch 1. Sc in each st around. Join with a sl st to the first sc. (18 sc)
- Round 5: Ch 1. Sc in each st around. Join with a sl st to the first sc. (18 sc)
- Round 6 (Petals):This round forms the actual petals.
- Ch 1 (does not count as a stitch).
*In the next stitch, work (sc, hdc, 2 dc, hdc, sc). (This creates one petal).- Sl st into the next stitch (this secures the base of the petal and moves you to the next position).
* - Repeat from
*to*around the circle 3 more times. (You should have 4 petals in total). - After the last
sl st, FO MC, leaving a tail about 6-8 inches (15-20 cm) long for sewing later.

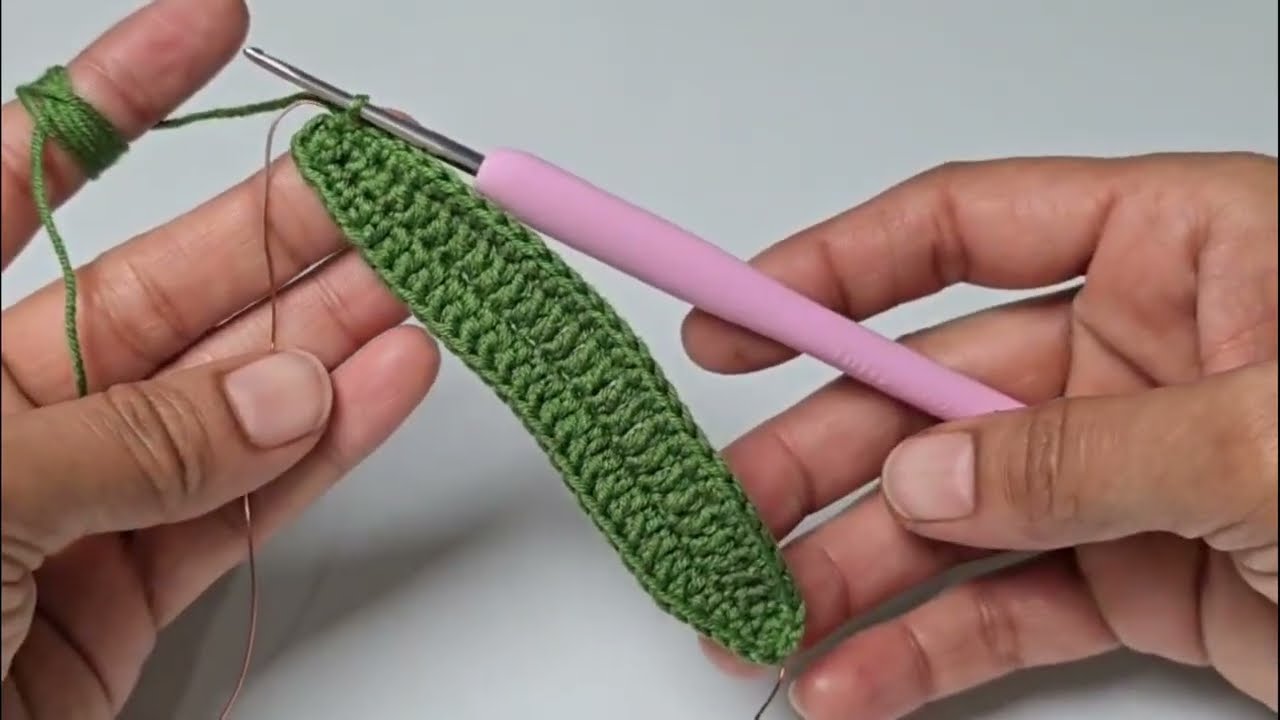
Part 2: The Stem (Stem Color 1 – SC1)
The stem is a simple tube. If using floral wire, insert it as you go.
- With SC1, ch 4.
- Round 1: Sc in the 2nd ch from hook, and in each ch across. (3 sc). Do not turn.
- Round 2: Join the ends of your row to form a tube: sl st into the first sc to create a circle. Ch 1. Sc in each sc around. (3 sc)
- Rounds 3-20 (or desired length): Sc in each st around (working in a continuous spiral). (3 sc per round)
- If using floral wire: Insert the floral wire into the tube as you crochet, ensuring it goes all the way to the end you just started. Continue crocheting around the wire. This helps the stem stand rigid and be poseable. You might bend the top of the wire into a small loop before inserting it so it doesn’t poke through the top of your stem.
- FO SC1, leaving a long tail (at least 8-10 inches / 20-25 cm) for sewing the stem to the flower head.
Part 3: The Leaves (Stem Color 2 – SC2) – Make 1 or 2
Tulip leaves are long and lance-shaped.
- With SC2, ch 16.
- Row 1: Sc in the 2nd ch from hook. Hdc in the next ch. Dc in the next 10 ch. Hdc in the next ch. Sc in the next ch. Sl st in the last ch. (15 stitches total plus 1 sl st)
- Now you’ll work down the other side of the starting chain to form the other half of the leaf.
- Row 2: Ch 1 (does not count as a stitch). Working into the back loops/underside of the same chain: Sl st into the same last st. Sc in the next ch. Hdc in the next ch. Dc in the next 10 ch. Hdc in the next ch. Sc in the next ch. Sl st into the base of the first sc of Row 1.
- FO SC2, leaving a tail for sewing.
Part 4: Assembly & Finishing
- Weave in All Ends NEATLY: This is crucial for a professional-looking flower.
- Use your yarn needle to carefully weave in all yarn tails on the wrong side of your flower head, stem, and leaves. Ensure they are hidden and won’t unravel.
- Attach Stem to Flower Head:
- Thread the long tail from the stem (SC1) onto your yarn needle.
- Position the open end of the stem to the center of the base of your flower head (Round 1).
- Using small, neat stitches, sew the stem securely to the flower head. Go around the entire base of the stem several times to ensure it’s firmly attached and doesn’t wobble.
- Attach Leaves to Stem:
- Thread the tail from a leaf (SC2) onto your yarn needle.
- Position the leaf at the base of the flower head, wrapping it slightly around the stem.
- Sew the bottom (sl st end) of the leaf securely to the stem and the very bottom of the flower head. You can add a few extra stitches along the spine of the leaf to secure it to the stem if desired.
- Repeat for a second leaf if you made one.
- Stiffen Petals (Optional for extra rigidity):
- If you want the petals to hold a very firm, open cup shape, you can gently shape them with your fingers.
- For extra stiffness, you can dilute some fabric stiffener or white glue with water and carefully paint it onto the underside of the petals. Allow to dry completely while holding the desired shape (you might need to use pins to hold them open while drying).
Tips for a Beautiful Tulip Flower
- Consistent Tension: This is key for creating even stitches and a well-formed flower that holds its shape.
- Yarn Choice: Cotton is excellent for flowers due to its crisp stitch definition and ability to hold shape.
- Tight Stitches for Stem: For the stem, working your single crochet stitches a bit tighter will create a denser tube that stands up better, especially if not using wire.
- Experiment with Petal Stitches: You can adjust the height of the petal stitches (e.g., using
trfor pointier petals, or justdcfor a simpler rounded one) to get different tulip looks. - Color Play: Tulips come in an incredible range of colors! Experiment with vibrant reds, sunny yellows, soft pinks, or elegant purples.
- Uses: These crocheted tulips make wonderful standalone decorations, part of a crocheted bouquet, or can be used as charming appliqués on blankets, hats, headbands, or bags. They also make lovely gifts!
You’re now ready to crochet your very own beautiful tulip flower! Enjoy bringing this symbol of spring to life with your hook and yarn.