 by
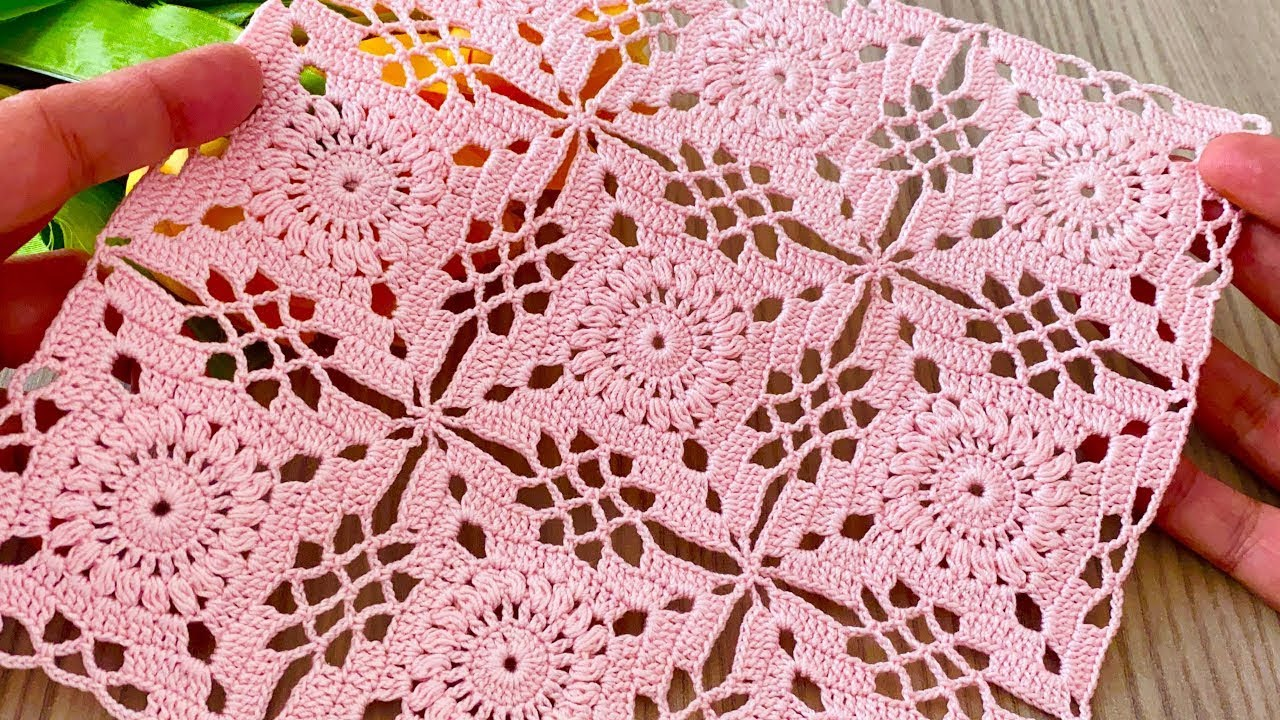
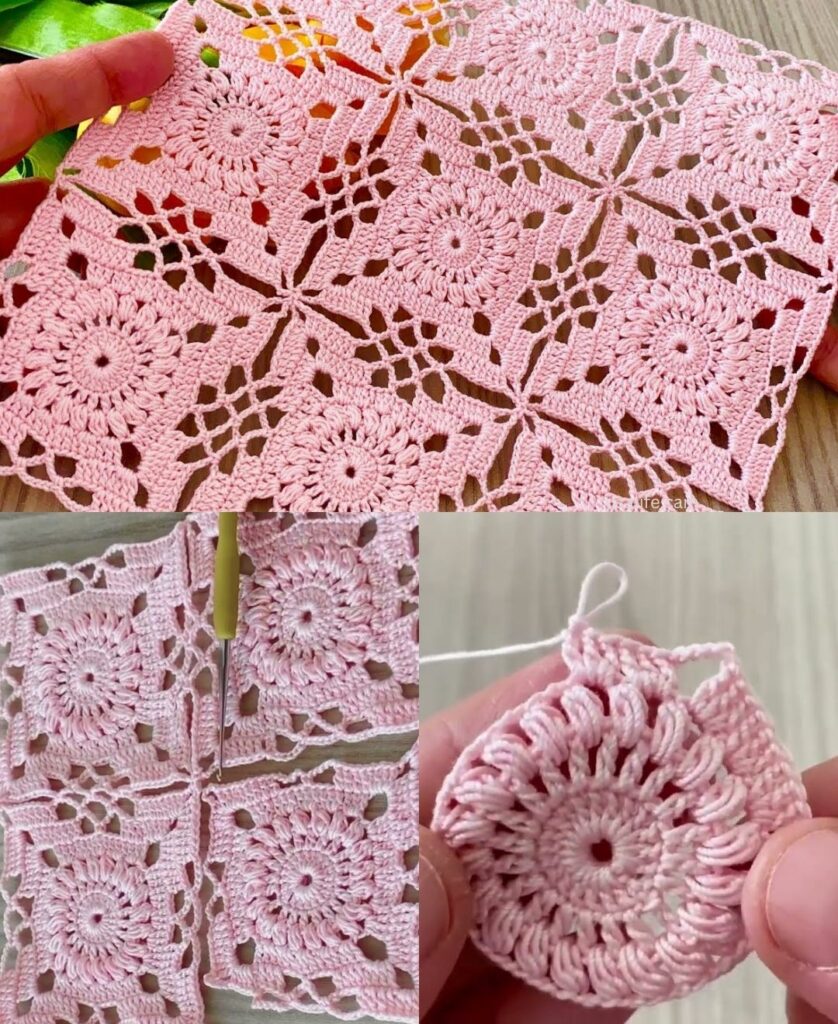
by A square motif is the fundamental building block of crochet. Whether you call it a “granny square” or a “solid motif,” the logic remains the same: you work in a circular path that is forced into a square shape by strategically increasing at four corners.
Here is a detailed guide to constructing a versatile, professional-looking square motif.

🧶 The Anatomy of a Square Motif
To make a square, you must turn a corner every time you reach a $90^\circ$ angle. In almost all patterns, this is achieved by working a specific set of stitches—usually (2 dc, ch 2, 2 dc) or (3 dc, ch 2, 3 dc)—into the same space. These chains create the “elbow” that allows your fabric to turn.
🛠 The Step-by-Step Construction
Round 1: The Core
- Start:
ch 4. Insert your hook into the first chain andsl stto form a ring. - The Base:
ch 3(counts as your first dc). Work 2 dc into the ring.ch 2(this is your first corner). - The Pattern: Work a cluster of 3 dc into the ring, then
ch 2. Repeat this 3 more times so you have 4 clusters in total. - Join:
sl stto the top of the initialch 3.

Round 2: Growing the Motif
- Travel:
sl stacross the next 2 stitches and into the nearest corner space. - Corner:
ch 3(counts as dc),2 dc,ch 2,3 dc(all in that corner space). - The Transition:
ch 1. - The Sides: Move to the next corner and work
(3 dc, ch 2, 3 dc). Repeat this in all 4 corners, remembering toch 1between each corner cluster. - Join:
sl stto the top of the initialch 3.

Round 3: The Expanding Frame
- Travel:
sl stto the nearest corner. - Corner:
ch 3,2 dc,ch 2,3 dc(all in the corner). - The Side:
ch 1. Work a cluster of 3 dc into the side space (the gap created by thech 1from Round 2).ch 1. - The Corners: Continue working
(3 dc, ch 2, 3 dc)in every corner and3 dcin the side spaces. - Join:
sl stto the top of the initialch 3.

📐 How to Achieve a “Boutique” Finish
1. The “Turning” Trick
If you notice your squares are starting to spiral or look skewed, try this: Turn your work over after every round. By working in the opposite direction for every round, your stitches stay perfectly vertical, and your square will remain symmetrical as it grows larger.
2. Blocking (The Secret Weapon)
You will notice your square looks slightly “wobbly” the moment you take it off the hook. This is perfectly normal.
- The Process: Pin your square to a foam mat or a clean towel, stretching it into a crisp, perfect square.
- The Set: Spritz it lightly with water or hover a steamer over it (do not touch the iron to the yarn).
- The Result: As it dries, the fibers “lock” into their new shape. Blocking is the difference between a “homemade” project and a “handmade” one.
3. Weaving Ends Strategically
If you are changing colors, do not leave your yarn tails until the end. As you begin a new round, hold your yarn tail against the top of the previous row and crochet over it. This hides the tail as you go, saving you hours of work when the project is finished.
💡 Choosing Your Join
Once you have several motifs, you have to connect them. The method you choose defines the style of your project:
- Mattress Stitch (Sewn): The best for runners or home decor. It creates a completely invisible, flat seam.
- Flat Slip Stitch: Creates a nice, raised decorative “grid” effect.
- Join-As-You-Go (JAYG): The fastest method. You attach the motifs by crocheting the final round of the next square directly into the previous one. This is ideal for large blankets or garments where you want flexibility.
Would you like me to suggest a specific layout for joining your motifs, such as a traditional grid, a “brick-lay” offset, or a diagonal diamond pattern?