by
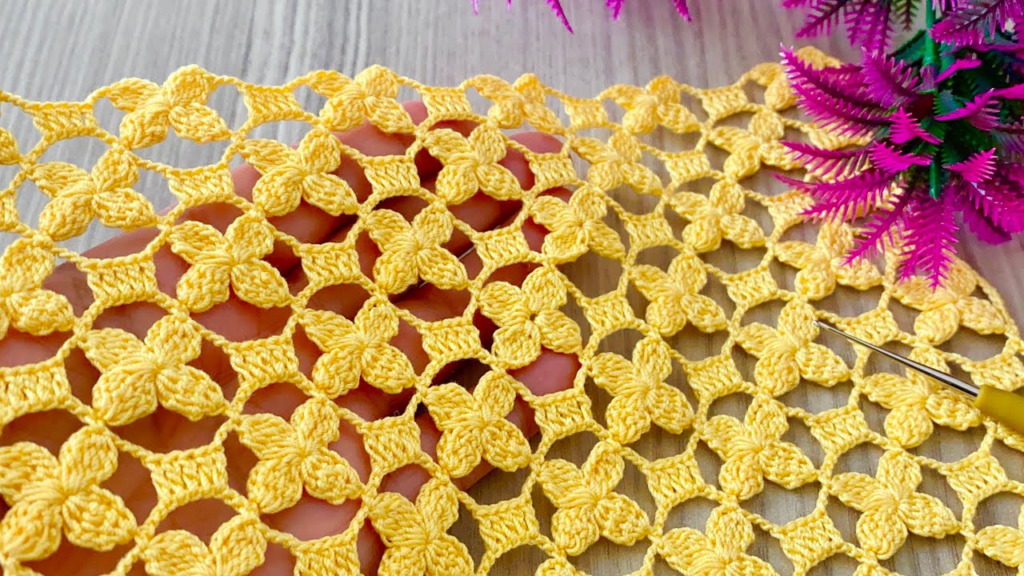
by Creating a “Flower Garden” project—whether a blouse or a shawl—is a beautiful way to combine delicate, textured motifs with the organic feel of floral shapes. The secret to this style is using a neutral “mesh” or “lattice” to connect your flowers, which makes the floral motifs pop like a garden against a trellis.
Here is your detailed guide to constructing these pieces.
🧶 The “Flower Garden” Toolkit
- Yarn: A fine-weight cotton or bamboo blend. These fibers provide the best “drape” for wearable items and won’t stretch out of shape like wool.
- Hook: 3.0 mm – 3.5 mm. You want your stitches to be small and tight so the “flower” details stand out clearly.
- The Concept: You will crochet your flowers individually and then join them using a chain-loop mesh.
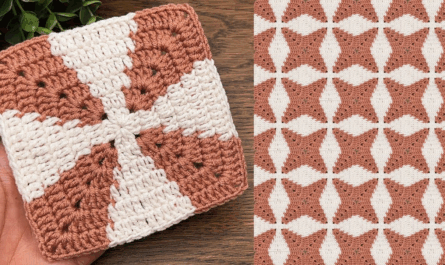
🛠 Part 1: The Flower Motif (The “Garden” Component)
- Center: Magic Ring.
ch 3(counts as dc), work 11 dc into the ring.sl stto join (12 stitches). - Petals:
ch 1, [in the next stitch, work (sc, dc, tr, dc, sc)]. Repeat 6 times around the center. - Backside (The Joiner): Turn the flower over. You will work into the back loops of the stitches from the center ring.
ch 5,sl stin the back of the next stitch. Repeat 6 times to create a “frame” of 6 loops behind the flower.
These loops are your “anchors” for joining the flowers together.
👗 Part 2: The Blouse (The “Garden Trellis”)
To make a blouse, the goal is to create a “boxy” fit that hangs gracefully.
- The Layout: Arrange your flowers in a rectangular grid on a flat surface.
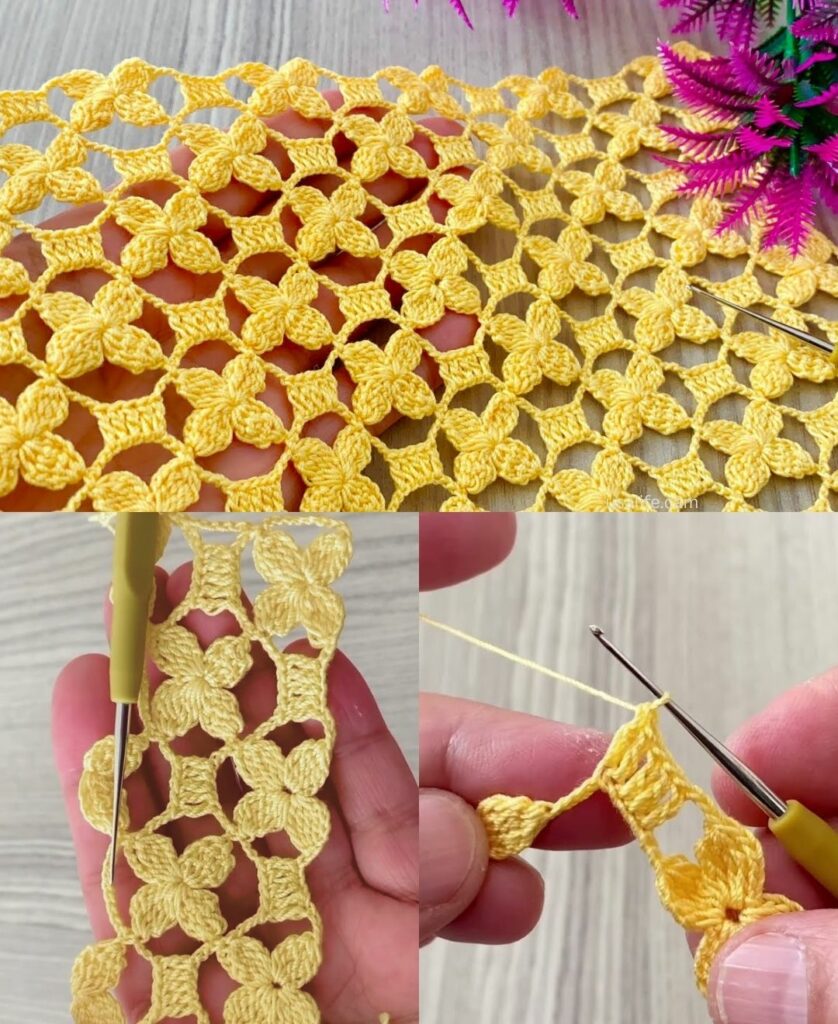
- The Lattice Join: Do not sew the flowers edge-to-edge. Instead, connect the “backside loops” of the flowers using a chain-mesh:
ch 5,sl stinto the loop of the next flower.- This creates a “trellis” look between your flowers, which is much more breathable and flattering for a blouse than a solid block of stitches.
- The Shape:
- Bodice: Create two rectangular panels (front and back).
- Armholes: Leave a 3-motif gap at the top corners of your panels.
- Neckline: Work a round of
scstitches along the top edge to “tighten” the neckline so it sits securely on your shoulders.

🧣 Part 3: The Shawl (The “Garden Cascade”)
A shawl allows for more artistic freedom because you don’t have to worry about “fit.”
- The Shape: Start with 1 flower. In the next row, join 2 flowers to it. In the third row, join 3 flowers. Continue this “triangle” expansion until your shawl reaches the desired length.
- The Edging: To make the shawl look like a professional accessory:
- Work a border of picot stitches (
ch 3,sl stin the first chain) around the entire perimeter. - The picots mimic the look of buds or leaves, perfectly finishing the “Flower Garden” theme.
- Work a border of picot stitches (

🎨 Design Tips for a Professional Result
- The Color Palette: Use a “Gradient” approach. Use darker floral colors (deep reds, purples) at the bottom (the hem of the blouse or the point of the shawl) and transition to lighter, softer colors (pinks, creams) toward the top. This creates an optical effect of a garden growing upward.
- The “Pop” Center: Use a small, contrasting button or a pearl bead in the center of every flower. This adds weight to the center of the motif, making it hang more “luxuriously” when worn.
- Blocking is Mandatory: These pieces will feel like a pile of tangled lace until you block them. Pin your finished blouse or shawl to a flat surface. Stretch the lattice/mesh between the flowers so the “trellis” is visible. Steam them lightly. This is what transforms a “crochet project” into a piece of wearable art.
💡 Troubleshooting
- The “Heavy” Blouse: If your blouse feels too heavy, your flower motifs are likely too dense. Ensure you are using a finer yarn and a smaller hook for the flowers than you use for the lattice.
- Uneven Edges: If your shawl edges aren’t straight, add “half-flowers” (semicircles) at the ends of your rows to square off the edges.
Would you like me to calculate how many flower motifs you would need for a specific size, or would you like a pattern for the “half-flower” used to straighten the edges of a shawl?