 by
by Creating a triangular shawl that can also function as a bolero (or a shawl-shrug) is a brilliant way to maximize your crochet effort. The secret to this design is the “Convertible Triangle”: a large, expansive triangle that is long enough to wrap around your shoulders, with added “cuffs” or “ties” to secure it into a garment.

Here is the masterclass on how to construct this versatile piece.
🧶 The Toolkit
- Yarn: Lightweight Acrylic/Cotton Blend (Sport or DK weight). You need something with a soft “drape”—if the yarn is too thick or stiff, it will feel bulky like a blanket rather than a garment.
- Hook: 4.5 mm (G/7) or 5.0 mm (H/8). A slightly larger hook than recommended for your yarn will create a looser, airier fabric that is much more comfortable to wear.

🛠 Part 1: The Triangular Shawl (The Base)
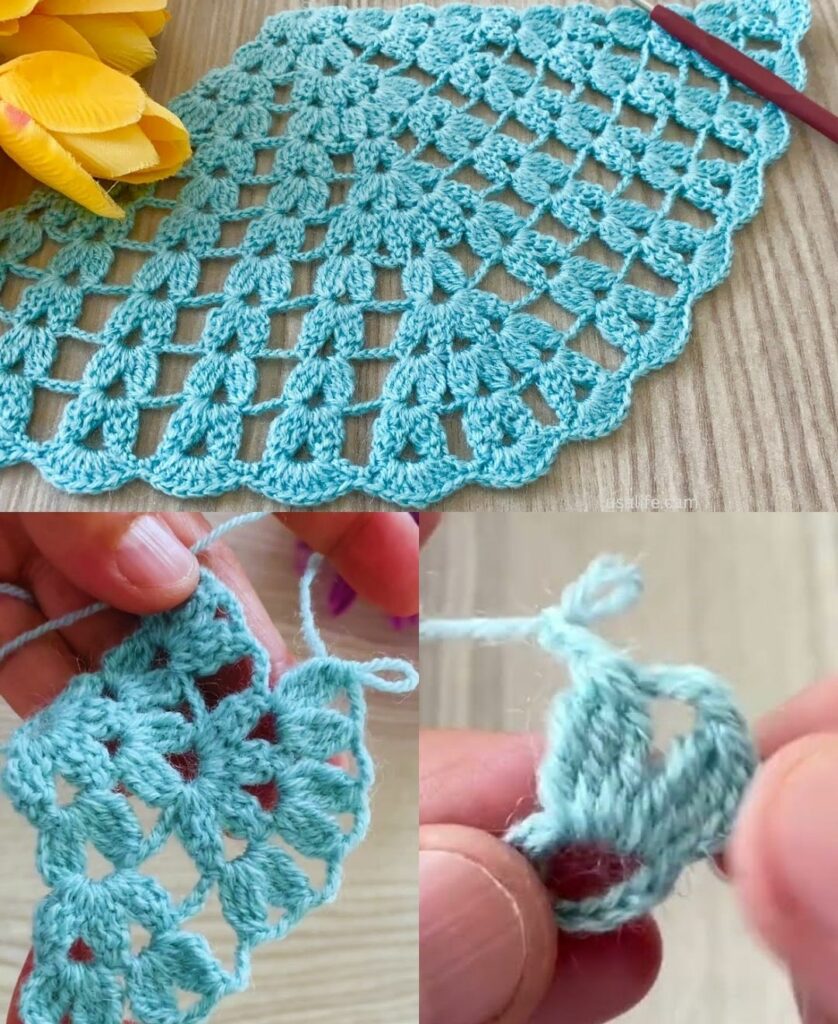
A shawl is simply an expanding triangle. To get the perfect shape, you must increase at the center and the two outer edges.
- The Start:
ch 4, join withsl stto form a ring. - Row 1:
ch 3(counts as dc),2 dcin ring,ch 2,3 dcin ring. (This is your start). Turn. - The Increase:
ch 3,2 dcin the first stitch. Workdcacross until you reach the centerch-2space. Work(2 dc, ch 2, 2 dc)into that center space. Workdcacross until the final stitch. Work(3 dc)into the final stitch. Turn. - Repeat: Continue this row until the shawl reaches your desired wingspan (usually from one wrist to the other).
👗 Part 2: The Bolero Transformation
To turn your shawl into a bolero, you need to create “armholes” or “sleeves” at the corners.
Method: The “Sleeve-fold”
- The Fold: Lay your finished triangle flat. Bring the two bottom “wing” corners up to meet at the center top.
- The Join: Sew the side edges together for about 6–8 inches from the bottom corners upward. This creates two “sleeve” tubes.
- The Result: When you put your arms through the tubes, the center of the triangle becomes the back, and the shawl wraps around your shoulders like a shrug.

🌟 Pro-Tips for a “Designer” Finish
- The “Picot” Border: To make your shawl look high-end, add a picot border. On your final row, work
sc, thench 3,sl stinto the first chain, thenscin the next stitch. Repeat this all the way around. It adds a “lacey” edge that makes the garment look much more intricate. - The Weight Trick: If your shawl feels like it’s slipping off your shoulders, crochet a long chain with a tassel at each end. Thread it through the motifs around the collar area. When you wear it as a bolero, tie the chain in a bow at the front to keep the garment securely in place.
- Blocking is the Make-or-Break Step: Because shawls are made of long, open stitches, they will look “bunchy” when finished.
- Pin your triangle to a bed or a carpeted floor.
- Stretch it into a perfectly sharp triangle.
- Spray it with water (or use a steamer).
- Leave it for 24 hours. This process “sets” the shape so that when you wear it, it drapes perfectly over your arms without bunching up.
💡 Creative Variations
- The “Flower Garden” Shawl: If you want to elevate this further, join your Flower Motif squares (from our previous discussion) to create the body of the triangle. The flowers will create a beautiful, textured “lace” effect that is stunning for special occasions.
- The “All-Season” Fiber Choice: If you make this in a 100% cotton yarn, it becomes a “summer bolero” perfect for beach cover-ups or evening dresses. If you make it in a wool/alpaca blend, it becomes a “winter shawl” that is incredibly warm and cozy.
Would you like me to help you map out the measurements for the “armholes” based on your size, or do you need a more detailed pattern for the “lacey” border to finish it off?