by
by Mini crochet flowers are the “multitools” of the crafting world. Because they work up in minutes, they are the perfect project for using up tiny leftover yarn scraps, practicing new stitches, and adding a handmade touch to almost anything.
Here is a guide to mastering the mini flower and a collection of creative ways to use them.

🧶 The Mini Flower Masterclass
To keep your flowers looking professional and “stunning,” use a smaller hook than your yarn suggests. This creates a tight, crisp fabric that holds its shape.
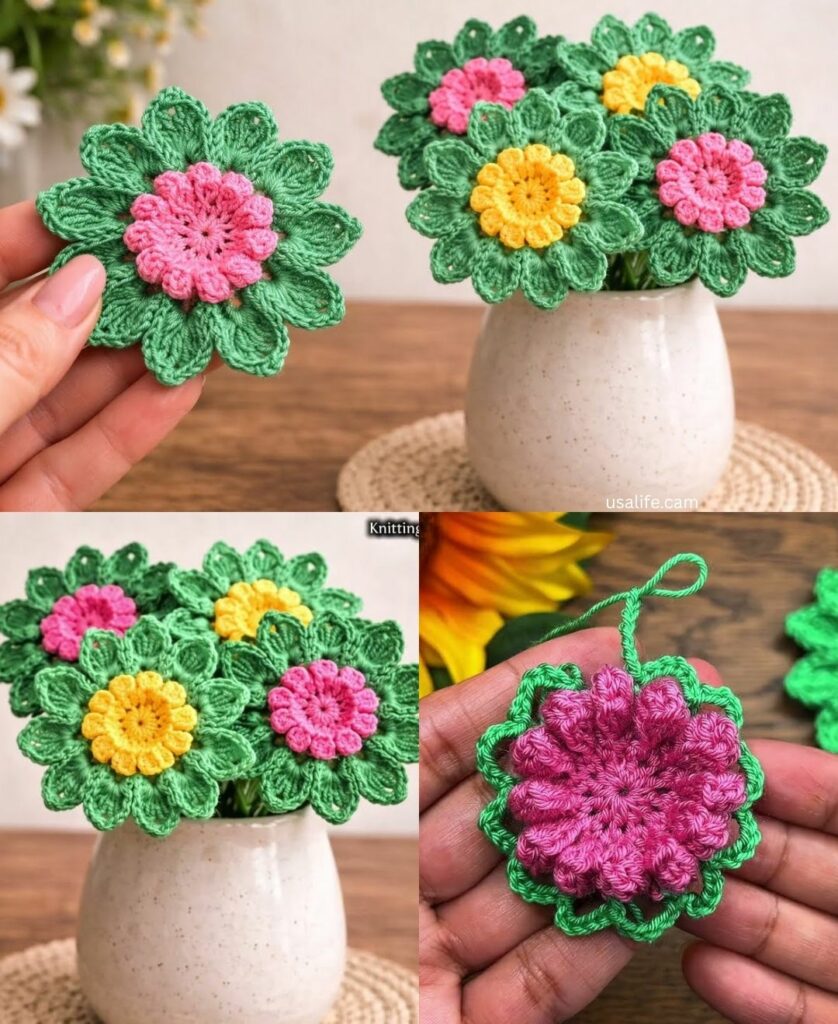
The Universal “Petal” Formula
Almost all mini flowers follow this simple logic:
- The Center (The Hub): Start with a Magic Ring or a
ch 4joined with asl st. - The First Round: Work 5 to 6
scinto the ring. Join with asl st. - The Petals: In the first stitch, work
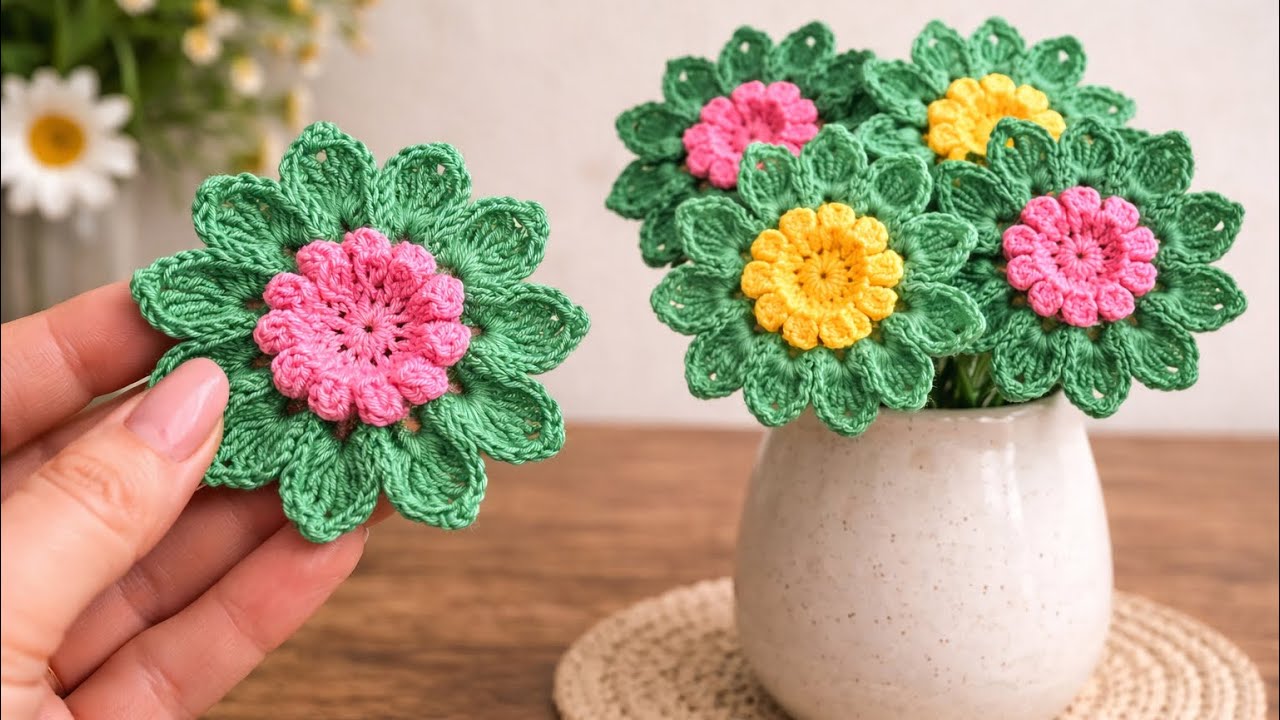
(sl st, ch 2, 2 dc, ch 2, sl st). This creates one petal. Repeat this in every stitch around the circle. - The Result: A perfect, 5-to-6 petal daisy.

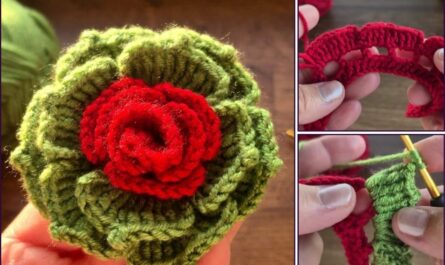
Pro-Tip: If you want a 3D effect, work your stitches into the Back Loops Only (BLO) of the center ring, leaving the front loops free. You can then go back and work a second row of larger petals into those front loops for a double-layered look.
💡 Endless Creative Ideas
Once you have a pile of these tiny blossoms, here is how to use them:
1. The “Botanical” Accessories
- Hairpins & Headbands: Hot-glue or sew your flowers onto metal hair clips or elastic headbands. A cluster of three different sized flowers looks much more “boutique” than a single one.
- Sunflower Keychains: Create a solid brown center (a small circle) and add yellow petals. Attach a keyring to the top for a bright, cheerful accessory.
- Brooches: Sew a safety pin to the back of a larger, layered flower to create a statement piece for a coat or cardigan.

2. Home Decor & Functional Art
- Cutlery Holders: If you are hosting a dinner, tie a piece of twine around your napkins and hot-glue a single mini flower to the knot. It transforms a simple table setting instantly.
- Gift Toppers: Stop using bows! Tie your gifts with velvet ribbon and attach a mini crochet flower to the center. It makes the packaging part of the gift.
- Wall Art: Create 20–30 flowers in a cohesive color palette (e.g., all pastels or all earth tones). Glue them to a canvas or frame them in a shadow box to create a “living” wall art piece that never wilts.
3. Clothing Upgrades
- Mending with Beauty: Have a small hole or a stubborn stain on a sweater? Cover it with a “flower patch.” Sew the flower directly over the imperfection to extend the life of your garment.
- Button Replacement: If you have a cardigan with plain buttons, sew a small, flat crochet flower directly onto the button. It adds instant vintage charm.
🎨 Design Variations to Try
- The “Picot” Edge: On your last round, add a
picot(ch 3, sl st into the first ch) to the tip of every petal. This creates a delicate, thorny look that is beautiful for roses. - The “Gradient” Effect: If you have several shades of the same color, make one flower in each shade. When clustered together, they create a beautiful, professional-looking ombre effect.
- Adding “Stamens”: Use a contrasting color (like bright yellow) to make a French knot in the very center of your flower. This small detail drastically increases the “realism” and quality of the finished piece.
✨ The “Pro” Finishing Secret
Mini flowers can often look “crinkled” or misshapen because of the tension required to make them small.
- Stiffening: For flowers intended for jewelry or decor, mix a tiny amount of white glue with water (50/50 mix). Dip your flower, squeeze out the excess, and pin it flat to a piece of styrofoam.
- Setting: When it dries, the flower will be rigid and perfectly shaped, allowing it to hold its petal structure perfectly even when attached to a bag or a hair clip.
Would you like me to provide a specific pattern for a 3D rose or a multi-layered sunflower to get you started on your first collection?