 by
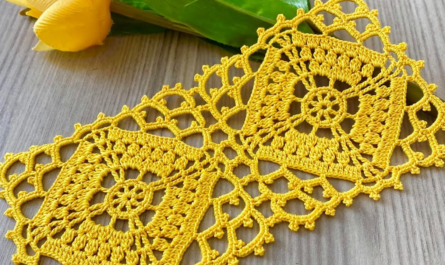
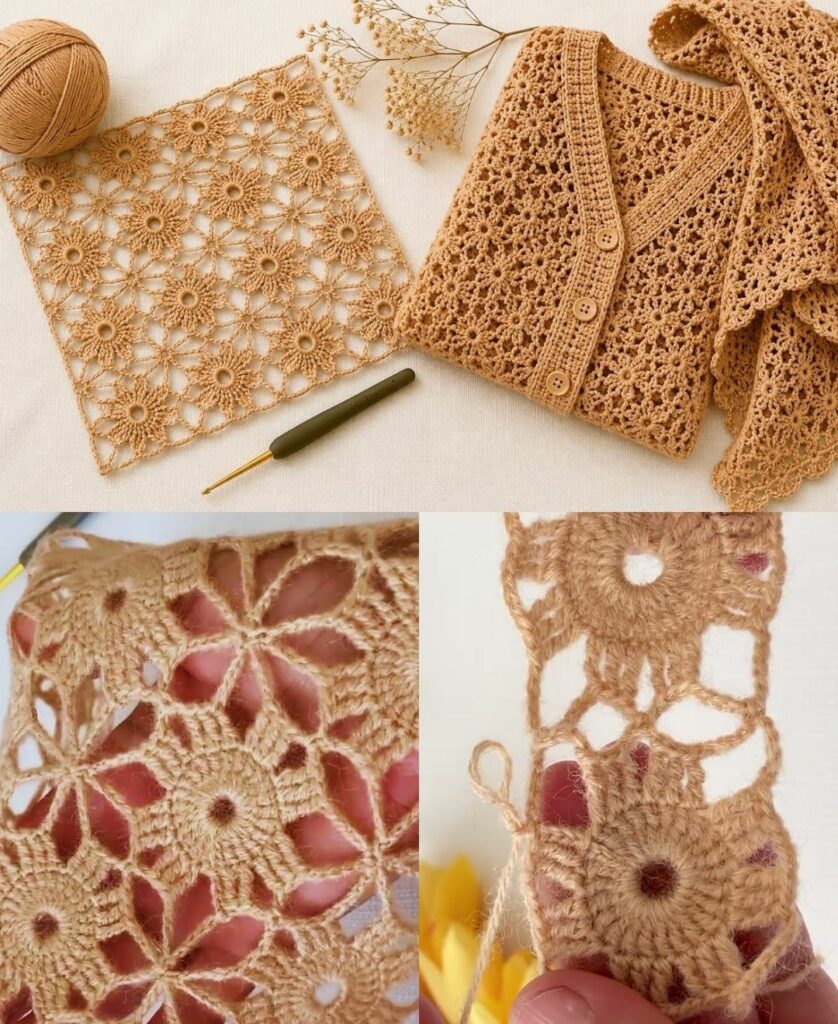
by This “Timeless Lattice Square” is the perfect multipurpose motif. It features a solid, stable center (essential for a well-fitting blouse) and an open, airy border (perfect for the drape needed in a shawl).
Because it uses a “Join-As-You-Go” ready edge, it is easy to assemble into any shape you desire.

🧶 The Master Toolkit
- Yarn: Mercerized Cotton (DK or Sport weight). This is the best choice for garments because it is smooth, breathable, and holds its shape beautifully.
- Hook: 3.5 mm. Using a slightly smaller hook than the yarn label recommends creates a tighter, more professional “boutique” look.
Stitch Key (US Terms):
- ch: Chain
- sl st: Slip Stitch
- dc: Double Crochet
- Corner:
(2 dc, ch 2, 2 dc)in the same space.
🛠 The Pattern: Timeless Lattice Square
Round 1: The Foundation
- Start:
ch 4, join withsl stto form a ring. - The Base:
ch 3(counts as first dc), work2 dcinto the ring.ch 2(corner). - The Pattern: Work
3 dcinto the ring,ch 2. Repeat this 3 more times. - Join:
sl stto the top of the initialch 3.

Round 2: The Structure
- Travel:
sl stto the first corner space. - The Corner:
ch 3,2 dc,ch 2,3 dc(in corner). - The Side:
ch 1. - The Pattern: In each of the 3 remaining corners, work
(3 dc, ch 2, 3 dc), withch 1between each corner group. - Join:
sl stto the top of the initialch 3.
Round 3: The Lattice Edge
- Travel:
sl stto the corner. - Corner:
ch 3,2 dc,ch 2,3 dc(in corner). - The Lattice:
ch 2, skip 3 dc,1 dcinto thech-1space of Round 2,ch 2, skip 3 dc. - The Pattern: Work your corner clusters
(3 dc, ch 2, 3 dc)in every corner and thech-2/dcsequence along the sides. - Join:
sl stto the top of the initialch 3.

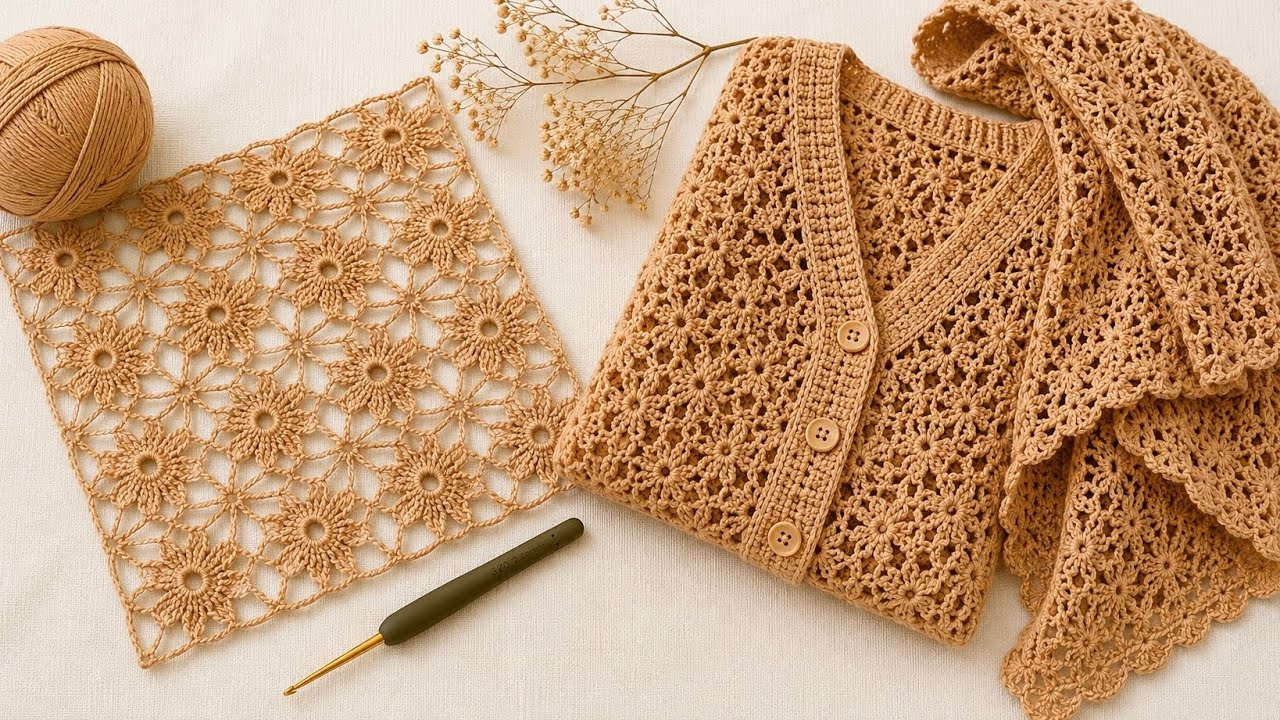
👗 Strategy for Your Projects
For the Blouse (Structured Drape)
- Assembly: Use the “Join-As-You-Go” method on the final round. As you create the
ch-2spaces of Round 3,ch 1,sl stinto the corresponding loop of your finished motif, thench 1to complete. This creates a flexible, “woven” seam. - Pro-Tip: For a flattering fit, arrange these motifs into a “Boxy” T-shape. The lattice edges will naturally stretch to fit your shoulders, and you can add a simple crochet chain-tie at the waist to cinch the silhouette.
For the Shawl (Fluid Movement)
- Assembly: Create a Diagonal Grid. Instead of joining your squares side-by-side (in a plus sign), join them corner-to-corner (in a diamond shape). This makes the shawl much more fluid and allows it to drape beautifully over your arms.
- Pro-Tip: Finish the shawl by adding a round of
picot stitches(ch 3,sl stin the first chain) along the edges. This mimics the look of delicate blossoms and gives the shawl a “high-end” finished weight.
✨ The “Designer” Secret: Blocking
Motifs often look like small, puckered squares until they are blocked.
- Pin: Lay your motif on a soft surface. Pin the corners first, then the sides.
- Steam: Hover a handheld steamer (or a steam iron) about 2 inches above the squares. The heat will relax the cotton fibers.
- Set: Let them dry completely on the pins. Do not remove until 100% dry. This step is what makes the difference between a project that looks like a “hand-knit sweater” and one that looks like a “luxury boutique piece.”
Would you like me to help you calculate the number of motifs required for your specific size, or would you like a pattern for the “picot” border to finish off your shawl?