by
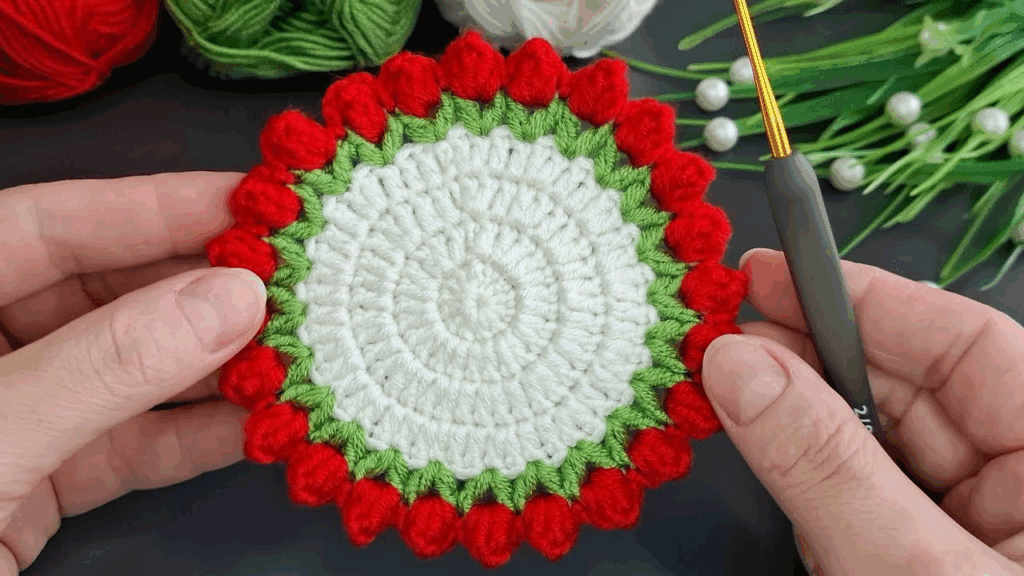
by Creating a crocheted coaster is a fantastic quick project, perfect for beginners, using up yarn scraps, and making thoughtful gifts. Here’s a detailed guide on how to make a basic round crochet coaster, along with some variations.
How to Make a Crochet Coaster
A coaster needs to be durable, absorbent, and lay flat. Cotton yarn is highly recommended for coasters due to its absorbency and heat resistance.
1. Materials You’ll Need
- Yarn:
- Fiber Content: 100% Cotton yarn is highly recommended. Cotton is absorbent, heat-resistant, and washable, making it ideal for protecting surfaces from spills and hot drinks. Acrylic can melt or deform with heat, so it’s generally not recommended for coasters, especially for hot beverages.
- Weight: Worsted weight (Aran) cotton is the most common and easiest to work with for coasters. DK (light worsted) can also work but will result in a slightly smaller or thinner coaster.
- Color: Any color you like! Coasters are great for using up small amounts of leftover yarn.
- Crochet Hook:
- The hook size will depend on your yarn weight. For worsted weight cotton, a 4.5mm (G/7) or 5.0mm (H/8) hook is a good starting point. Check your yarn label for a recommendation.
- The goal is to create a dense fabric so the coaster doesn’t have too many gaps. If your stitches look too loose, go down a hook size.
- Scissors: For cutting yarn.
- Yarn Needle (Tapestry Needle): For weaving in ends.
- Measuring Tape/Ruler (Optional): To check your coaster’s size.
2. Basic Crochet Stitches You’ll Use
This guide will focus on using single crochet (sc) or double crochet (dc), both of which are excellent for coasters. We’ll start with a single crochet pattern for a denser coaster, then mention a double crochet variation.
You’ll also need to know:
- Chain (ch): The foundation of your work.
- Slip Stitch (sl st): Used to join rounds.
- Magic Ring (also known as Magic Circle or Adjustable Ring): The best way to start a round project like a coaster, as it creates a tight center hole. If you’re new to this, you can use the chain method (see below).
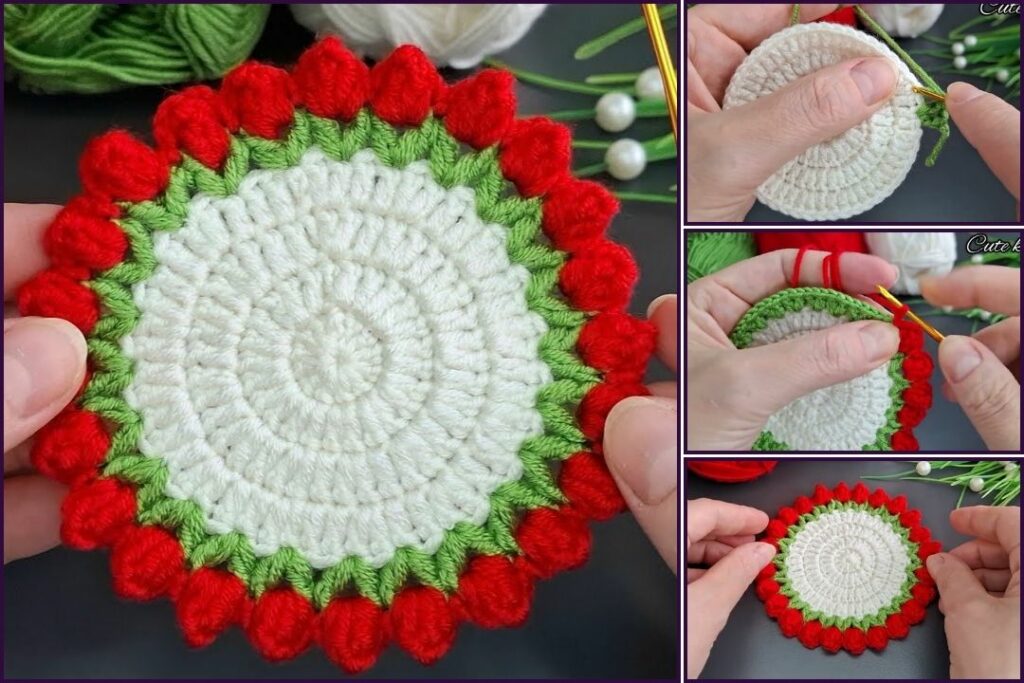
3. Let’s Make a Round Single Crochet (SC) Coaster (Pattern)
This pattern creates a dense, sturdy coaster.

Abbreviations:
- ch: chain
- sc: single crochet
- st(s): stitch(es)
- sl st: slip stitch
- MR: magic ring
Instructions:
Starting the Coaster (Choose one method):
- Method 1: Magic Ring (Recommended for a tighter center)
- Make a magic ring (MR).
- Ch 1 (does NOT count as a stitch).
- Work 8 sc into the magic ring.
- Gently pull the tail to close the ring tightly.
- Join with a sl st to the first sc of the round. (You should have 8 sc).
- Method 2: Chain Method (Easier for beginners)
- Ch 2.
- Work 8 sc into the second chain from the hook (the first chain you made).
- Join with a sl st to the first sc of the round. (You should have 8 sc).

Building the Coaster (Increasing Rounds):
We will be increasing the number of stitches in each round to keep the circle flat. The general rule for perfect flat circles in single crochet is to increase by 8 stitches per round.
Round 1:
- Ch 1 (does not count as a stitch).
- Work 2 sc in each st around. (16 sc)
- Join with a sl st to the first sc of the round.
Round 2:
- Ch 1 (does not count as a stitch).
- 1 sc in the first st, 2 sc in the next st. Repeat from * to * around. (24 sc)
- Join with a sl st to the first sc of the round.
Round 3:
- Ch 1 (does not count as a stitch).
- 1 sc in each of the first 2 sts, 2 sc in the next st. Repeat from * to * around. (32 sc)
- Join with a sl st to the first sc of the round.
Round 4:
- Ch 1 (does not count as a stitch).
- 1 sc in each of the first 3 sts, 2 sc in the next st. Repeat from * to * around. (40 sc)
- Join with a sl st to the first sc of the round.
Continue in this pattern until your coaster reaches your desired size. A standard coaster is usually 4-5 inches (10-12 cm) in diameter.
- For Round N: You will work (N-1) single crochets, then 2 single crochets in the next stitch.

Finishing the Coaster:
- Fasten Off: Once your coaster is the desired size, cut your yarn, leaving a tail of about 6-8 inches. Yarn over your hook, pull the tail completely through the loop on your hook, and pull tight to secure.
- Weave in Ends: Thread your yarn needle with the tail. Carefully weave the tail through the stitches on the wrong side of your work, making sure it’s secure and won’t unravel. Trim any excess yarn. Repeat for the starting tail from your magic ring or chain.
4. Variations for Coasters
a. Double Crochet (DC) Coaster
A DC coaster works up faster and has a slightly lacier look than an SC coaster. The principle of increasing is similar, but you typically increase by 12 stitches per round for a flat circle in double crochet.
Instructions (DC Coaster):
Starting (Choose one method):
- Magic Ring: Ch 2 (counts as first dc), 11 dc into MR. Join with sl st to top of ch 2. (12 dc)
- Chain Method: Ch 4, sl st to first ch to form ring. Ch 2 (counts as first dc), 11 dc into ring. Join with sl st to top of ch 2. (12 dc)
Building the Coaster:
- Round 1: Ch 2 (counts as first dc). 2 dc in each st around. Join with sl st to top of ch 2. (24 dc)
- Round 2: Ch 2. 1 dc in the first st, 2 dc in the next st. Repeat from * to * around. Join with sl st to top of ch 2. (36 dc)
- Round 3: Ch 2. 1 dc in each of the first 2 sts, 2 dc in the next st. Repeat from * to * around. Join with sl st to top of ch 2. (48 dc)
- Continue until desired size. For Round N, you will work (N-1) double crochets, then 2 double crochets in the next stitch.
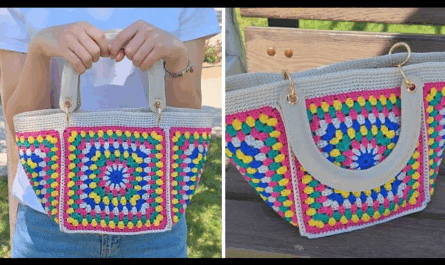
b. Square Coaster (Granny Square Style)
You can adapt a small granny square pattern to make a square coaster.
Instructions (Simple Square Coaster):
- Start: Ch 4, sl st to first ch to form ring. OR Magic Ring.
- Round 1: Ch 3 (counts as first dc). (2 dc, ch 2, 3 dc, ch 2, 3 dc, ch 2, 3 dc, ch 2) into the ring. Join with sl st to top of ch 3. (12 dc, 4 ch-2 sps)
- Round 2: Sl st into first ch-2 sp. Ch 3. (2 dc, ch 2, 3 dc) into same ch-2 sp (first corner). * (3 dc, ch 2, 3 dc) into next ch-2 sp*. Repeat from * to * 2 more times. Join with sl st to top of ch 3.
- Round 3 (and beyond): Sl st into next dc and then into ch-2 sp. Ch 3. (2 dc, ch 2, 3 dc) into same ch-2 sp. 3 dc in the space between the next two 3-dc clusters. (3 dc, ch 2, 3 dc) into next ch-2 sp. Repeat from * to * around. Join with sl st to top of ch 3.
- Fasten off and weave in ends.
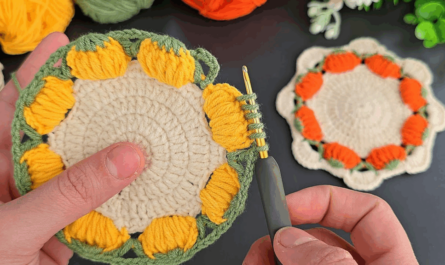
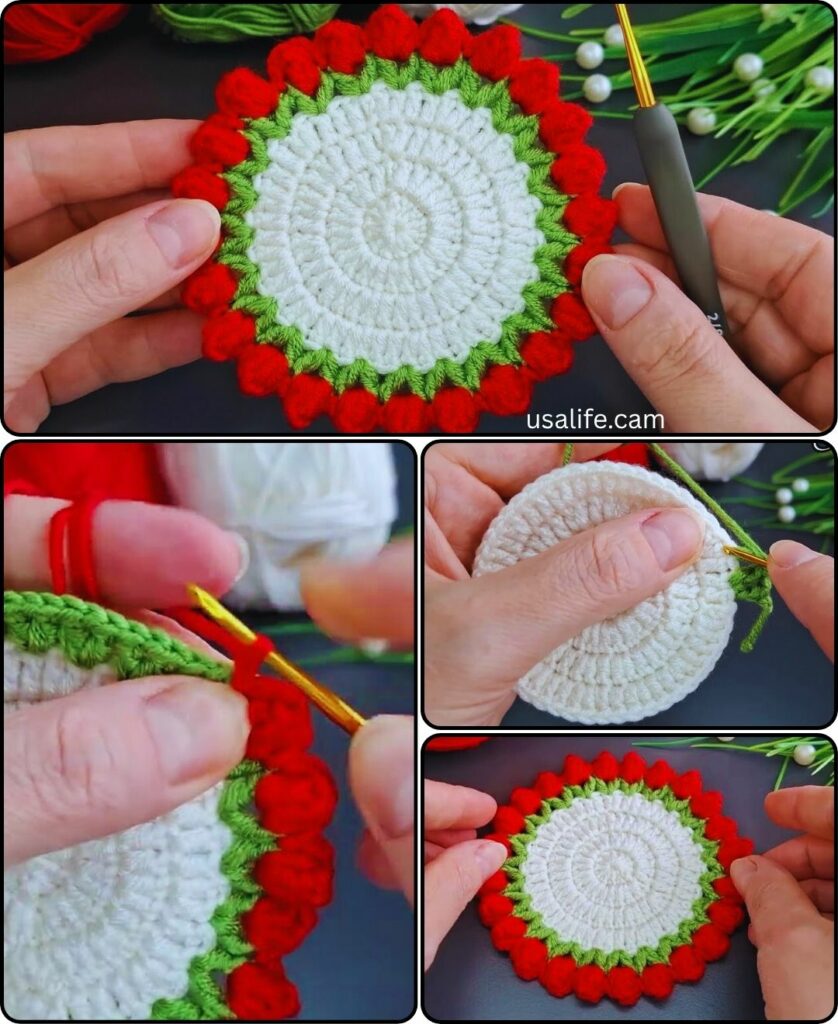
c. Textured Coasters
- Front Post/Back Post Stitches: Use these stitches (e.g., fpdc, bpdc) to create raised ridges and texture.
- Picot Edging: Add a decorative picot stitch border around the edge of your coaster for a fancy touch.
- Shell Stitch: Use a small shell stitch repeat for a delicate, decorative edge.
5. Tips for Success
- Yarn Choice is Key: Seriously, use cotton for functional coasters!
- Tension: Keep your tension consistent. Too loose, and your coaster will be flimsy; too tight, and it might curl.
- Laying Flat: If your coaster starts to ruffle (too many stitches), try skipping an increase in the next round or going down a hook size. If it starts to bowl (not enough stitches), try adding an extra increase in the next round or going up a hook size.
- Blocking (Optional but Recommended): For a truly flat and neat coaster, you can block it. Wet the finished coaster, gently shape it into a perfect circle (or square), pin it down to a foam board or towel, and let it dry completely.
Crocheting coasters is a rewarding and practical skill. Enjoy making a stack of them for your home or as gifts!